

2017-2025 Chrysler Pacifica Sun Visor: Fixing Drooping and Matching Complex Options
This guide covers the common failure points of the Pacifica sun visor, from drooping hinges to electrical faults, and explains how to choose the correct replacement by matching features like HomeLink and sunroof options.
- Compatibility is critical: You must match your replacement visor to your vehicle's options, specifically the presence of a sunroof and/or a HomeLink garage door opener.
- The most common failure is a worn internal hinge that causes the visor to droop; replacement is the only permanent fix.
- A loose or rocking visor mount can often be fixed by installing foam pads as described in TSB 23-083-23.
- Replacement is a very easy DIY job, requiring only a Torx screwdriver and about 15 minutes.
Common Failure Symptoms and Known Issues

The sun visor in the Chrysler Pacifica is generally reliable, but like any frequently used interior part, it can develop problems over time. The most common issues are mechanical wear leading to drooping and electrical faults with the integrated accessories.
Symptoms of a Failing Sun Visor:
- Drooping or Sagging: The most frequent complaint is a visor that won't stay in its upright position against the headliner. It may fall down when hitting a bump or simply refuse to stay up at all. This is caused by wear in the internal pivot mechanism, which loses tension over time due to repeated use and heat exposure. 🎬 Watch a mechanic demonstrate how to replace a sagging visor.
- Vanity Mirror Light Failure: The lights around the vanity mirror may fail to turn on when the cover is opened. This can be due to a burnt-out bulb, a faulty switch in the mirror cover mechanism, or a damaged wire inside the visor's pivot point.
- Loose or Rocking at the Mount: Some owners report the entire visor assembly feels loose or rocks where it attaches to the headliner. Chrysler has issued a Technical Service Bulletin (TSB) for this specific issue.
- HomeLink Buttons Not Working: For models equipped with the universal garage door opener, the buttons may become unresponsive, preventing you from programming or using the feature. This is typically an electrical issue within the visor itself.
- Cracked Plastic or Broken Mirror: The plastic housing, mirror, or mirror cover can become brittle from sun exposure and crack from physical stress.
Known Issues, TSBs, and Recalls
As of early 2026, there are no specific safety recalls from the National Highway Traffic Safety Administration (NHTSA) for the sun visors on the 2017-2025 Chrysler Pacifica. However, there is a relevant Technical Service Bulletin (TSB).
- TSB 23-083-23: Released in July 2023, this TSB addresses customer complaints of one or both sun visors rocking or feeling loose at the mounting point. The cause is identified as missing foam pads at the body mount. The official repair procedure involves removing the sun visor, applying a specific foam pad (Part No. 68713588AA) to the body mount on both the left and right sides, and reinstalling the visors. The fasteners should be tightened to 2.5 N·m (22 in. lbs.).
Compatibility Warning: The biggest challenge when replacing a Pacifica sun visor is matching the correct features. A visor's wiring and physical shape can differ based on whether the vehicle is equipped with a sunroof and/or the HomeLink universal garage door opener. You cannot simply install a visor with HomeLink in a van that wasn't equipped with it from the factory and expect it to work, and vice-versa. Always verify your vehicle's options before purchasing a replacement.
Buying a Used Sun Visor


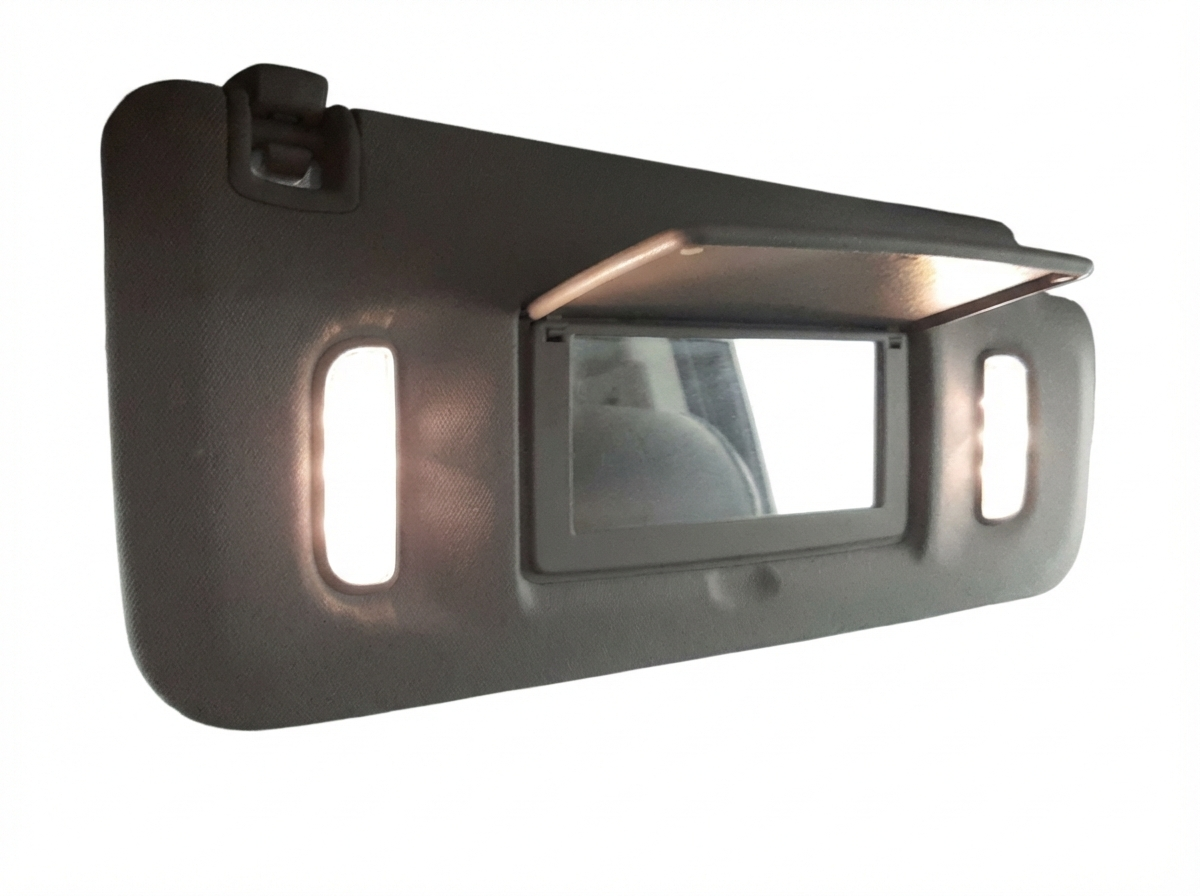
A used OEM sun visor is often the best choice for replacement, as it guarantees a perfect match for your interior's color and fabric, and ensures electronic compatibility, which is often a problem with new aftermarket parts. Here’s what to look for.
Inspection Checklist:
- Test the Hinge: Hold the visor by its mounting base and swing it through its full range of motion. It should feel firm and hold any position without assistance. If it feels loose or drops on its own, the internal pivot is worn out, and you should pass on it.
- Check for Cracks: Carefully inspect the plastic around the mounting point and the main body of the visor. Stress cracks are common, especially on the rod that extends for side window coverage.
- Verify the Features: Look for the HomeLink buttons (three small buttons, usually with a house icon). Check the electrical connector—the number of pins and connector shape must match your original part.
- Examine the Mirror and Light: Open the vanity mirror cover. Ensure the mirror isn't cracked and the cover's hinge isn't broken. If possible, test the light.
- Match the Color: Chrysler Pacificas come with different interior colors like Black, Grey, and Tan/Beige. To ensure a perfect match, find your vehicle's interior trim code on the sticker located on the driver's side door jamb.
Cost Comparison for a Chrysler Pacifica Sun Visor
Prices can vary significantly based on the features (especially HomeLink) and the source.
| Part Source | Estimated Price Range |
|---|---|
| New OEM (Dealer) | $120 - $500+ |
| New Aftermarket | $50 - $250 |
| Used OEM (Salvage/Online) | $30 - $130 |
| Shop Labor Cost | $40 - $80 |
Pro Tip: Dealer prices for visors with HomeLink can be extremely high, sometimes quoted at over $500. A used OEM part from a reputable seller can offer the exact same functionality for a fraction of the cost.
Sun Visor Replacement Guide

Replacing the sun visor on a 2017-2025 Pacifica is a simple DIY task that usually takes less than 15 minutes and requires only basic tools.
Tools Needed:
- Torx screwdriver (commonly a T20 or T25) or socket
- Small flathead screwdriver or trim removal tool
Step-by-Step Instructions:
- Expose the Mounting Screws: Use a small flathead screwdriver or a trim tool to gently pry open the plastic cover at the base of the sun visor, where it meets the headliner. The cover is hinged and will swing out of the way.
- Disconnect the Electrical Connector: Before removing the screws, you may be able to see the electrical connector. If accessible, press the release tab and carefully pull the connector apart. If not, wait for the next step.
- Remove the Mounting Screws: While holding the visor to prevent it from falling, use a Torx screwdriver to remove the two screws holding it to the roof.
- Fully Disconnect and Remove: With the screws out, lower the visor from the headliner. If you haven't already, disconnect the electrical wiring harness. The old visor is now free. 🎬 Watch this quick walkthrough of the Pacifica visor removal process.
- Install the New Visor: Installation is the reverse of removal. First, connect the electrical harness of the new visor. Position the visor against the headliner, aligning the screw holes.
- Secure the Visor: Hand-start the two Torx screws to avoid cross-threading, then tighten them until snug. Do not overtighten, as this can crack the plastic mount or strip the threads. The official torque spec for the TSB is 2.5 N·m (22 in. lbs.).
- Finalize and Test: Snap the plastic trim cover back into place. Test the visor's movement and check that the vanity light and any HomeLink buttons are functioning correctly.
Frequently Asked Questions (FAQ)
How do I fix a drooping sun visor without replacing it?
For a temporary fix, some people have success with DIY methods like inserting a piece of a zip tie or a toothpick into the pivot mechanism to add friction. However, these are not permanent solutions. 🎬 See a simple DIY trick to fix a floppy visor. The only long-term fix for a worn internal hinge is to replace the entire sun visor assembly.
Why did my vanity mirror light stop working?
The most common cause is a burnt-out bulb. You can replace the bulb by prying off the lens cover with a small screwdriver. If a new bulb doesn't work, the issue could be the microswitch in the mirror cover's hinge or a broken wire inside the visor's main pivot. In that case, the entire visor assembly usually needs to be replaced.
Can I install a visor with HomeLink if my van doesn't have it?
No, this is not a plug-and-play upgrade. The vehicle's wiring harness is different for models with and without the HomeLink garage door opener. You must replace your visor with one that matches the original features of your vehicle.
What tools do I need to replace the sun visor?
You will typically only need a Torx screwdriver (often a T20 size) and a small flathead screwdriver or plastic trim tool to pop open the screw cover. It is a very simple job that does not require special tools.
Helpful Videos
Technical Specifications
OEM Part Numbers: 68258524AF 68258524AG 6EL06DX9AC 6EL06DX9AD 6EL08PD2AB 6EL08PD2AC 6EL08PD2AD 7BC60DX9AA 7BC60DX9AB 7BC60PD2AB 7BC60PD2AA 6EL06PD2AB 6EL06PD2AC 6EL06PD2AA
Mounting fastener torque: 2.5 N·m (22 in. lbs.)
We Have This Part in Stock



The information in this article is provided for general reference and educational purposes only. Vehicle specifications, procedures, and part compatibility can vary by production date, trim level, and region. Always consult your vehicle's factory service manual and verify part numbers before purchasing or performing repairs. Safety-critical components such as airbags, seat belts, and braking systems should be installed by a qualified professional.
- Chrysler Pacifica:
- 🎬 Helpful Videos
- 🛍️ Shop This Part
- Common Failure Symptoms and Known Issues
- Symptoms of a Failing Sun Visor:
- Known Issues, TSBs, and Recalls
- Buying a Used Sun Visor
- Inspection Checklist:
- Cost Comparison for a Chrysler Pacifica Sun Visor
- Sun Visor Replacement Guide
- Tools Needed:
- Step-by-Step Instructions:
- Frequently Asked Questions (FAQ)
- 🎟️ Get 5% Off