

2011-2013 Chevrolet Caprice PPV Sun Visor: Fixing Droop and Finding the Right Part
This guide covers the common failure points, replacement steps, and how to choose the correct used sun visor for your 2011-2013 Chevrolet Caprice Police Patrol Vehicle.
- The most common failure is a sagging or drooping visor; always test the pivot tension of a used part before buying.
- You must verify if your car needs a non-illuminated (most PPVs) or illuminated visor, as they are not easily interchangeable.
- Replacement is a simple DIY job for any skill level, requiring only a pry tool and a screwdriver.
- New OEM visors are largely discontinued, making used OEM parts the most practical and available replacement option.
Symptoms of a Failing Sun Visor
A failing sun visor is usually easy to spot. The symptoms are typically mechanical rather than electrical, unless you have an illuminated model. Here’s what to look for:
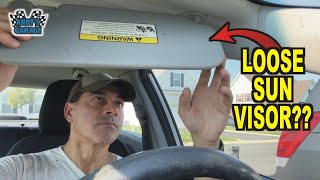
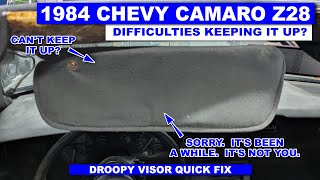
- Visor Droops or Sags: This is the most common failure. The internal pivot mechanism wears out, losing the tension required to hold the visor flush against the headliner. It may sag slightly or drop down completely, obstructing your view. 🎬 Watch: Quick fix for a droopy sun visor
- Won't Stay in Position: When you swing the visor to the side window, it may not stay put and swing back toward the windshield. This also points to a worn pivot.
- Broken Vanity Mirror or Cover: The small plastic hinges on the vanity mirror cover can become brittle and break, leaving the cover loose or detached.
- Flickering or Dead Vanity Light: On the rare models equipped with them, the vanity light may flicker or stop working entirely. This can be caused by a bad bulb, a faulty switch in the mirror cover hinge, or damaged wiring near the mounting point.
- Cracked Mounting Point: The plastic base where the visor screws into the roof can become brittle and crack, causing the entire assembly to feel loose.
Buying a Used 2011-2013 Caprice Sun Visor: What to Check
Since new OEM sun visors for this model are largely discontinued, the used market is your primary source. Here’s how to ensure you get a good part.
Step 1: Verify Illuminated vs. Non-Illuminated
The most critical compatibility check is whether your visor has a built-in vanity light. The vast majority of Caprice PPV (Police Patrol Vehicle) models were equipped with non-illuminated sun visors. However, civilian versions (sold primarily in Australia as the Holden Caprice) often had illuminated visors.
- Check Your Original Visor: Look at your current visor. If there is a vanity mirror, is there a light around it or a small switch that activates when you open the cover? If not, you need the common non-illuminated version.
- Check the Wiring: If you have the old visor removed, a non-illuminated version will have no electrical connector. An illuminated one will have a small wire harness leading from the mounting base.
Warning: An illuminated visor cannot be installed in a car not wired for it without significant custom wiring. A non-illuminated visor can be installed in a car wired for lights, but you will simply leave the connector in the headliner unplugged.
Step 2: Match the Interior Color
The 2011-2013 Caprice PPV had a very limited interior color palette, making matching relatively easy. The most common color is a dark charcoal grey or black, often referred to as Jet Black. A lighter grey was also available.
- Find Your Interior Trim Code: The most accurate way to match the color is by finding your car's RPO (Regular Production Option) code. This is found on the "Service Parts Identification" (SPID) sticker, which on the Caprice PPV is located on the underside of the spare tire cover in the trunk. Look for a three-character code ending in 'I' for interior, or a code like '4AA' for Jet Black.
- Visually Compare: When buying online, compare the photos carefully to your existing interior. Be aware that lighting can alter colors in photos.
Step 3: Physical Inspection of a Used Visor
Before purchasing, inspect the used part for the same issues that cause them to fail.
- Test the Pivot Tension: Ask the seller to confirm that the visor holds itself up firmly. It should feel stiff to move, not loose or floppy.
- Check the Mirror Cover: Ensure the vanity mirror cover (if present) opens and closes properly and that its hinges are intact.
- Inspect the Fabric: Look for stains, tears, or areas where the fabric is separating from the inner board. Note any impressions from garage door openers.
- Examine the Mounting Points: Check for any cracks in the plastic base or the secondary clip that holds the other end of the visor.
Replacement Guide
Replacing the sun visor on a 2011-2013 Caprice is a simple DIY task that usually takes less than 15 minutes.
Tools Needed:
- Small flathead screwdriver or trim removal tool
- Torx driver (commonly a T20 or T25) or Phillips screwdriver, depending on the screws used
Step-by-Step Instructions:
- Pry Off the Screw Cover: At the base of the visor where it mounts to the roof, there is a plastic cover hiding the screws. Use a small flathead screwdriver or a trim tool to gently pry this cover off.
- Remove the Mounting Screws: With the cover removed, you will see two or three screws. Use your Torx or Phillips driver to remove them while holding the visor to prevent it from falling.
- Disconnect Electrical Connector (if applicable): If you have an illuminated visor, carefully pull the base away from the headliner and locate the small electrical plug. Depress the tab on the connector and pull it apart.
- Remove the Visor: Unhook the visor from its mounting point and the clip on the other end and remove it from the vehicle.
- Installation: Installation is the reverse of removal. First, connect the electrical plug if you have one. Then, position the new visor and start the mounting screws by hand to avoid cross-threading. Tighten the screws until they are snug, but do not overtighten, as this can crack the plastic mount. Finally, snap the plastic cover back into place.
Pro Tip: The smaller, stationary clip that holds the outer end of the visor can sometimes be tricky to reinstall on GM vehicles. If you remove it, take note of how the metal spring clip inside is oriented. It may be easier to separate the plastic housing from the metal clip in the roof, reassemble them off the car, and then snap the complete assembly back into the headliner.
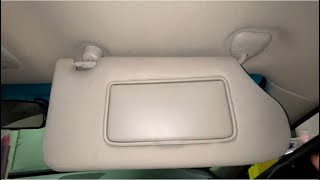
🎬 See this step-by-step visor replacement walkthroughKnown Issues, Recalls, and TSBs
There are no recalls or Technical Service Bulletins (TSBs) from GM or the NHTSA specifically related to the sun visors on the 2011-2013 Chevrolet Caprice. While several recalls exist for this vehicle concerning the shifter, ignition key, and seat belts, the sun visor is not part of any safety campaign.
Cost Comparison
Pricing for a replacement sun visor can vary significantly based on the source.
| Part Source | Estimated Price Range (per visor) |
|---|---|
| New OEM | $100 - $160+ (Largely discontinued and very difficult to find) |
| New Aftermarket | Not generally available for this specific model. |
| Used OEM | $50 - $125 (Most common option) |
| Shop Labor Cost | $30 - $60 |
Part Number Reference
These part numbers are for the main sun visor assemblies. Most are for the common non-illuminated versions found in the PPV. Always verify the part number and features with the seller before purchasing.
| Part Number | Side | Features | Notes |
|---|---|---|---|
| 92262661 | Left (Driver) | Non-Illuminated | Replaces 92245798. |
| 92262660 | Right (Passenger) | Non-Illuminated | Replaces 92245796. Often listed as discontinued. |
| 09104239 | Left or Right | Support Clip Only | This is the stationary clip that holds the outer end of the visor, not the main assembly. |
Frequently Asked Questions (FAQ)
Can I repair my sagging sun visor instead of replacing it?
Sometimes, yes. There are DIY fixes, such as using special repair clips or even zip ties inserted into the pivot joint to add friction. However, these are often temporary solutions. If the internal mechanism is broken or the visor's structure is cracked, replacement is the only reliable repair.
🎬 Watch: How to fix a loose sun visorWill a sun visor from a Holden Caprice fit my Chevrolet Caprice PPV?
Yes, most likely. The 2011-2013 Chevrolet Caprice PPV is a re-badged version of the Australian Holden WM series Caprice. Interior components like sun visors are often identical. However, be aware that Holden offered more trim levels, so you are more likely to find illuminated visors or different fabric colors from Australian sellers.
What is the difference between the main visor mount and the support clip?
The main mount is the larger, hinged base that contains the pivot mechanism and screws into the roof. The support clip (part #09104239) is the small, stationary C-shaped clip near the rearview mirror that the end of the visor snaps into when in the forward position.
Why are new sun visors for my Caprice so hard to find?
The Caprice PPV was a fleet-only vehicle in North America with a limited production run. As a result, GM has discontinued many specific interior trim parts for it. Your best source for a replacement is typically a used OEM part from a vehicle recycler or an online marketplace like eBay.
Helpful Videos
Technical Specifications
OEM Part Numbers: 92262661 92245798 92262660 92245796 09104239
Interior Colors: Jet Black, Light Grey. Find RPO code on SPID label under spare tire cover.
We Have This Part in Stock


The information in this article is provided for general reference and educational purposes only. Vehicle specifications, procedures, and part compatibility can vary by production date, trim level, and region. Always consult your vehicle's factory service manual and verify part numbers before purchasing or performing repairs. Safety-critical components such as airbags, seat belts, and braking systems should be installed by a qualified professional.
- Chevrolet Caprice:
- 🎬 Helpful Videos
- 🛍️ Shop This Part
- Symptoms of a Failing Sun Visor
- Buying a Used 2011-2013 Caprice Sun Visor: What to Check
- Step 1: Verify Illuminated vs. Non-Illuminated
- Step 2: Match the Interior Color
- Step 3: Physical Inspection of a Used Visor
- Replacement Guide
- Known Issues, Recalls, and TSBs
- Cost Comparison
- Part Number Reference
- Frequently Asked Questions (FAQ)
- 🎟️ Get 5% Off