

2013-2018 Acura RDX Sun Visor: Fixing a Drooping Visor and Finding the Right Replacement
A complete guide to diagnosing a sagging sun visor, finding the correct color-matched part, and performing a simple DIY replacement for your 2013-2018 Acura RDX.
- The most common failure is the internal pivot wearing out, causing the visor to sag; this is not repairable and requires full replacement.
- Replacement is a very simple DIY job that takes less than 15 minutes with basic tools.
- You must verify your RDX's interior color code (found on the driver's door jamb sticker) to ensure you buy a matching used part.
- A used OEM visor from a low-mileage vehicle is a reliable and much cheaper alternative to a new dealer part.
Symptoms of a Failing Sun Visor

The most common failure for the 2013-2018 Acura RDX sun visor is a gradual loss of tension in the pivot mechanism. This results in a visor that droops or sags, refusing to stay flush against the headliner. This can be a minor annoyance or a significant safety hazard if it obstructs the driver's view.
- Drooping or Sagging: The visor won't stay in the fully stowed position and hangs down, sometimes by an inch or more. This is caused by internal wear in the tensioning mechanism inside the visor's arm.
- Cracking Sound on Adjustment: You might hear a cracking or popping sound when moving the visor, indicating that an internal plastic piece has broken.
- Vanity Light Failure: The light in the mirror may flicker or fail to turn on when the cover is opened. This can be due to a bad bulb, a faulty switch in the mirror assembly, or damaged wiring where the visor mounts to the roof.
- Broken Mirror or Cover: The vanity mirror itself can crack from impact, or the hinge on the cover can break from repeated use, preventing it from staying closed.
Known Issues, TSBs, and Recalls
For the 2013-2018 Acura RDX, there are no specific recalls or Technical Service Bulletins (TSBs) issued by Acura or the NHTSA for the sun visors themselves. However, the issue of sagging or drooping visors is a widely reported problem among owners in forums. The failure is typically due to the internal plastic and spring mechanism wearing out over time, a common issue across many vehicles, not just Acura.
Pro Tip: While there are no official recalls for this specific part, it's always a good practice to check for any open recalls on your vehicle by entering your VIN on the NHTSA website.
Buying a Used 2013-2018 RDX Sun Visor

A used OEM sun visor is an excellent, cost-effective alternative to a brand-new part. Since the primary failure is mechanical wear, a visor from a lower-mileage vehicle can provide years of service. Here’s what to look for:
- Verify the Pivot Tension: Ask the seller to confirm that the visor is stiff and holds its position firmly. It should not feel loose or floppy. This is the most critical inspection point.
- Check for Physical Damage: Inspect photos carefully for any cracks in the plastic housing, especially around the mounting point. Ensure the mirror and its cover are intact and the hinge works correctly.
- Confirm the Color: The 2013-2018 RDX was available with several interior colors. You must match the color of the replacement visor to your vehicle's interior. Don't guess based on photos, as lighting can be deceptive.
- Electrical Connector: Ensure the electrical pigtail and connector for the vanity light are present and undamaged.
How to Find Your RDX's Interior Color Code
To guarantee a perfect match, find your vehicle's interior color code. This is located on the VIN sticker in the driver's side door jamb. Look for a code that starts with "NH" or "YR". Common interior colors for this generation include Graystone, Parchment (sometimes called Sandstorm), and Ebony (black). When ordering a part, providing this code ensures you get the correct color.
Cost of Replacement
Replacing a sun visor is a straightforward job that most owners can do themselves, saving on labor costs. Prices for the part can vary significantly.
| Part Type | Estimated Cost |
|---|---|
| New OEM (Dealer) | $260 - $420 |
| New Aftermarket | $50 - $100 |
| Used OEM | $40 - $85 |
| Shop Labor Cost | $50 - $100 |
Part Numbers and Color Variants

Part numbers for these visors vary by side (Left/Driver, Right/Passenger) and interior color. The final letters of the part number often indicate the color. Always verify compatibility with your specific vehicle's VIN.
| Side | Color | Part Number | Supersedes |
|---|---|---|---|
| Right (Passenger) | Sandstorm / Parchment | 83230-TX4-A02ZA | 83230-TX4-A01ZA |
| Left (Driver) | Sandstorm / Parchment | 83280-TX4-A02ZA | 83280-TX4-A01ZA |
| Right (Passenger) | Gray / Graystone | 83230-TX4-A02ZC | 83230-TX4-A01ZB |
| Left (Driver) | Gray / Graystone | 83280-TX4-A02ZC | 83280-TX4-A01ZB |
Step-by-Step Replacement Guide

Replacing the sun visor on a 2013-2018 Acura RDX is a simple task that requires only basic hand tools and about 10-15 minutes.
- Position the Visor: Unclip the visor from the center hook and swing it towards the side window.
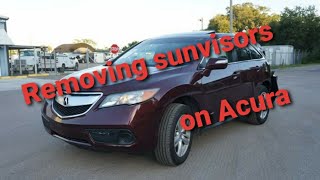
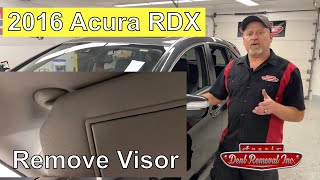
- Release the Mounting Post: At the base where the visor pivots, you will see the round mounting post against the headliner. You need to rotate the entire visor assembly. A video guide shows a small pin that needs to be depressed with a small screwdriver while rotating the visor to release it. 🎬 Watch: Step-by-step Acura RDX visor replacement guide Another method involves using a small flathead screwdriver to gently pry open a small cover on the base to expose the mounting screws. 🎬 See: How to release the mounting post on a 2016 RDX
- Remove Mounting Screws: Once the cover is off or the assembly is released, you will see two Phillips head screws holding the visor bracket to the roof. Remove these screws.
- Disconnect Electrical Connector: Carefully lower the visor assembly. The vanity light wire will still be connected. Depress the tab on the small electrical connector and pull it apart. Do not pull on the wires themselves.
- Install the New Visor: Installation is the reverse of removal. Connect the electrical plug, line up the mounting bracket with the screw holes, and tighten the screws securely but do not overtighten. Snap the cover back into place. Test the visor's movement and the vanity light to ensure everything is working correctly.
Warning: When disconnecting the electrical plug, be careful not to let the vehicle-side of the harness fall back into the headliner. If it does, you may need to gently pull the headliner down slightly to retrieve it.
Frequently Asked Questions (FAQ)
Why does my sun visor keep falling down?
The most common reason is wear and tear on the internal pivot joint, which loses its tension over time. This is especially common in cars that experience high interior temperatures, as heat can degrade the plastic and metal components inside the visor.
Can I just tighten a screw to fix the drooping?
Unfortunately, no. The tension mechanism is internal to the visor assembly and is not adjustable. While the mounting screws hold the visor to the roof, they do not control the pivot tension. The entire unit must be replaced.
Is the driver's side visor the same as the passenger's side?
No, they are not interchangeable. They are mirror images of each other and have different part numbers. You must order the correct part for the side you are replacing.
Is it difficult to replace the sun visor myself?
No, this is considered a very easy DIY repair. It typically requires only a screwdriver and can be completed in under 15 minutes. It does not require removing any major trim pieces.
Helpful Videos
Technical Specifications
OEM Part Numbers: 83230-TX4-A01ZA 83230-TX4-A02ZA 83230-TX4-A02ZC 83280-TX4-A01ZA 83280-TX4-A02ZA 83280-TX4-A01ZB 83280-TX4-A02ZC
Contains a single electrical connector for the illuminated vanity mirror.
We Have This Part in Stock



The information in this article is provided for general reference and educational purposes only. Vehicle specifications, procedures, and part compatibility can vary by production date, trim level, and region. Always consult your vehicle's factory service manual and verify part numbers before purchasing or performing repairs. Safety-critical components such as airbags, seat belts, and braking systems should be installed by a qualified professional.
- Acura RDX:
- 🎬 Helpful Videos
- 🛍️ Shop This Part
- Symptoms of a Failing Sun Visor
- Known Issues, TSBs, and Recalls
- Buying a Used 2013-2018 RDX Sun Visor
- How to Find Your RDX's Interior Color Code
- Cost of Replacement
- Part Numbers and Color Variants
- Step-by-Step Replacement Guide
- Frequently Asked Questions (FAQ)
- 🎟️ Get 5% Off