

1995-1998 Nissan 240SX Struts: Diagnosing Clunks and Restoring Handling
This guide covers how to identify failing struts on your S14 240SX, what to look for when buying used OEM replacements, and essential installation tips.
- Failing struts cause clunking noises, a bouncy ride, and poor handling; visible fluid leaks are a sure sign of failure.
- Always replace struts in pairs (front or rear) and replace the strut mounts, boots, and bump stops at the same time.
- A four-wheel alignment is mandatory after strut replacement to prevent uneven tire wear and ensure proper handling.
- When buying used, prioritize low-mileage units and inspect them carefully for any signs of fluid leaks or physical damage.
Symptoms of a Failing 240SX Strut

Worn struts degrade ride quality and handling gradually, but certain signs indicate it's time for a replacement. Listening for specific noises and feeling how the car behaves are key to diagnosis.
Noises and Vibrations
- Clunking or Banging: A common symptom is a clunking, rattling, or banging noise when driving over bumps or rough roads. This can be caused by the worn internal components of the strut failing to control the suspension movement or by a failing upper strut mount.
- Popping or Creaking When Turning: If you hear a popping, creaking, or groaning sound when turning the steering wheel, it often points to a worn bearing inside the upper strut mount, which is a common failure point.
Poor Ride Quality and Handling
- Bouncy or "Floaty" Ride: One of the most classic signs of a bad strut is an excessively bouncy ride. After hitting a bump, the car will continue to oscillate up and down instead of settling quickly.
- Nose Dives and Rear Squats: When your struts are worn, the front end of the car may dive forward excessively during hard braking, and the rear end may squat during acceleration. This instability compromises control.
- Body Roll in Turns: A feeling that the vehicle is tipping or leaning excessively to one side during turns is another indicator of failing struts.
Visual Signs
- Fluid Leaks: Struts are filled with hydraulic fluid. If the seals fail, this fluid can leak out, leaving an oily residue on the exterior of the strut body. A leaking strut can no longer dampen suspension movement effectively.
- Uneven Tire Wear: Worn struts can cause tires to bounce as you drive, leading to a specific type of uneven wear called "cupping," where high and low spots develop across the tread.
Buying a Used 1995-1998 240SX Strut: What to Look For

Given the age of the S14 240SX, new OEM struts can be expensive or difficult to find. Low-mileage used OEM struts can be a cost-effective alternative to cheap aftermarket parts, often providing superior ride quality and durability. However, careful inspection is critical.
Physical Inspection
- Check for Leaks: The most important check is for any sign of fluid leakage. Look for oily, greasy residue on the strut body. A strut that has leaked is no longer functional and should be rejected.
- Inspect the Piston Rod: The polished metal rod extending from the top of the strut should be perfectly straight, smooth, and free of rust, pitting, or damage. Any imperfections can tear the seals and cause leaks.
- Examine the Body and Mounts: Check the strut body for significant dents or heavy rust that could compromise its integrity. Ensure all mounting points, both at the bottom knuckle and the top hat, are intact and not bent or cracked.
- Perform a Manual Compression Test: If the strut is off the car, place the bottom on the ground and push down on the top with your body weight. The strut should compress smoothly and offer consistent resistance. When you let go, it should rebound on its own. It should not feel overly easy to compress or make any noise.
Mileage and Compatibility
- Mileage is Key: Struts are wear items, with a typical lifespan of 50,000 to 100,000 miles. Always prioritize struts from a low-mileage donor vehicle. A used strut with over 100,000 miles is likely near the end of its service life.
- Verify Part Numbers: The 240SX had different struts for front and rear, and potentially for different trim levels (e.g., Base vs. SE). For example, part number 54302-65F25 is listed for the front right on standard (non-SE) models. Always match part numbers or verify fitment for your specific vehicle to ensure correct spring rates and damping.
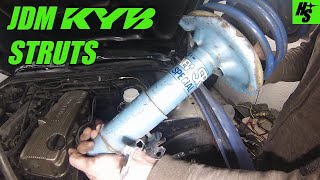
- A Note on JDM Parts: Be cautious when considering struts from imported Japanese Silvia S14 models. While they may physically fit, the spring rates and damping characteristics can be different, which will affect ride height and handling.
Known Issues, TSBs, and Recalls
As of this writing, there are no specific recalls or Technical Service Bulletins (TSBs) from Nissan or the NHTSA directly related to the struts on the 1995-1998 240SX. Most issues are related to normal wear and tear over time. The most significant recall for the 1995 model year was NHTSA Campaign ID 94V135000, which concerned an improperly wired brake warning light, not the suspension.
Pro Tip: Many 240SX owners on forums report that clunking noises from the rear can also be caused by worn subframe bushings or other suspension arms, so it's important to diagnose the entire suspension system before replacing parts.
Cost Comparison for 240SX Struts
Prices can vary significantly based on the source and type of part. Always replace struts in pairs (both front or both rear) to ensure balanced handling.
| Part Type | Estimated Price (Per Pair) | Notes |
|---|---|---|
| New OEM | $450 - $700+ | Often difficult to source, may be discontinued. Offers original ride and performance. |
| New Aftermarket (e.g., KYB) | $250 - $550 | Quality varies by brand. KYB is a popular OEM-quality replacement. |
| Used OEM | $100 - $250 | Price depends heavily on mileage and condition. A good value if from a low-mileage car. |
| Shop Labor | $250 - $500 | Includes installation for one axle (pair of struts) and a mandatory wheel alignment. |
Related Parts to Replace With Your Struts

To save on future labor costs and ensure a complete repair, it is highly recommended to replace several related components at the same time as the struts.
- Strut Mounts: Also known as insulator assemblies, these rubber and metal mounts at the top of the strut absorb vibrations and contain a bearing that allows the front suspension to pivot. They wear out, causing clunking or creaking noises.
- Dust Boots (Bellows): These flexible covers protect the polished strut rod from dirt, moisture, and debris, which can damage the seals and cause premature failure. If your old ones are torn or cracked, they must be replaced.
- Bump Stops: These are foam or rubber cushions that prevent the suspension from bottoming out during severe impacts. They degrade over time and should be replaced with the strut.
Installation Tips and Torque Specs

Replacing struts is a job that can be done by a skilled DIYer, but it requires special tools and safety precautions.
Warning: Disassembling a strut requires a spring compressor to safely handle the high-tension coil spring. Attempting this without the proper tool can result in serious injury. If you are not comfortable using a spring compressor, it is safer to purchase a complete "quick-strut" assembly (if available) or have a professional perform the installation.
Key Replacement Steps
- Lift and securely support the vehicle on jack stands, then remove the wheel.
- Disconnect any brake lines or ABS sensor wires attached to the strut body.
- Remove the two large bolts connecting the bottom of the strut to the steering knuckle.
- In the engine bay (for front) or trunk (for rear), remove the nuts holding the top of the strut mount to the strut tower.
- Remove the strut assembly from the vehicle.
- Carefully use a spring compressor to relieve tension from the coil spring.
- Remove the top nut on the strut shaft to disassemble the strut, mount, and spring.
- Reassemble with the new strut and any new related parts, paying close attention to the correct orientation of the top mount.
- Reinstall the assembly in the vehicle. 🎬 Watch this step-by-step video for a complete 240SX front strut installation.
Important Torque Specs
Using correct torque specs is crucial for safety and performance. Always consult a factory service manual for your specific vehicle, but common values are:
- Strut to Steering Knuckle Nuts (Front): 86 ft-lbs (117 Nm)
- Strut Top Mount to Body Nuts: 29-40 ft-lbs (39-54 Nm)
- Rear Shock to Knuckle Nut: 65-80 ft-lbs (88-108 Nm)
Pro Tip: A four-wheel alignment is absolutely necessary after replacing struts. The new components will change the vehicle's ride height and suspension angles, affecting tire wear and handling.
Frequently Asked Questions (FAQ)
Can I replace just one strut?
No, you should always replace struts in pairs on the same axle (both front or both rear). Replacing only one will result in unbalanced handling, braking, and ride height, which can be unsafe.
Do I need a wheel alignment after replacing struts?
Yes, a four-wheel alignment is mandatory. Strut replacement directly affects critical suspension angles like camber and toe. Skipping the alignment will lead to poor handling, crooked steering, and rapid, uneven tire wear.
What's the difference between a strut and a shock absorber?
A shock absorber is simply a damper. A strut is a more complex assembly that integrates the damper into a structural component of the suspension, which also serves as a mounting point for the coil spring and pivots with the steering. The 240SX uses struts on both the front and rear.
Are front and rear struts the same on a 240SX?
No, front and rear struts are not interchangeable. They have different lengths, mounting points, and are designed for different weight loads and suspension geometries. Left and right side struts are also often different.
Helpful Videos
Technical Specifications
OEM Part Numbers: 54302-65F25 54302-65F26 54302-69F26 54302-70F25 54302-70F26 54302-80F25 54302-80F26 54303-65F25 54303-65F26 54303-70F00 54303-70F25 54303-70F26 54303-70F27 54303-70F28 54303-70F85
Strut Top Mount to Body Torque: 29-40 ft-lbs (39-54 Nm). Front Strut to Knuckle Torque: 86 ft-lbs (117 Nm). Rear Strut to Knuckle Torque: 65-80 ft-lbs (88-108 Nm).

The information in this article is provided for general reference and educational purposes only. Vehicle specifications, procedures, and part compatibility can vary by production date, trim level, and region. Always consult your vehicle's factory service manual and verify part numbers before purchasing or performing repairs. Safety-critical components such as airbags, seat belts, and braking systems should be installed by a qualified professional.
- Nissan 240SX:
- 🎬 Helpful Videos
- Symptoms of a Failing 240SX Strut
- Noises and Vibrations
- Poor Ride Quality and Handling
- Visual Signs
- Buying a Used 1995-1998 240SX Strut: What to Look For
- Physical Inspection
- Mileage and Compatibility
- Known Issues, TSBs, and Recalls
- Cost Comparison for 240SX Struts
- Related Parts to Replace With Your Struts
- Installation Tips and Torque Specs
- Key Replacement Steps
- Important Torque Specs
- Frequently Asked Questions (FAQ)
- 🎟️ Get 5% Off