

2004-2009 Cadillac XLR Navigation Radio: A Guide to Programming, Failures, and Replacement
This in-depth guide covers the common problems, costs, and critical dealer programming required for the 2004-2009 Cadillac XLR's factory navigation stereo.
- A replacement radio, new or used, absolutely requires programming by a Cadillac dealer or a specialist with a GM Tech 2 tool to function.
- The most common failures are mechanical issues with the 6-disc CD changer and screen delamination or backlight failure.
- When buying a used unit, prioritize the physical condition of the screen and budget for the mandatory programming cost.
- Upgrading to an aftermarket radio is possible but expensive, requiring special adapters to retain the Bose amplifier and steering wheel controls.
Symptoms of a Failing Navigation Radio
When the navigation radio in a Cadillac XLR begins to fail, it can present a variety of issues. Recognizing these symptoms can help you determine if the head unit is the source of the problem.
Common Failure Symptoms:
- CD Changer Errors: The most common complaint is a "CD Error" message on the screen, or the unit refusing to accept or eject discs. This can be caused by internal mechanism failure or, in the case of a recently serviced unit, a forgotten shipping pin that locks the mechanism.
- No Sound from Speakers: The radio may power on, display stations, and appear to function normally, but no audio comes from the speakers. This can sometimes be caused by a failure within the head unit, which acts as the source selector for the Bose amplifier. In other cases, the amplifier itself or its fuse may be the culprit.
- Blank or Flickering Screen: The display may go completely black, flicker, or dim erratically, even though the radio's audio functions might still work. This often points to a failure of the screen's backlight or the power inverter board that supplies it.
- Unresponsive or Delaminating Touchscreen: The touchscreen may stop responding to touch, or you may see what looks like bubbles or peeling under the surface. This is known as delamination, where the layers of the screen separate due to age, heat, and humidity.
- Unit is "LOCKED": If you install a replacement radio from another vehicle, the screen will often display "LOCKED" or "Theft Lock Activated." This is the anti-theft system, and it means the unit will not function until it is programmed to your vehicle's VIN.
- Bluetooth Connectivity Issues: Some Technical Service Bulletins (TSBs) note issues like loss of audio after a Bluetooth connection is established, particularly with older BlackBerry phones.
Pro Tip: If you experience a CD changer error or other strange behavior, a simple first step is to try resetting the system. You can do this by pulling the fuses for the radio and amplifier for a few minutes, or by disconnecting the car's battery. This can sometimes clear temporary software glitches.
Known Issues, TSBs, and Recalls
While there have been no major recalls specifically for the radio unit, several Technical Service Bulletins (TSBs) have been issued that relate to its function.
- TSB #PIC4858A: Addresses a "CD Error" message or failure to accept discs, often caused by a shipping pin not being removed from a service replacement unit.
- TSB #PI0086E: Details an unexpected loss of radio audio and other issues when connecting certain BlackBerry smartphones via Bluetooth.
- Special Coverage #15643: While not a radio issue, it's a common electrical problem on the XLR. An airbag warning light may illuminate due to a poor connector design under the power seats. GM extended the warranty for this specific issue.
Programming and Anti-Theft: The #1 Buyer Concern
This is the most critical information for anyone replacing the factory radio in a 2004-2009 Cadillac XLR. You cannot simply swap a used radio from another car and expect it to work.
Warning: A replacement radio, whether new or used, MUST be programmed to your vehicle's VIN. Without this programming, the radio's anti-theft system will keep it in a "locked" state, rendering it useless.
This programming procedure pairs the serial number of the radio to your car's Body Control Module (BCM) over the vehicle's data network. This is not a simple code entry; it requires specialized tools and software.
- Who can program it? A Cadillac dealership is the most reliable option. Some independent repair shops that specialize in GM vehicles and have a GM Tech 2 scan tool or a modern equivalent with a subscription to GM's Technical Information System (TIS) can also perform the programming. A standard OBD-II code reader cannot do this.
- What tool is needed? The original dealership tool is the GM Tech 2 with a CANDi (Controller Area Network diagnostic interface) module, as the XLR uses GM's CAN bus system. Newer systems like the MDI 2 with Tech2Win software on a laptop can also be used.
- What happens if I don't program it? The unit will power on but will be locked. You will likely have no audio and a message on the screen indicating it is locked.
Buying a Used 2004-2009 XLR Navigation Radio
Buying a used OEM radio is often the most cost-effective way to replace a failed unit. However, you must factor in the additional cost and hassle of dealership programming.
Inspection Checklist for a Used Unit:
- Check the Screen Condition: Carefully inspect the touchscreen for any signs of delamination (bubbling, peeling), deep scratches, or cracks. This is a common failure point and is expensive to fix.
- Verify Button and Knob Function: If possible, press all the buttons and turn the knobs. They should move freely without sticking.
- Inspect the Connectors: Look at the rear of the unit and ensure none of the connector pins are bent, broken, or corroded.
- Confirm Part Numbers: While several part numbers may be compatible, it's best to match your original part number if possible. Known OEM part numbers include 10379717, 25845290, and 87400053.
- Budget for Programming: Remember to call your local Cadillac dealer or a qualified specialist shop beforehand to get a quote for programming a replacement radio. This cost should be added to the price of the used unit.
Cost to Replace the Cadillac XLR Navigation Radio
The cost can vary significantly depending on the path you choose for replacement or repair.
| Item | Estimated Cost | Notes |
|---|---|---|
| New OEM Unit | $1,200+ (if available) | Often discontinued and very difficult to find new. |
| Used OEM Unit | $400 - $900 | Prices on sites like eBay vary based on condition. Does not include programming. |
| Remanufactured / Repair Service | $300 - $800 | Companies like Hi-Tech Electronic Services offer repair for specific issues like screen or CD changer failure. |
| Aftermarket Head Unit | $450 - $1,500+ | Requires expensive adapters (~$150-$250 for a PAC RP5-GM11) to retain the Bose amp and steering wheel controls. Installation kits can also be costly (~$150). |
| Dealer Programming Labor | $125 - $250 | Typically 1-1.5 hours of labor. Call ahead for a precise quote. |
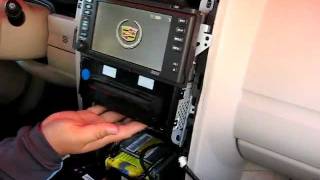
| Shop Labor (Physical Swap) | $100 - $200 | The physical replacement is straightforward and takes about an hour. | 🎬 Watch: How to remove the XLR radio for repair
Frequently Asked Questions (FAQ)
Can I install a modern aftermarket radio with Apple CarPlay or Android Auto?
Yes, you can install a modern double-DIN aftermarket stereo, but it requires special integration adapters. You will need an interface module like the PAC RP5-GM11 to retain the factory Bose amplifier, OnStar, and steering wheel controls. You will also need a dash kit, like the Metra 99-3026B, to physically fit the new radio. Be aware that the total cost for the unit, adapters, and installation can be significant.
My radio screen says "CD Error." What can I do?
This is a very common problem. First, try a system reset by disconnecting the battery for 15-30 minutes. If that doesn't work, the internal 6-disc changer mechanism has likely failed. You can either send the entire head unit to a specialist for repair, replace the entire unit, or consider an aftermarket radio.
Why is my radio screen blank but I can still hear music?
This usually indicates a failure of the LCD screen's backlight or the power supply to the screen, not the radio itself. The unit can be sent to an electronics repair shop to have the screen assembly or its related components replaced, which is often cheaper than replacing the entire radio.
Can I program a replacement radio myself?
No, not without professional-grade tools. The programming requires a GM Tech 2 scan tool or a newer MDI interface with an active GM software subscription. This is not something a DIY mechanic can typically do. You must go to a dealer or a properly equipped independent shop.
Is the radio from a Cadillac SRX the same?
While the radio from a similar-year Cadillac SRX looks nearly identical and may even share some internal components like the CD changer, it is not a direct plug-and-play replacement. Forum users have reported that using an SRX unit can cause issues like reversed steering wheel controls. It is always best to use a unit specifically from another XLR.
Helpful Videos
Technical Specifications
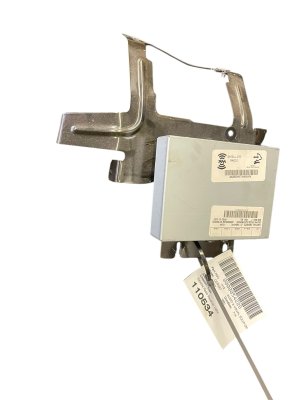
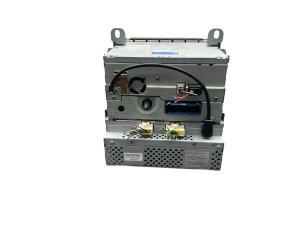
OEM Part Numbers: 10379717 25845290 87400053 15852294 10353490
Integrated AM/FM tuner, 6-disc in-dash CD changer, DVD-based GPS Navigation, Color Touchscreen Display, GM Class II / CAN bus data integration, Bose amplifier integration, VIN-locked anti-theft system.
We Have This Part in Stock



The information in this article is provided for general reference and educational purposes only. Vehicle specifications, procedures, and part compatibility can vary by production date, trim level, and region. Always consult your vehicle's factory service manual and verify part numbers before purchasing or performing repairs. Safety-critical components such as airbags, seat belts, and braking systems should be installed by a qualified professional.
- Cadillac XLR:
- 🎬 Helpful Videos
- 🛍️ Shop This Part
- Symptoms of a Failing Navigation Radio
- Common Failure Symptoms:
- Known Issues, TSBs, and Recalls
- Programming and Anti-Theft: The #1 Buyer Concern
- Buying a Used 2004-2009 XLR Navigation Radio
- Inspection Checklist for a Used Unit:
- Cost to Replace the Cadillac XLR Navigation Radio
- Frequently Asked Questions (FAQ)
- 🎟️ Get 5% Off