

2024-2026 Dodge Charger Steering Column Shroud: Part Numbers, Rattles, and Replacement
Your complete guide to identifying, inspecting, and replacing the upper steering column cover on the new generation of Dodge Charger.
- This guide is for the upper steering column shroud; the lower shroud is a separate part.
- Failure is almost always physical (cracks, broken tabs) or audible (rattles), and it will not trigger warning lights.
- Two primary OEM part numbers exist (7RP19TX7AA, 7SS06TX7AA); matching your original part's number is critical for correct fitment.
- Replacement is a simple DIY task, typically requiring only the removal of a few screws from underneath the column.
Symptoms of a Failing Steering Column Shroud
Because the steering column shroud is a cosmetic and protective plastic part, failure symptoms are almost always physical or audible. You will not get any dashboard warning lights or diagnostic trouble codes for a broken shroud.
Rattling or Squeaking Noises
The most common symptom is noise. A rattling, buzzing, or squeaking sound coming from directly behind the steering wheel often points to a loose or damaged shroud. This can be caused by broken mounting tabs or clips that no longer hold the upper and lower halves together securely. The noise may be constant or only appear when driving on rough roads. Some owners of previous Charger generations have noted plastic-on-plastic rubbing sounds that can be resolved by careful adjustment or adding small felt pads.
🎬 Watch: How to fix a Dodge Charger rattle noiseVisible Cracks or Broken Pieces
Physical damage is another clear sign of failure. This can happen from impact, improper removal during a previous repair, or from the plastic becoming brittle over time due to sun exposure. Look for cracks, especially around the screw holes or where the two halves meet. A broken shroud may have sharp edges or hang down, potentially interfering with driver controls.
Loose Fit and Gaps
If the shroud feels loose to the touch or you can see significant gaps between the upper and lower sections, it's a sign that it is not properly secured. This can allow dust and debris to enter the steering column assembly, potentially damaging more sensitive components over time.
Known Issues, Recalls, and Technical Service Bulletins (TSBs)
As the 2024-2026 Dodge Charger is a new platform, there are no specific recalls or Technical Service Bulletins (TSBs) related to the steering column shroud itself. However, several TSBs and recalls have been issued for other components on the vehicle.
- NHTSA Recall 25V389: Affects some 2024-2025 Charger EV models, which may not produce the required pedestrian warning sound at low speeds due to a software issue.
- NHTSA Recall 26V262000: A software error in some 2024-2025 Charger EVs may cause the instrument panel display to fail, increasing crash risk.
- TSB S2408000088: Addresses a diagnostic trouble code (B15A1-00) related to the media port connection in the radio.
- TSB 08-022-25 REV. A: A software update for the Battery Pack Control Module (BPCM) to address several potential diagnostic codes and improve battery state of charge accuracy.
Pro Tip: While no recalls exist for the shroud, it's always a good practice to check for any open recalls on your vehicle by entering your Vehicle Identification Number (VIN) on the NHTSA website.
Buying a Used 2024-2026 Charger Steering Column Shroud
As these Chargers are very new, used shrouds will be rare until more vehicles enter salvage yards. However, when they do become available, a used OEM shroud is an excellent, cost-effective option. Here’s what to inspect before buying.
1. Verify All Mounting Tabs and Clip Points
This is the most critical inspection point. Carefully examine the entire part, especially the edges and screw bosses. Look for small plastic tabs, clips, and the holes where screws pass through. Ensure none are cracked, stressed (showing white lines), or broken off completely. A single broken tab can be the difference between a snug, rattle-free fit and a part that will never sit right.
2. Check for Cracks and Stress Marks
Flex the part slightly and inspect its surface under good light. Look for hairline cracks, especially radiating from corners or screw holes. Also, look for white stress marks in the plastic, which indicate it has been bent or stressed and is weakened in that area.
3. Match the Part Number Exactly
Turn the part over and find the molded-in OEM part number. It is essential to match this number to your original part. Mopar uses different part numbers for shrouds that may look similar but have subtle differences for various trim levels or options (e.g., with or without paddle shifters, different steering wheel designs). The known OEM part numbers for the upper shroud are 7RP19TX7AA and 7SS06TX7AA. There are also separate part numbers for the lower shroud, such as 7RP21TX7AA.
4. Inspect for Cosmetic Damage
Check for deep scratches, scuffs, or discoloration from chemical cleaners. While minor cosmetic issues might be acceptable for a daily driver, they can be an eyesore since the part is directly in your line of sight. Ensure the color and texture match your vehicle's interior.
Replacement Guide
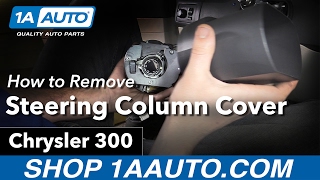
Replacing the steering column shroud is a straightforward job suitable for a DIYer with basic tools. 🎬 Watch: How to replace a steering column cover The process typically involves removing a few screws and carefully separating the two plastic halves.
Warning: You will be working near the airbag. While you are not removing the airbag itself, it is always best practice to disconnect the negative battery terminal and wait 15 minutes before starting work to de-energize the system.
- Center the Steering Wheel: Ensure the steering wheel and front wheels are pointing straight ahead.
- Locate Mounting Screws: Look on the underside of the steering column. There are typically 2-3 Phillips or Torx head screws holding the lower shroud to the upper shroud and the column itself.
- Remove Screws: You may need to turn the steering wheel 90 degrees to the left and right to gain better access to the screws.
- Separate the Shroud Halves: Once the screws are out, gently pull the lower shroud down. The upper and lower halves are interlocked with plastic clips along the sides. Carefully pry them apart. Often, applying gentle, even pressure is enough to separate them.
- Install the New Shroud: Snap the new upper and lower pieces together around the column, ensuring all clips engage. Reinstall the mounting screws, being careful not to overtighten them, as this can crack the plastic.
- Reconnect Battery: If you disconnected it, reconnect the negative battery terminal.
Cost Comparison
Prices for a steering column shroud are relatively low, but labor costs at a dealership can add up. As of mid-2024, aftermarket options are not available, and used parts are not yet common.
| Part Type | Estimated Cost |
|---|---|
| New OEM (Dealer/Online) | $18 - $30 |
| New Aftermarket | Not Yet Available |
| Used OEM (Salvage) | $15 - $25 (projected) |
| Shop Labor | $50 - $100 |
Frequently Asked Questions (FAQ)
Is this part the upper or lower half of the shroud?
The part numbers 7RP19TX7AA and 7SS06TX7AA specifically refer to the upper steering column shroud. The lower shroud has a different part number, such as 7RP21TX7AA. Always verify which piece you need before ordering.
Why are there two different part numbers for the upper shroud?
Automakers often use different part numbers for components that have minor variations. This could be due to differences in color, texture, or slight shape changes to accommodate different steering wheel options (like paddle shifters) or trim packages. The best way to ensure a perfect match is to use the part number from your original shroud.
Do I need to disconnect the battery to replace the steering column shroud?
While not strictly required by all procedures, it is highly recommended as a safety precaution. You are working in close proximity to the airbag and other sensitive electrical components. Disconnecting the negative battery terminal and waiting 15 minutes is a simple step to prevent accidental airbag deployment or electrical shorts.
Can a broken steering column shroud cause any real problems?
Yes. While often seen as a cosmetic part, a broken shroud can cause issues. A loose piece could fall and interfere with the brake pedal or accelerator. It also allows dust and foreign objects to get into the clockspring and steering column mechanisms, which can lead to more expensive repairs down the road.
Helpful Videos
Technical Specifications
OEM Part Numbers: 7RP19TX7AA 7SS06TX7AA
Material: Molded Plastic. Position: Upper half of steering column.

The information in this article is provided for general reference and educational purposes only. Vehicle specifications, procedures, and part compatibility can vary by production date, trim level, and region. Always consult your vehicle's factory service manual and verify part numbers before purchasing or performing repairs. Safety-critical components such as airbags, seat belts, and braking systems should be installed by a qualified professional.
- Dodge Charger:
- 🎬 Helpful Videos
- Symptoms of a Failing Steering Column Shroud
- Rattling or Squeaking Noises
- Visible Cracks or Broken Pieces
- Loose Fit and Gaps
- Known Issues, Recalls, and Technical Service Bulletins (TSBs)
- Buying a Used 2024-2026 Charger Steering Column Shroud
- 1. Verify All Mounting Tabs and Clip Points
- 2. Check for Cracks and Stress Marks
- 3. Match the Part Number Exactly
- 4. Inspect for Cosmetic Damage
- Replacement Guide
- Cost Comparison
- Frequently Asked Questions (FAQ)
- 🎟️ Get 5% Off