

2020-2026 Tesla Model Y Rear Spoiler: Adhesive Failure, Replacement, and Upgrades
This guide covers the common problem of spoiler separation on Performance models and provides a complete guide to buying and installing a replacement or aftermarket spoiler.
- The most common failure is the factory adhesive tape letting go, causing the spoiler to lift or detach completely.
- Only the Performance trim comes with a factory carbon fiber spoiler; adding one to a LR or RWD Model Y is a cosmetic upgrade.
- When buying a used spoiler, the most critical check is for warping by laying it on a perfectly flat surface.
- During installation, do NOT use adhesion promoter on the paint; Tesla's service documents warn it can cause damage.
Spoiler Variants: Performance vs. Standard Models

A key point of confusion is which Tesla Model Y trims come with a rear spoiler. Only the Performance trim includes a factory-installed carbon fiber spoiler. Long Range (LR) and Rear-Wheel Drive (RWD) models do not come with a spoiler from the factory. However, adding a spoiler is a very popular aftermarket modification for these trims to achieve the Performance look. The official OEM part numbers 1533971-00-A and 1533971-00-B are for the factory carbon fiber spoiler.
Known Issues and Technical Service Bulletins (TSBs)

Widespread Adhesive Failure
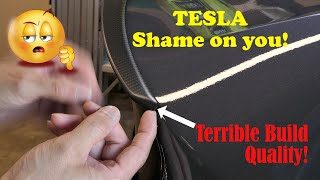
The single most common known issue for the factory-installed Model Y Performance spoiler is the failure of the double-sided adhesive tape used to mount it. This problem has been widely documented by owners since the vehicle's early production years, with many reporting that their spoilers become loose, lift at the edges, or detach completely. The cause is often attributed to poor surface preparation at the factory, inadequate quality adhesive, or a slight mismatch in the curvature of the spoiler and the trunk lid, which puts constant tension on the tape. Many owners have had their spoilers replaced multiple times under warranty for the same issue.
🎬 Watch: One owner's experience with Tesla's spoiler warranty process.TSB for Whistling Noise
Tesla issued Service Bulletin SB-25-11-007 for some Model Y vehicles built at the Giga Berlin factory. On these specific vehicles, a gap between the liftgate and the spoiler may produce a whistling sound at high speed. The official fix involves removing the spoiler and applying special sealing tape to the edges of the liftgate before reinstalling it.
Pro Tip: Some owners have reported water leaks in the trunk and assumed it was from a poorly sealed spoiler. However, Tesla also has a TSB (SB-23-10-003) for trunk water leaks caused by liftgate assembly seals, which is a more likely culprit.
Symptoms of Failure

- Spoiler Lifting at Edges: The most common first sign of failure is one or both corners of the spoiler lifting away from the trunk lid. You may be able to fit a finger underneath the edge where it was once flush.
- Complete Detachment: In advanced cases of adhesive failure, the spoiler can detach from the vehicle entirely, often while driving at highway speeds. This is a significant safety hazard for other vehicles on the road.
- Whistling or Wind Noise: A high-pitched whistling sound from the rear of the vehicle at speed can indicate a gap has formed between the spoiler and the liftgate, as addressed in TSB SB-25-11-007.
- Clear Coat Delamination: The carbon fiber spoiler's protective clear coat can begin to peel, yellow, or develop milky white spots, particularly along the edges. This is a cosmetic failure but can precede adhesive failure if moisture gets underneath.
Buying a Used Rear Spoiler

A used OEM spoiler is an excellent way to replace a damaged one or upgrade a non-Performance model. Given the known issues, here's what to inspect carefully:
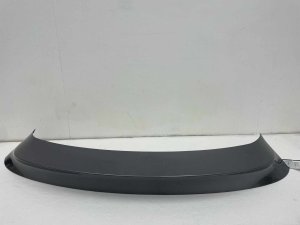
- Check for Warping: This is the most critical inspection. Lay the spoiler on a perfectly flat surface like a glass table or granite countertop. It should sit flush with no significant rocking or gaps. A warped spoiler will never make proper contact with the trunk lid, guaranteeing that any new adhesive will fail.
- Inspect the Finish: For the OEM carbon fiber spoiler, look closely for any signs of the clear coat peeling, yellowing, or developing cloudy spots. While minor surface scratches can be polished, clear coat failure requires professional refinishing.
- Check for Cracks: Examine the entire spoiler, especially the thin edges and corners, for any stress cracks or impact damage.
- Verify Authenticity: Cheap aftermarket spoilers often have a poor fit, with a curve that doesn't perfectly match the Model Y's trunk. A genuine used OEM part is almost always a better choice for fitment than a new, low-quality aftermarket part.
Replacement and Installation Guide

Replacing the Model Y spoiler is a straightforward process that a patient DIYer can accomplish. The key to success is meticulous preparation.
Difficulty: 2/5
Estimated Time: 1.5 hours
Tools & Materials:
- Heat Gun or Hair Dryer
- Fishing Line or Dental Floss
- Plastic Trim Removal Tools
- 3M Adhesive Eraser Wheel (for a drill)
- Isopropyl Alcohol (IPA) Wipes
- High-Quality 3M VHB (Very High Bond) Automotive Double-Sided Tape
- Masking Tape (Painter's Tape)
- Microfiber Towels
Step-by-Step Procedure:
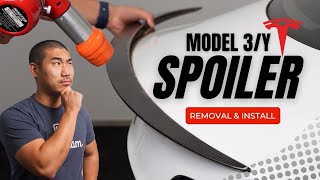
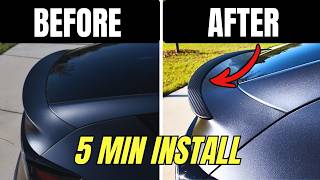
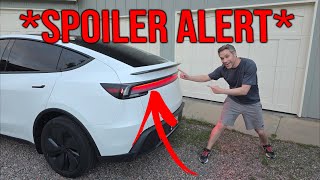
- Removal of Old Spoiler: Gently heat one end of the spoiler with a heat gun to soften the adhesive. Slide fishing line under the corner and use a sawing motion to cut through the adhesive tape along the length of the spoiler. Use plastic trim tools to gently lift as you go. 🎬 See this step-by-step spoiler removal and installation walkthrough.
- Remove Old Adhesive: Once the spoiler is off, use a 3M Adhesive Eraser Wheel on a drill to safely remove the bulk of the old tape from the trunk lid. Use Goo Gone or a similar product for any remaining residue, then clean thoroughly.
- Surface Preparation: This is the most important step. Thoroughly clean the installation area on the trunk lid with isopropyl alcohol wipes to remove all wax, oils, and residue. The surface must be perfectly clean for the new adhesive to bond. Let it dry completely.
- Dry Fit and Alignment: Before peeling the backing from the new tape, place the spoiler on the trunk. Center it carefully. Use small pieces of masking tape on the trunk and spoiler to create alignment marks so you can place it perfectly.
- Installation: Apply new 3M VHB tape to the underside of the spoiler if it doesn't already have it. Peel the backing off the tape. Using your alignment marks, carefully place the spoiler onto the trunk, starting from the center and working your way out.
- Apply Pressure: Once positioned, apply firm pressure along the entire length of the spoiler for several seconds in each spot. Tesla specifies applying over 20 pounds of pressure for 10 seconds at a time, with extra emphasis on the ends. This "wets out" the adhesive, ensuring a strong bond.
- Secure and Cure: Use masking tape to hold the spoiler ends down firmly against the trunk lid. The adhesive needs time to cure. Allow it to sit for at least 24 hours (72 hours is ideal for a full-strength bond) 🎬 Watch: How to get a permanent, secure spoiler bond. before removing the tape, washing the car, or driving at high speeds.
Warning: Tesla's official service procedure explicitly states DO NOT apply adhesion promoter to the liftgate paint. It can damage the paint and may actually impair the bond with the specific tape used. Proper cleaning is all that is required.
Cost Comparison
| Part Type | Estimated Cost |
|---|---|
| New OEM (Carbon Fiber) | $425 - $800 (Part only or including installation from Tesla) |
| New Aftermarket | $150 - $2,000+ (Varies widely by brand and material) |
| Used OEM | $120 - $400 |
| Shop Labor Cost | $100 - $200 |
Frequently Asked Questions (FAQ)
Is a loose or delaminating spoiler covered under Tesla's warranty?
Yes, in most cases. Adhesive failure and clear coat delamination are widely known defects, and Tesla typically replaces the spoiler free of charge under the vehicle's basic warranty. However, if the spoiler was removed for a PPF wrap or the car is out of warranty, the claim may be denied.
Can I prevent my new spoiler from lifting?
The best prevention is proper installation. Ensure the trunk surface is meticulously cleaned with isopropyl alcohol. After installation, apply firm pressure and use masking tape to hold the ends down for at least 24-72 hours to allow the adhesive to fully cure. Some owners also apply a ceramic coating or PPF to the spoiler itself to protect the carbon fiber finish from UV damage.
Do I need the special Tesla spoiler alignment jigs?
No, the jigs (Part #1694265-00-A) are what Tesla service centers use for perfect placement, but they are not necessary for a DIY installation. You can achieve a perfectly centered installation by carefully measuring and using painter's tape to create alignment guides before you stick the spoiler down.
Does the spoiler actually improve performance or range?
Yes, but the effect is most noticeable at higher speeds. The spoiler is designed to increase downforce, which improves stability. Aerodynamic analysis by aftermarket companies has shown that a full body kit including a spoiler can reduce overall vehicle drag, which could lead to a small improvement in energy efficiency. For daily driving, its primary benefit is aesthetic.
Helpful Videos
Technical Specifications
OEM Part Numbers: 1533971-00-A 1533971-00-B
Material: Carbon Fiber (OEM Performance Model) Attachment Method: Double-sided adhesive tape Related TSB: SB-25-11-007 (Whistling noise on certain Berlin-built models)
We Have This Part in Stock



The information in this article is provided for general reference and educational purposes only. Vehicle specifications, procedures, and part compatibility can vary by production date, trim level, and region. Always consult your vehicle's factory service manual and verify part numbers before purchasing or performing repairs. Safety-critical components such as airbags, seat belts, and braking systems should be installed by a qualified professional.
- TESLA Y:
- 🎬 Helpful Videos
- 🛍️ Shop This Part
- Spoiler Variants: Performance vs. Standard Models
- Known Issues and Technical Service Bulletins (TSBs)
- Widespread Adhesive Failure
- TSB for Whistling Noise
- Symptoms of Failure
- Buying a Used Rear Spoiler
- Replacement and Installation Guide
- Tools & Materials:
- Step-by-Step Procedure:
- Cost Comparison
- Frequently Asked Questions (FAQ)
- 🎟️ Get 5% Off