

1999 Ford Windstar Instrument Cluster: PATS, Programming, and Failure Guide
Learn why replacing your 1999 Windstar's speedometer requires special anti-theft programming to avoid a no-start condition and how to choose the right used part.
- A replacement cluster MUST be programmed for the PATS anti-theft system by a dealer or locksmith, otherwise the van will not start.
- Repairing your original cluster is often the best option, as it requires no programming and keeps your original mileage.
- You must verify if your van has the 3-button message center; clusters for models with and without it are not interchangeable.
- The mileage is stored in the cluster; a used part will display the mileage from the donor car, not your own.
Symptoms of a Failing 1999 Windstar Instrument Cluster

A failing instrument cluster in a 1999 Ford Windstar often presents a distinct set of problems. The most common cause is failing solder joints on the main electrical connector, leading to intermittent power and strange behavior. Here are the most frequently reported symptoms:
- Intermittent or Dead Gauges: The speedometer, tachometer, fuel, and temperature gauges may drop to zero, freeze in place, or bounce around erratically. This can happen to all gauges at once or just one or two.
- Complete Power Loss: The entire cluster, including all gauges, warning lights, and the odometer display, may suddenly go dark while driving and then come back on randomly.
- Flashing "THEFT" Light and No-Start: A rapidly flashing "THEFT" light on the dash when you try to start the van is a classic sign of a PATS fault. If the cluster cannot communicate properly with the key and the engine computer, it will prevent the engine from starting as a security measure.
- Blank or Garbled Odometer Display: The digital odometer screen may become dim, show jumbled characters, or go completely blank.
- Tachometer Needle Breaking: In some cases of severe gauge fluctuation, the tachometer needle can spin completely around and break off or get stuck.
- False Warning Lights: The airbag, ABS, or brake warning lights may illuminate for no reason due to the cluster's internal electrical faults.
The Critical Role of PATS in Your Windstar's Cluster

The single most important thing to understand before replacing your 1999 Windstar's cluster is its connection to the Passive Anti-Theft System (PATS). For this model year, the instrument cluster acts as the control module for the anti-theft system. It works like this:
- A transponder chip inside your ignition key holds a unique security code.
- An antenna ring around the ignition cylinder reads this code when you turn the key.
- The instrument cluster receives this code, verifies it's a programmed key, and then sends an "OK to start" signal to the Powertrain Control Module (PCM).
Warning: Because the cluster is part of the security system, you cannot simply swap in a used cluster from another vehicle. If you install a replacement cluster without programming it, the vehicle will not start and the "THEFT" light will flash rapidly.
Variant Differences: Message Center vs. No Message Center

For the 1999 model year, Ford offered two main types of instrument clusters for the Windstar. It is crucial to get the correct type for your van, as they are not interchangeable.
- Cluster with Message Center: This version is found on higher trim levels and features a small digital display screen controlled by a 3-button switch panel (usually labeled INFO, SETUP, RESET) located elsewhere on the dash.
- Cluster without Message Center: This is the base model cluster and lacks the extra digital display screen and associated buttons.
When sourcing a replacement, you must match the type that is originally in your vehicle. A cluster designed for a van with a message center will not work correctly in a van without one, and vice-versa.
Buying a Used 1999 Ford Windstar Instrument Cluster
Buying a used OEM cluster is often the most cost-effective solution, but careful selection is key to avoiding problems.
How to Verify Compatibility
- Match the Message Center: First and foremost, confirm if your original cluster has the message center display or not. This is the most important compatibility check.
- Check the Part Number: The most reliable method is to match the engineering number printed on a sticker on the back or side of your original cluster. Look for a number starting with XF2F- or XF2Z-. While multiple part numbers may be compatible, matching this prefix is a strong indicator of a correct fit.
- Visual Inspection: Before purchasing, inspect the used cluster for any physical damage. Check for a clear, uncracked plastic lens and ensure all mounting tabs are intact. Avoid any units with signs of water damage or corrosion on the circuit board.
A Note on Mileage
The vehicle's mileage is stored electronically inside the instrument cluster itself. When you install a used cluster, the odometer will display the mileage from the donor vehicle, not your van's original mileage. This cannot be changed without specialized equipment. Be aware that selling a vehicle with an inaccurate odometer reading may have legal implications; it's good practice to document the mileage of both the original cluster and the replacement at the time of the swap.
Programming and Installation Guide
While the physical installation is straightforward for a DIY mechanic, the electronic programming is not.
Pro Tip: Many companies offer a repair service for your original cluster. This is often the best option, as it avoids all programming and mileage issues. You send them your faulty cluster, they repair the common internal faults (like bad solder joints), and send it back ready to plug and play.
Installation Steps
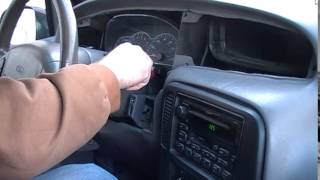
🎬 Watch this step-by-step instrument cluster removal video.- Disconnect the negative battery terminal.
- Lower the steering column to its lowest position.
- Carefully pry off the plastic trim panel surrounding the instrument cluster.
- Remove the screws (typically four) that secure the cluster to the dashboard.
- Gently pull the cluster forward and disconnect the single large electrical connector on the back.
- Installation is the reverse of removal.
Programming Requirements
After a replacement cluster is installed, it must be programmed to the vehicle's PATS system. This procedure is often called a "parameter reset." 🎬 Watch: How PATS programming works after module replacement. It syncs the new cluster with your existing keys and the PCM.
- Who can do it? A Ford dealership or an automotive locksmith with advanced diagnostic tools (like Ford IDS, Autel, or Snap-on scanners with security functions) can perform the programming. Most independent repair shops can also do this, provided they have the correct equipment.
- What's involved? The technician connects a scan tool to the vehicle's OBD-II port and initiates a security access procedure, which can take about 10 minutes. They then perform the parameter reset, which tells the vehicle's security system to accept the new cluster. A minimum of two keys must be programmed to the new setup 🎬 See how to program a set of PATS keys. for the vehicle to start.
Known Issues, Recalls, and TSBs
- Common Failure: The most widespread issue is the intermittent operation due to cracked solder joints on the circuit board where the main connector attaches. This is what causes the gauges to flicker, die, and behave erratically.
- Recall 09S09: While not directly for the cluster, a major recall was issued for the Speed Control Deactivation Switch, which could leak brake fluid. On 1999-2003 Windstars, this fluid could migrate to the ABS module and cause a fire. This is an important safety check for any owner.
- Recall for Subframe Corrosion: Many 1999 Windstars, especially those in salt-belt states, were recalled for front subframe corrosion that could affect steering control.
- OBD-II Codes: A failing cluster can store its own trouble codes. Common codes include B1342 (ECU is Defective), B1202/B1204 (Fuel Sender Circuit Fault), and various U-codes indicating a loss of communication with other modules. A PATS-related no-start will often log codes like B1600 or B1681.
| Part/Service | Estimated Cost |
|---|---|
| New OEM | $400 - $570 (plus core charge, if available). Often discontinued. |
| Remanufactured | $200 - $350. |
| Used OEM | $50 - $125. |
| Repair Service (Your original unit) | $125 - $180. |
| Shop Labor (Installation & Programming) | $100 - $250. |
Frequently Asked Questions (FAQ)
Why is my "THEFT" light flashing and my van won't start after replacing the cluster?
This happens because the replacement cluster has not been programmed to your vehicle's Passive Anti-Theft System (PATS). The cluster is a key part of the security system, and it must be electronically matched to your keys and engine computer by a dealer or qualified locksmith before the engine will be allowed to start.
Can I just swap the circuit board from my old cluster into the replacement one to avoid programming?
This is generally not recommended. The main failure point is often the solder on the circuit board itself. While theoretically possible if the replacement has a broken lens but a good board, it's a delicate process. A much safer and more reliable option is to have your original cluster professionally repaired, which solves the problem without requiring any programming.
Will the mileage on the used cluster change to match my van?
No. The mileage is stored in the cluster's memory. The odometer will show the mileage from the vehicle the cluster was removed from. Changing the mileage requires specialized tools and services.
Do I absolutely need a dealer to program the new cluster?
No, a dealer is not the only option. Many professional automotive locksmiths and well-equipped independent repair shops have the necessary scan tools and software to perform the PATS "parameter reset" required to program the cluster to your van.
Helpful Videos

Technical Specifications
OEM Part Numbers: 1F2Z10849AA XF2F-10849-CK XF2F-10849-CL XF2F-10849-CM XF2F-10849-DG XF2F-10849-DJ XF2F-CK XF2F-DG XF2F-DJ XF2F10849AL XF2F10849AM XF2F10849BH XF2F10849BM XF2FAL XF2FAM XF2Z-10849-AA
PATS System Type: C (Cluster is the control module). Variants: Available with or without a 3-button message center display. Primary Failure Mode: Cracked solder joints on the main electrical connector.
We Have This Part in Stock

The information in this article is provided for general reference and educational purposes only. Vehicle specifications, procedures, and part compatibility can vary by production date, trim level, and region. Always consult your vehicle's factory service manual and verify part numbers before purchasing or performing repairs. Safety-critical components such as airbags, seat belts, and braking systems should be installed by a qualified professional.
- Ford Windstar:
- 🎬 Helpful Videos
- 🛍️ Shop This Part
- Symptoms of a Failing 1999 Windstar Instrument Cluster
- The Critical Role of PATS in Your Windstar's Cluster
- Variant Differences: Message Center vs. No Message Center
- Buying a Used 1999 Ford Windstar Instrument Cluster
- How to Verify Compatibility
- A Note on Mileage
- Programming and Installation Guide
- Installation Steps
- Programming Requirements
- Known Issues, Recalls, and TSBs
- Frequently Asked Questions (FAQ)
- 🎟️ Get 5% Off