

2017-2023 E-Class Seat Trim Guide: Matching Panels for Sedan, Coupe, Sport & Standard Seats
This guide covers the common failure points, replacement costs, and critical compatibility checks for the W213, S213, C238, and A238 E-Class seat trim panels.
- Compatibility is extremely complex; you must verify your vehicle's body style (Sedan/Wagon vs. Coupe/Convertible) and exact seat type (Standard, Sport, or Performance) before buying.
- Replacement is more difficult than on many cars because some panels are secured with rivets that must be drilled out and replaced with a rivet gun.
- When buying a used panel, the condition of the mounting clips on the back is more important than minor cosmetic scuffs on the front.
- Several safety recalls exist for the passenger seat's Occupant Classification System; while not a trim issue, it's a critical safety concern for anyone working on the front seats.
Symptoms of a Failing Seat Trim Panel
Failure of a seat trim panel is typically due to physical damage rather than mechanical breakdown. There are no associated fault codes. Symptoms are usually visible or audible and include:
- Cracks and Fractures: The most common failure is cracking, especially on the side bolster trim near the seat belt buckle, which gets stressed from occupants getting in and out of the vehicle.
- Broken Mounting Tabs: The plastic tabs and clips on the back of the panel are fragile. If they break, the panel will feel loose, sag, or rattle against the seat frame.
- Rattling Noises: A loose or improperly secured panel will vibrate and create annoying rattling or buzzing sounds, particularly when driving over rough surfaces.
- Scuffs and Cosmetic Damage: Deep scratches, gouges, or peeling of the soft-touch finish can detract from the interior's appearance.
- Broken Switch Mounts: The housing that secures the seat control switch can break, causing the switch to become loose or fall into the panel.
Safety Recall Notice: While not a defect of the trim panel itself, multiple NHTSA recalls exist for the front passenger seat on 2017-2018 E-Class models. NHTSA campaign #17V076000 notes that an incorrectly installed pressure hose for the Occupant Detection System could cause the system to misclassify an adult passenger as a child seat, deactivating the airbag and increasing injury risk in a crash. Dealers will inspect the routing and replace parts if necessary. Always verify if your vehicle is affected when working on or replacing the passenger seat.
Buying a Used Seat Trim Panel: A Detailed Checklist
Sourcing a used OEM seat trim panel is a great way to save money, but careful verification is essential to get the correct part. A panel from the wrong configuration will not fit or function correctly. Follow these steps to ensure a match.
Step 1: Identify Your E-Class Body Style
The front and rear seats are different between the major body styles. Trim panels are not interchangeable between them.
- Sedan (W213) & Wagon (S213): These four-door models share most front seat designs.
- Coupe (C238) & Convertible (A238): These two-door models have unique front seats with integrated headrests and different side trim to accommodate the seat belt presenter. Rear trim is also completely different.
Step 2: Determine Your Front Seat Type
Mercedes offered several distinct seat designs. The shape of the trim panels is different for each.
- Standard (Luxury) Seats: These are the base seats, focused on comfort. They have less aggressive side bolsters.
- Sport (AMG-Line) Seats: Part of the AMG-Line package, these seats have more pronounced side bolsters on the cushion and backrest for better support.
- AMG Performance Seats: Optional on AMG models, these are aggressive, one-piece racing-style seats with large bolsters and fixed headrests. Their trim is entirely unique.
Step 3: Verify Switch & Option Cutouts
The driver's side trim panel is the most complex. Inspect the cutouts on your original panel and ensure the replacement has the exact same configuration for features like:
- 3-position memory seat buttons
- Heated seat button
- Ventilated (cooled) seat button
- Multicontour seat adjustment controls (if equipped)
A panel missing a cutout for a feature your car has cannot be used without modification.
Step 4: Match the Color and Finish
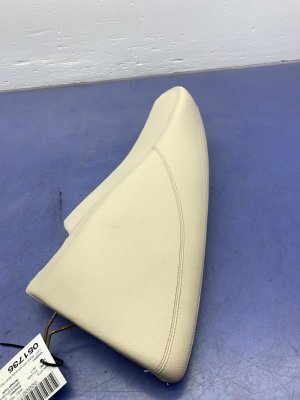
E-Class interiors came in many colors like Black, Macchiato Beige, and Nut Brown. Ensure the plastic trim color is an exact match. Also, check the finish; some panels have a standard plastic grain, while others may have a soft-touch coating or specific textures that must match.
Step 5: Perform a Detailed Physical Inspection
Pro Tip: The back of the panel is more important than the front. Minor scuffs on the visible surface can often be ignored, but broken mounting points mean the panel will never fit securely.
- Check All Mounting Tabs: Carefully inspect the back of the panel. All plastic clips and tabs must be present and free of cracks. These are essential for a tight, rattle-free installation.
- Inspect Screw Holes: Look for cracks radiating from any screw mounting points. This is a common weak spot.
- Examine Switch Housings: Ensure the plastic structures that hold the seat control switches in place are intact.
Replacement Overview & Difficulty
Replacing a side seat trim panel on the W213 E-Class is a manageable DIY project for someone with patience and the right tools. However, it is more involved than on many other vehicles.
The process typically involves removing Torx screws and carefully prying the panel away from the seat frame. However, a critical step for some panels is that they are secured by metal rivets. These rivets must be drilled out with a drill and drill bit. The new or replacement panel must then be secured with new rivets using a rivet gun. This step makes the job more complex than a simple clip-on/clip-off process.
- Difficulty Rating: 3/5 (Moderate, due to the need to drill and install rivets)
- Estimated Time: 0.5 - 1.5 hours
- Required Tools: Plastic trim removal tools, Torx screwdriver set, drill, drill bits, rivet gun, new rivets.
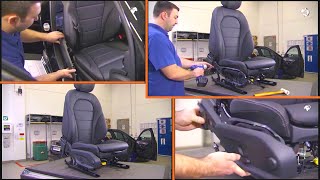
A tutorial video shows the process of drilling out rivets on a W213 seat, highlighting the need for care to avoid damaging the seat frame.
🎬 Watch this step-by-step seat trim replacement videoCost Comparison for E-Class Seat Trim Panels
Prices vary significantly based on which specific panel you need (driver vs. passenger, side vs. back) and its features.
| Part Type | Estimated Cost | Notes |
|---|---|---|
| New OEM | $180 - $400+ | Purchased from a Mercedes-Benz dealer. Guarantees a perfect match but is the most expensive option. |
| Used OEM | $75 - $200 | Sourced from a salvage vehicle. Offers excellent value but requires careful inspection and verification of compatibility. |
| New Aftermarket | Not Generally Available | Complete plastic trim panels are typically not produced by aftermarket companies. Only seat *covers* (upholstery) are available. |
| Shop Labor | $150 - $300 | Typically 1-2 hours of labor at an independent shop. Cost may be higher if multiple trim pieces or the seat cushion must be removed. | 🎬 See how to remove the seat bottom cushion
Frequently Asked Questions (FAQ)
Can I use a seat trim panel from a Coupe on my Sedan?
No. The front seats in the 2-door Coupe (C238) and Convertible (A238) are different from the 4-door Sedan (W213) and Wagon (S213). The trim panels are not interchangeable between body styles.
Why are there so many different part numbers for the same trim piece?
Part numbers vary based on the vehicle's body style, seat type (Standard, Sport), color, and options (memory, heating/ventilation). Each unique combination has a unique part number to ensure a correct fit and function.
My trim panel is cracked but the seat controls work. Do I have to replace it?
No, it is not critical for the vehicle's operation. A broken trim panel is primarily a cosmetic issue. However, it can expose sharp metal edges of the seat frame or internal wiring, and broken pieces can fall and interfere with seat movement. It is recommended to replace it to maintain safety and interior quality.
How can I remove the old panel without breaking more clips?
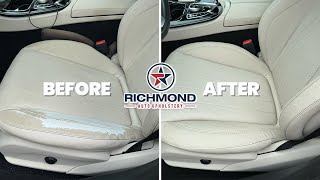
Always use a set of plastic trim removal tools, not a metal screwdriver. First, identify and remove all screws. For panels secured with rivets, you must drill them out. For panels with clips, pry gently and evenly, trying to apply pressure as close to the clip location as possible. Watching a replacement video beforehand can help you understand where the clips and screws are located.
Helpful Videos
Technical Specifications
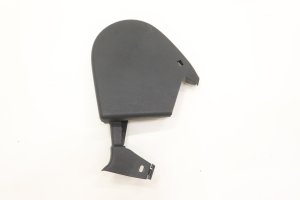
OEM Part Numbers: A2059105320
Material: ABS Plastic. Attachment Method: Clips, Torx screws, and pop rivets.
We Have This Part in Stock



The information in this article is provided for general reference and educational purposes only. Vehicle specifications, procedures, and part compatibility can vary by production date, trim level, and region. Always consult your vehicle's factory service manual and verify part numbers before purchasing or performing repairs. Safety-critical components such as airbags, seat belts, and braking systems should be installed by a qualified professional.
- Mercedes-Benz E-Class:
- 🎬 Helpful Videos
- 🛍️ Shop This Part
- Symptoms of a Failing Seat Trim Panel
- Buying a Used Seat Trim Panel: A Detailed Checklist
- Step 1: Identify Your E-Class Body Style
- Step 2: Determine Your Front Seat Type
- Step 3: Verify Switch & Option Cutouts
- Step 4: Match the Color and Finish
- Step 5: Perform a Detailed Physical Inspection
- Replacement Overview & Difficulty
- Cost Comparison for E-Class Seat Trim Panels
- Frequently Asked Questions (FAQ)
- 🎟️ Get 5% Off