

2023-2025 Genesis GV60 Seat Trim: A Guide to Ergo Motion, Ventilated Seats, and Part Variations
This guide covers the critical compatibility differences in seat trim panels for the Genesis GV60, including common failures and replacement tips.
- Seat trim panels are NOT interchangeable between all GV60 models; Performance 'Ergo Motion' seats have unique trim.
- Verify if your vehicle has ventilated seats, as this may require a different seat back panel.
- When buying a used panel, the most critical inspection is checking for broken mounting clips on the back.
- If the panel contains electrical switches, you must disconnect the 12V battery before starting the replacement.
Compatibility: The Single Biggest Mistake to Avoid
Before purchasing a replacement seat trim panel for a 2023-2025 Genesis GV60, you must correctly identify your vehicle's specific seat configuration. Ordering the wrong panel is a common and costly mistake due to significant differences between trim levels.
Warning: The GV60 Performance trim is equipped with 'Ergo Motion' seats. These seats contain seven internal air pockets for massage and active posture support. This complex internal structure alters the shape of the seat frame and cushions. As a result, trim panels from a Performance model will likely not fit the standard seats found in the Advanced or Standard RWD models, and vice-versa.
Warning: The seat back panels may differ between models with and without ventilated front seats. Ventilated seats, standard on the Advanced and Performance trims, require openings in the seat back for air circulation. A panel from a non-ventilated seat will block this function. Carefully compare the back of your original panel to photos of the replacement part to ensure any necessary vent patterns match.
Key Differences by Trim Level:
- Performance Trim: Features Nappa leather and 'Ergo Motion' front seats with power bolsters and a massage function. The trim panels are unique to this seat design.
- Advanced Trim: Features leather upholstery with heated and ventilated front seats.
- Standard RWD Trim: Features synthetic leather upholstery with heated-only front seats.
Symptoms of a Failing Seat Trim Panel
Failures can be either physical damage or, if the panel includes switches, electrical issues.
Physical Symptoms
- Cracks and Scuffs: The most common issue is cosmetic damage near the lower front of the seat cushion, caused by occupants getting in and out of the vehicle.
- Rattles and Creaks: A rattling noise coming from the side of the seat, especially over bumps, often points to a broken mounting clip or tab on the back of the trim panel.
- Loose Fit: If the panel feels loose or has a large gap where it meets the seat upholstery, its mounting points are likely broken, preventing it from seating correctly.
Electrical Symptoms (for panels with integrated switches)
- Inoperative Seat Controls: The inability to adjust the seat position is a direct sign that the switch assembly within the trim panel has failed.
- Intermittent Function: Some owners report heated or ventilated seat buttons failing mid-drive, only to work again after the vehicle is shut off and restarted. This points to an intermittent fault in the switch or its related control module.
- Parasitic Battery Drain: In some Genesis models, a faulty power seat switch module has been known to cause a parasitic draw that can drain the 12V battery, leading to a no-start condition. If your seat controls stop working and you later find the battery is dead, the switch may be the culprit.
Known Issues, TSBs, and Recalls for the GV60 Seat System
While there are no recalls specifically for the plastic seat trim panels, several important service campaigns and recalls exist for the overall seat and safety system in the GV60.
- TSB for Seat Movement: A Technical Service Bulletin was issued for some 2023 GV60 models that may exhibit a slight rocking or play in the front seats during acceleration and braking. The fix involves replacing specific seat track bolts and washers.
- Recall for Seat Belt Pretensioners: A critical safety recall was issued for front seat belt pretensioners that could explode upon deployment, projecting metal fragments into the cabin and increasing the risk of injury in a crash.
- Recall for Seat Belt Retractor: Another recall addresses an issue where the front passenger seat belt's automatic locking retractor could get stuck, preventing the belt from being extended and fastened.
Always check with a Genesis dealer or use the NHTSA website to see if your vehicle's VIN is affected by these or any other open recalls.
Buying a Used GV60 Seat Trim Panel: An Inspection Guide
Since color-matched aftermarket interior trim is not typically available for newer vehicles, a used OEM panel is the best choice for a cost-effective repair. Pay close attention to the following details before buying.
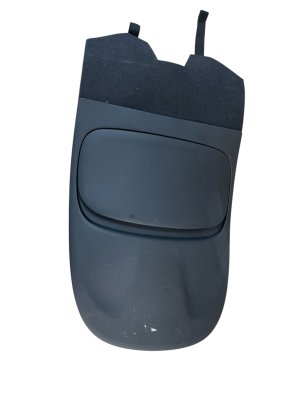
- Verify Compatibility First: Confirm the donor vehicle's trim level (Performance, Advanced, or Standard) and options (ventilated seats). This is the most important step. An eBay listing for a used panel from a 2023 GV60 Performance trim is a good example of the details to look for.
- Inspect All Mounting Points: This is the most critical inspection point. Turn the panel over and carefully check every plastic clip, hook, and screw boss. Even one broken tab can cause a poor fit and lead to rattles.
- Check for Stress Marks: Look for thin, white lines in the plastic, especially around screw holes and corners. These are stress marks that indicate the plastic is fatigued and may crack soon.
- Match the Color and Finish: The GV60 is offered with several interior colors, such as Obsidian Black. Ensure the color and texture (e.g., gloss, matte, grain) of the used panel perfectly match your interior.
- Test Integrated Switches: If the panel includes the seat control switch, purchase from a seller who guarantees its functionality or offers a good return policy.
Replacement Overview & Difficulty
- Difficulty: 2/5 (Easy to Moderate)
- Estimated Time: 0.5 - 1.0 hours
- Tools Needed: Phillips screwdriver, plastic trim removal tool set.
Pro Tip: Always use plastic trim removal tools to pry panels off. Using a screwdriver or metal pry bar will almost certainly scratch or gouge the soft-touch plastics and upholstery surrounding the panel.
General Replacement Steps:
- Disconnect the 12V Battery: If the trim panel contains any electrical switches, you must disconnect the negative terminal of the 12V battery (located in the front trunk or 'frunk') and wait 10-15 minutes before starting work. This prevents short circuits and potential airbag deployment.
- Position the Seat: Move the seat to a position that gives you the best access to all screws and edges of the panel. For the main side panel, moving the seat fully up and forward is often helpful.
- Remove Screws: Locate and remove any visible Phillips head screws. These are often hidden under small plastic caps or deep within the panel's contours.
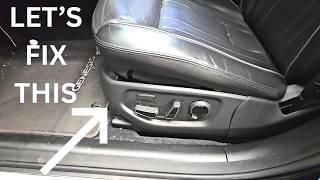
- Pry the Panel Off: Carefully work a plastic trim tool into the seam between the trim panel and the seat. Gently pry to release the hidden plastic clips. You will hear them pop as they release. Work your way around the panel until it is free. 🎬 See this Genesis front seat trim replacement walkthrough
- Disconnect Electrical Connectors: If there are switches, carefully disconnect the wiring harnesses by pressing their release tabs.
- Install the New Panel: Connect the wiring, align the clips on the new panel with the holes in the seat frame, and press firmly to snap it into place. Reinstall any screws. Reconnect the battery and test all functions.
| Part/Service | Estimated Cost |
|---|---|
| New OEM Seat Trim Panel | $250 - $450 |
| New Aftermarket | Not Available |
| Used OEM Seat Trim Panel | $75 - $200 |
| Shop Labor for Installation | $120 - $250 |
Frequently Asked Questions (FAQ)
Will a seat trim panel from a GV60 Performance fit my Advanced model?
No, it is highly unlikely. The Performance model's 'Ergo Motion' seats have a different internal structure and shape, meaning the trim panels are not interchangeable with the standard seats in the Advanced or Standard RWD trims.
Do I really need to disconnect the battery to replace a plastic trim piece?
Yes. If the trim panel houses any electrical components, like the power seat adjustment switch, disconnecting the 12V battery is a mandatory safety step to prevent electrical shorts or other system faults.
My trim panel has a small crack. Can I repair it?
Repairing cracked plastic trim is difficult and rarely provides a durable, cosmetically acceptable result. Adhesives and epoxies often fail to bond well with automotive-grade plastics and cannot replicate the original texture. For a lasting and clean repair, replacement with a good-condition used OEM part is the best option.
What is the difference between the inner and outer seat trim panels?
The outer trim panel is the large piece on the side of the seat facing the door, and it typically houses the main seat controls. The inner trim panel is the smaller piece on the side facing the center console.
Helpful Videos


Technical Specifications
OEM Part Numbers: 88390-CU100-NNB 88390CU100NNB 88392-CU000 88392CU000
Varies by trim level (Standard, Advanced, Performance) and options (ventilated seats, interior color).
We Have This Part in Stock


The information in this article is provided for general reference and educational purposes only. Vehicle specifications, procedures, and part compatibility can vary by production date, trim level, and region. Always consult your vehicle's factory service manual and verify part numbers before purchasing or performing repairs. Safety-critical components such as airbags, seat belts, and braking systems should be installed by a qualified professional.
- Genesis GV60:
- 🎬 Helpful Videos
- 🛍️ Shop This Part
- Compatibility: The Single Biggest Mistake to Avoid
- Key Differences by Trim Level:
- Symptoms of a Failing Seat Trim Panel
- Physical Symptoms
- Electrical Symptoms (for panels with integrated switches)
- Known Issues, TSBs, and Recalls for the GV60 Seat System
- Buying a Used GV60 Seat Trim Panel: An Inspection Guide
- Replacement Overview & Difficulty
- General Replacement Steps:
- Cost Comparison
- Frequently Asked Questions (FAQ)
- 🎟️ Get 5% Off