

Tesla Model 3, Y, S & X Seat Switch Guide: Part Numbers, DIY Repair & Common Failures (2017-2026)
This guide helps you diagnose a faulty seat switch, find the correct part number for your specific Tesla, and decide between replacing the entire switch or just the commonly broken button caps.
- The most common failure is not the electronics, but the physical plastic button caps breaking off. Check if you only need to replace the cap before buying a whole new switch.
- There are many different part numbers depending on vehicle model, year, driver/passenger side, and lumbar support. Always match the part number from your original switch.
- Replacement is a simple DIY job requiring only a T20 Torx driver and a trim tool, and can be completed in under an hour.
- If your seat memory is acting strange, try the 'Recalibrate Seats' function in the service menu before assuming the switch is broken.
Symptoms of a Failing Seat Switch

Problems with a Tesla seat switch can range from minor annoyances to a complete inability to adjust the seat. Here are the most common symptoms owners experience.
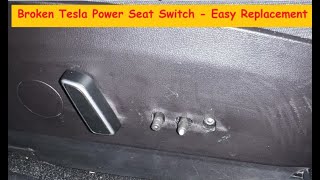
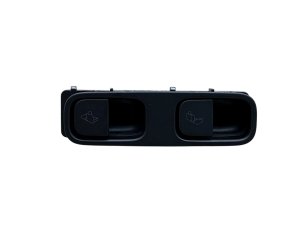
- Broken or Missing Buttons: This is the most frequent issue. The plastic paddles, especially the one controlling the forward/backward seat movement, can be fragile. They are often broken by being accidentally kicked, snagged by a bag, or stepped on when entering or exiting the vehicle. In this case, the electronic switch underneath may still work if you can activate the post it connects to.
- Unresponsive Controls: You press a button, and nothing happens. The seat is completely stuck in one or all directions. This can indicate a total switch failure, a blown fuse, or a wiring issue.
- Intermittent Operation: The switch works only some of the time. You might have to press a button multiple times to get the seat to move. This often points to worn internal contacts within the switch assembly.
- Seat Moves in Wrong Direction or Only One Way: A specific function, like moving forward or reclining, may stop working while others are fine. This usually points to a failure of a specific contact inside the switch assembly.
- Slow Seat Movement: If the seat moves much slower than it used to, it could be an early sign of a failing switch, but it can also be caused by a weak seat motor or binding in the seat tracks.
Pro Tip: Before blaming the switch for memory position problems, try recalibrating the seats. This option can be found in the vehicle's Service menu on the touchscreen. Software glitches can sometimes cause memory profiles to become corrupted, and a calibration can resolve the issue without replacing any parts.
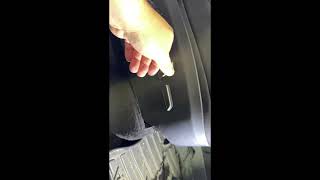
🎬 Watch this guide to calibrate your seat, steering, and mirrors.Part Number & Compatibility Guide

Tesla has used several different seat switches across its model lineup and years. Using the correct part number is essential for a successful repair. The driver's side (Left Hand) and passenger's side (Right Hand) switches are different and are not interchangeable.
| Part Number(s) | Position & Features | Commonly Fits Vehicles | Notes |
|---|---|---|---|
| 1098529, 1098529-00-E, 1098529-00-F | Driver (Left Hand) with Lumbar | 2017-2023 Model 3, 2020-2023 Model Y | This is the most common switch for pre-refresh Model 3 and Y with memory and lumbar support. |
| 1551854-01-A, 1551854-01-B | Driver (Left Hand) with Lumbar | 2021-2023 Model 3/Y | An updated version or variant for specific production runs. One source notes a potential rework needed for vehicles made from May-June 2021. Always verify by original part number. |
| 1786322-00-B | Passenger (Right Hand) without Lumbar | 2024-2026 Model 3 ('Highland'), 2024-2026 Model Y | This switch is for the newer 'Highland' refresh models, which often do not have lumbar control on the passenger side. |
| 1551855-01-A | Passenger (Right Hand) with Lumbar | 2021-2023 Model 3/Y | This is the passenger-side equivalent for pre-refresh models that are equipped with passenger lumbar support. |
| 1098530-00-F | Passenger (Right Hand) with Lumbar | 2019-2021 Model S/X, some Model 3/Y | This part number also appears for passenger-side applications with lumbar support. |
Warning: The button caps themselves also have part numbers (e.g., 1098840, 1551844). Do not confuse a button cap part number with the part number for the entire electronic switch assembly. The switch assembly number is printed on the main body of the part.
Known Issues, TSBs, and Recalls

While the switches can be fragile, there are no widespread safety recalls in the North American market for the failure of the seat adjustment switch itself.
- No Switch Recall: There are no NHTSA recalls for faulty seat adjustment switches on these models.
- Australian Software Recall: Some 2019-2020 Model 3 vehicles in Australia were recalled for a software issue with the driver's seat *occupancy sensor*, which could prevent the seatbelt warning from activating. This was fixed via an over-the-air software update and is unrelated to the physical adjustment switch.
- Model Y Second-Row Seat Recall: A recall was issued for some 2022-2023 Model Y vehicles because bolts on the *second-row* seat back frames may not have been properly tightened. This does not involve the front power seat switches.
Buying a Used Seat Switch
A used OEM seat switch is an excellent, cost-effective solution, especially since the failure is often simple mechanical damage. Here’s what to look for when buying a recycled part.
- First, Check Your Buttons: Is your problem just a broken plastic button cap? If the switch still works electronically, you may only need to buy a replacement button cap, which is very inexpensive. Some owners even buy a cheap aftermarket switch just to harvest the plastic paddles to repair their original OEM switch. 🎬 See how to replace the full assembly or just the buttons.
- Match the Part Number Exactly: As shown in the table above, there are multiple versions. The only way to guarantee compatibility with features like lumbar and memory is to match the part number from your original switch.
- Inspect the Plastic Paddles: This is the weakest point. Closely examine the photos of the used part. Look for stress marks (white-ish lines in the plastic) or hairline cracks on the paddles and the small posts they mount on.
- Check the Electrical Connector: Ensure the connector housing isn't cracked and that all the small pins inside are straight and free of corrosion.
- Why Used OEM is a Good Choice: The circuit boards in original Tesla switches are high quality. Failure is almost always due to the physical plastic components. A used OEM part that is physically intact is often a more reliable choice than a brand-new, non-OEM aftermarket switch which may have lower quality internal electronics.
Replacement Overview (DIY)

Replacing the seat switch is a beginner-friendly job that can be done with basic tools.
- Difficulty: 1.5 out of 5
- Estimated Time: 30-45 minutes
- Tools Needed: T20 Torx driver/socket, small ratchet, plastic trim removal tool.
Step-by-Step Process:
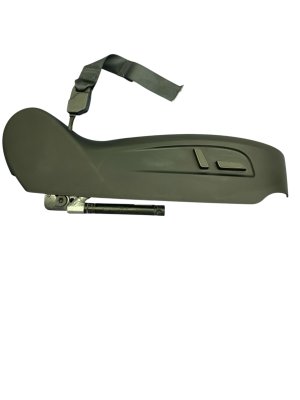
- Access the Trim Screw: There is a single T20 Torx screw holding the bottom of the plastic side trim to the seat frame. You may need to raise the seat to its highest position to get access.
- Remove the Side Trim: After removing the screw, use a trim tool to carefully pry the plastic side cover away from the seat. It is held in by several clips.
- Disconnect the Switch: With the trim panel loose, you can access the back of the switch. Press the tab on the electrical connector to unplug it.
- Unscrew the Switch: The switch assembly is held to the inside of the trim panel with three more T20 screws. Remove them, and the old switch will come free.
- Installation: Installation is the reverse of removal. Attach the new switch to the trim panel, plug in the electrical connector, and test all functions before snapping the trim panel back into place 🎬 Follow this video for a step-by-step Model Y switch repair. and reinstalling the final screw.
Cost Comparison
| Part Type | Estimated Cost |
|---|---|
| New OEM (from Tesla) | $85 - $160 (may include mobile installation) |
| Used OEM (Recycled) | $40 - $80 |
| New Aftermarket (Full Assembly) | $20 - $50 |
| New Aftermarket (Button Caps Only) | $10 - $20 |
| Shop Labor | $75 - $150 |
Frequently Asked Questions (FAQ)
Can I just replace the broken plastic button instead of the whole switch?
Yes, in many cases. If the electronic part of your switch still works, you can often just replace the broken plastic button cap. Some people buy an inexpensive aftermarket switch and transfer the new plastic buttons over to their original OEM switch assembly.
Is the driver's side switch the same as the passenger's side?
No. The driver's side (LH) and passenger's side (RH) switches are different parts and have different part numbers. They are not interchangeable.
My seat memory isn't working correctly. Is the switch bad?
Not necessarily. Before replacing the switch, try recalibrating the seats using the vehicle's touchscreen service menu. Corrupted software is a common cause of seat memory problems and can often be fixed without any new parts.
How do I know which part number to buy for my Tesla?
The most reliable method is to remove the plastic side trim from your seat and read the part number directly off your existing switch. This ensures you get the correct version for your vehicle's specific features (like lumbar support) and production date.
Helpful Videos
Technical Specifications
OEM Part Numbers: 1098529 1098529-00-E 1098529-00-F 1098530-00-F 1551854-01-A 1551854-01-B 1551855-01-A 1786322-00-B
Controls 8-way seat adjustment. May include a 4-way joystick for lumbar support depending on the part number. Connects via a single multi-pin electrical connector.
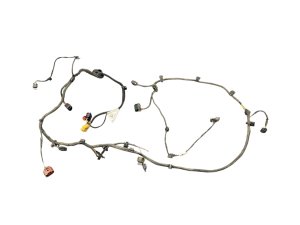
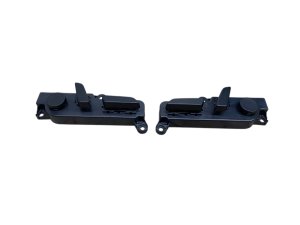
We Have This Part in Stock



The information in this article is provided for general reference and educational purposes only. Vehicle specifications, procedures, and part compatibility can vary by production date, trim level, and region. Always consult your vehicle's factory service manual and verify part numbers before purchasing or performing repairs. Safety-critical components such as airbags, seat belts, and braking systems should be installed by a qualified professional.
- Tesla Model 3:
- Tesla Model Y:
- Tesla Model S:
- Tesla Model X: