

2011-2016 Honda CR-Z Front Seat: Solving Airbag Faults and Common Wear
Your complete guide to diagnosing common CR-Z seat problems, inspecting a used replacement, and understanding critical safety system compatibility.
- The most critical issue with CR-Z seats is the SRS airbag light; if it's on, the airbags may not deploy in a crash.
- When buying a used seat, verifying the integrity of the airbag and its wiring is more important than the physical condition. Never buy a seat from a wrecked car.
- Swapping a passenger seat requires professional recalibration of the Occupant Detection System (ODS) sensor.
- Always disconnect the battery for at least 3-5 minutes before unplugging or removing a seat to prevent accidental airbag deployment and system faults.
Common 2011-2016 CR-Z Seat Problems


The sporty, bolstered seats in the Honda CR-Z are a defining feature, but they are also prone to specific issues over time. Understanding these common points of failure is key to diagnosing problems and making a smart purchase when buying a used replacement.
1. Airbag (SRS) Warning Light
By far the most common and serious issue is an illuminated Supplemental Restraint System (SRS) warning light on the dashboard. If this light is on, the entire airbag system may be disabled and will not deploy in a crash. Several seat-related issues can trigger this light:
- Faulty ODS Sensor: The Occupant Detection System (ODS) sensor in the passenger seat is a known failure point. It can become faulty due to moisture, physical damage, or internal electronics failure. This sensor is calibrated to the vehicle's VIN, making a simple swap complicated.
- Loose Connectors: The yellow electrical connectors under the seats can become loose or corroded, especially if something is stored under the seat or if the interior has been exposed to moisture. This interrupts the signal to the SRS module, triggering a fault.
- Swapped Seats: Installing a seat from another CR-Z, especially a different model year, can cause an airbag light if the ODS system is not recalibrated by a dealer or a professional with advanced scan tools.
2. Worn or Torn Upholstery
The driver's side seat, particularly the left-side bolster, is highly susceptible to wear and tear. The fabric or leatherette can fray, rip, or crack from the friction of getting in and out of the low-slung car. This is a cosmetic issue but significantly affects the interior's appearance and can be a sign of high mileage or rough use.
3. Collapsed Foam Cushion
Over time, the foam in the seat bottom and back can break down and collapse. This leads to a lack of support, making the seat uncomfortable on long drives. You might feel the seat frame through the cushion or notice that you sit lower than you used to. This is most common on the driver's side.
Pro Tip: Many owners choose to install aftermarket seat covers on their CR-Z to protect against bolster wear or to hide existing damage. This can be a cost-effective way to improve the interior's look without replacing the entire seat.
Buying a Used 2011-2016 CR-Z Front Seat: An Inspection Guide
Buying a used OEM seat is often the most practical solution, as new seat components from Honda can be prohibitively expensive or discontinued. However, because of the integrated safety systems, careful inspection is crucial.
Physical Inspection Checklist:
- Check the Upholstery: Closely inspect the outer bolsters for rips, fraying, or previous repairs. Check for stains, burns, or other damage on the main seating surfaces.
- Test the Foam: Press firmly on the seat bottom and side bolsters. The foam should feel firm and supportive. If it feels soft, crunchy, or you can easily feel the metal frame, the cushion is worn out.
- Verify Mechanical Adjustments: Test all levers. Ensure the seat slides forward and backward smoothly on its tracks and that the recline mechanism works without binding.
Safety System Inspection (Most Important):
Warning: Never purchase a seat from a vehicle that was in a significant accident. The side airbag may have deployed, and internal sensors could be damaged even if there is no visible issue. Many salvage yards will not sell front seats 🎬 Watch this guide on pulling seats from a salvage yard with airbags for this reason.
- Inspect the Airbag Seam: Look at the seam on the outboard side of the seat back (the side closest to the door). This is where the side airbag deploys. The seam should be tight and factory-perfect. Any signs of splitting, re-stitching, or tampering are major red flags.
- Examine All Wiring: Carefully inspect all the wiring harnesses and connectors under the seat. Look for any cut wires, damaged insulation, or broken connector clips. The yellow connectors are for the SRS (airbag) system and must be in perfect condition.
- Match Part Numbers & Features: The CR-Z had different seat trims (cloth, leather accents) and features across years. While seats may be physically interchangeable, the electronics might not be. The safest bet is to find a seat from the exact same year and trim level. Swapping a passenger seat requires recalibration of the ODS sensor.
Cost of Replacing a CR-Z Front Seat
The cost can vary dramatically depending on the source of the part and who performs the labor.
| Part Source | Estimated Cost | Notes |
|---|---|---|
| New OEM (Components) | $450 - $1,000+ | Honda typically sells seat components (cushion pads, covers, frames) separately. A complete new seat is not usually available and would be extremely expensive. A single new foam cushion can cost over $300. |
| New Aftermarket | $200 - $500 (Covers Only) | Complete aftermarket seats are not common, but high-quality custom-fit seat covers are available to restore the look of the original seat. |
| Used OEM (Complete Assembly) | $250 - $750 | This is the most common repair method. Prices vary based on condition, trim (cloth vs. leather), and whether it's a driver or passenger seat. |
| Shop Labor Cost | $100 - $250 | A professional mechanic can typically swap a seat in 1-2 hours. Labor costs will be higher if ODS sensor recalibration is required. |
Front Seat Replacement Walkthrough

Replacing the front seat is a straightforward job for a DIYer with basic tools. The difficulty is low, but following safety procedures is critical.
Installation Difficulty: 2/5
Estimated Time: 1 - 1.5 hours
Tools & Materials:
- Socket set with extension (14mm socket is common for Honda seat bolts)
- Torque wrench
- Trim removal tool or flathead screwdriver (taped to prevent scratches)
Step-by-Step Guide:
- DISCONNECT THE BATTERY. This is the most important step. Disconnect the negative battery terminal and wait at least 3-5 minutes for the SRS system's backup power to discharge. Failure to do this could result in accidental airbag deployment.
- Remove Bolt Covers: The seat is held down by four bolts. The rear bolts are often covered by plastic trim pieces. Gently pry these covers off.
- Unbolt the Seat: Slide the seat all the way forward to access the two rear bolts and remove them. Then, slide the seat all the way back to access the two front bolts and remove them.
- Disconnect Electrical Connectors: Gently tilt the seat backward to access the connectors underneath. There will be several, including one or two large yellow connectors for the airbag system. Carefully unclip them. Do not pull on the wires.
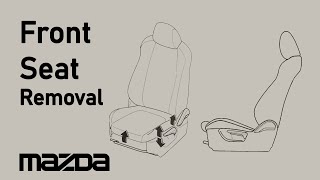
- Remove the Seat: With the bolts and wires disconnected, you can now carefully lift the seat out of the car. 🎬 See how to safely remove a front seat step-by-step Be mindful of the door panels and interior trim to avoid scratches.
- Installation: Installation is the reverse of removal. Place the new seat inside, reconnect all electrical connectors securely, and hand-tighten all four mounting bolts before torquing them to specification. A common torque spec for Honda seat bolts is around 32 lb-ft, but always verify for your specific model.
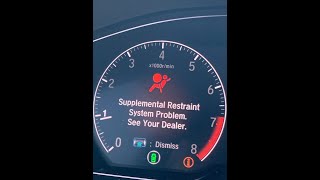
- Reconnect Battery & Initialize: After the seat is fully installed, reconnect the negative battery terminal. Turn the ignition to the 'ON' position (without starting the car). If the SRS light comes on and stays on, the system may need to be reset or the passenger ODS sensor may require recalibration. 🎬 Watch this quick DIY method to reset your Honda SRS light
Recalls and Technical Service Bulletins (TSBs)
The 2011-2016 Honda CR-Z was subject to the widespread Takata airbag recall. This recall concerned the driver's side frontal airbag inflator, which could rupture during deployment. While this is not directly related to the seat assembly itself, it is a critical safety repair for the vehicle. Verify with a Honda dealer or on the NHTSA website that this recall has been completed for any vehicle you own or are considering purchasing.
While no TSBs specifically target the CR-Z's seats, Honda has issued bulletins for other models regarding faulty passenger seat weight sensors that cause SRS light issues, indicating it's a known problem area for the manufacturer.
Frequently Asked Questions (FAQ)
My airbag light is on after I unplugged my seat. How do I fix it?
The SRS system stores a fault code when a component is disconnected. Even after plugging it back in, the light will stay on. First, try disconnecting the car's 12-volt battery for 30 minutes to clear the system memory. If the light returns, the fault is still present (like a bad sensor) or the system needs to be reset with a professional OBD2 scanner that can access SRS modules.
Can I install a seat from a Civic Si into my CR-Z?
Yes, this is a popular modification, but it requires significant work. The mounting points are different and require custom brackets or drilling. More importantly, you must transfer the seat belt buckle, airbag, and sensors from your original CR-Z seat to the new seat to ensure the safety systems function correctly. Failure to do so will result in a permanent airbag light.
Is it safe to drive with the airbag light on?
No. If the SRS warning light is illuminated, you should assume the entire airbag system is disabled and will not deploy in an accident, increasing the risk of serious injury. It is critical to have the system diagnosed and repaired.
Why are used passenger seats more complicated than driver seats?
The passenger seat contains the Occupant Detection System (ODS) weight sensor, which is calibrated to the car's main computer (ECU) and VIN. If you swap the passenger seat, this sensor must be re-initialized by a Honda dealer or a shop with a compatible high-level scan tool. The driver's seat does not have this complex sensor, making it a simpler swap.
Helpful Videos


Technical Specifications
OEM Part Numbers: 04811-SZT-A02ZD 04811-SZT-A11ZB 04815-SZT-G30ZB 04815-SZT-G31ZB 04815-SZT-G51ZB 81121-SZT-A02ZA 81127-SZT-A02 81131-SZT-A02ZA 81131-SZT-G01ZA 81140-SZT-G02ZG 81531-SZT-G02ZE 81531-SZT-G24ZF 81531-SZT-G51ZA 81537-SZT-G01
Seats contain integrated side airbags. The passenger seat contains a calibrated Occupant Detection System (ODS) weight sensor. Electrical connectors for the SRS system are typically yellow.

The information in this article is provided for general reference and educational purposes only. Vehicle specifications, procedures, and part compatibility can vary by production date, trim level, and region. Always consult your vehicle's factory service manual and verify part numbers before purchasing or performing repairs. Safety-critical components such as airbags, seat belts, and braking systems should be installed by a qualified professional.
- Honda CR-Z:
- 🎬 Helpful Videos
- Common 2011-2016 CR-Z Seat Problems
- 1. Airbag (SRS) Warning Light
- 2. Worn or Torn Upholstery
- 3. Collapsed Foam Cushion
- Buying a Used 2011-2016 CR-Z Front Seat: An Inspection Guide
- Physical Inspection Checklist:
- Safety System Inspection (Most Important):
- Cost of Replacing a CR-Z Front Seat
- Front Seat Replacement Walkthrough
- Tools & Materials:
- Step-by-Step Guide:
- Recalls and Technical Service Bulletins (TSBs)
- Frequently Asked Questions (FAQ)
- 🎟️ Get 5% Off