

2018-2022 Lincoln Navigator Rear Control Panel: Fixing Blank Screens and Unresponsive Controls
Your guide to diagnosing, replacing, and understanding the second-row audio and climate control module in your Navigator, including critical programming information.
- This module is NOT plug-and-play. A replacement unit will likely require programming or configuration by a dealer to function correctly.
- The most common failure symptoms are a blank screen or unresponsive controls for rear climate, audio, and seat functions.
- Physical replacement is very easy, requiring only basic trim tools and the removal of four bolts.
- Before blaming the panel for A/C issues, check TSB 22-2089, as a frozen evaporator is a common, separate problem.
Symptoms of a Failing Rear Control Panel

When the rear console switch cluster begins to fail, it can cause a range of issues for second-row passengers. Because it is a networked electronic module, symptoms can range from a total loss of function to intermittent glitches.
- Blank or Unresponsive Touchscreen: The most common symptom is the screen failing to turn on or not responding to touch. This can sometimes be an intermittent issue.
- Inability to Control Rear Climate: Passengers may be unable to adjust temperature, fan speed, or airflow, leaving the rear climate stuck on its last setting.
- Audio and Seat Controls Not Working: The controls for audio source, volume, and seat features like heating, ventilation, or massage may become inoperative.
- DTC U0257 or Similar Network Codes: A diagnostic trouble code like U0257 (Lost Communication With Front Controls/Display Interface Module) may be stored in the vehicle's main computer. While this specific code often points to the front display, a similar communication loss code for the rear module would indicate a network fault or module failure.
Pro Tip: Before replacing the panel for an A/C issue, be aware of Technical Service Bulletin (TSB) 22-2089. This TSB addresses poor A/C performance and loss of airflow caused by the evaporator freezing over due to a faulty temperature sensor. If the A/C works for a while and then stops blowing, but works again after the vehicle sits, the issue is likely the evaporator sensor, not the control panel.
Programming and Installation: Is It Plug-and-Play?

This is the most critical question for anyone replacing this module. Based on information from used parts suppliers, the Rear Console Switch Cluster is NOT considered a simple plug-and-play part. One seller explicitly notes, "Audio unit may need to be reprogrammed to vehicle for interchange."
Modern Ford and Lincoln vehicles use a system of networked modules that are configured to the specific vehicle's VIN and options list. While the physical replacement is straightforward, the new module likely needs to be introduced to the vehicle's network. This process, often called "Module Configuration" or updating "As-Built Data," requires specialized tools like the Ford Diagnostic and Repair System (FDRS).
Without proper programming, a replacement module may not function at all, or only some features may work. While some basic functions might operate, full compatibility with all vehicle options (like heated/ventilated seats, massage, or specific audio systems) typically requires this configuration step. It is recommended to plan for a visit to a dealership or a well-equipped independent shop with Ford-specific programming capabilities after installation.
Buying a Used Rear Console Switch Cluster

Given the high cost of a new OEM module, a used unit from a recycled vehicle is an excellent value. However, there are important factors to consider to ensure you get a good part.
- Match Part Numbers Carefully: The most reliable way to ensure compatibility is to match the engineering number printed on the back of your original part (e.g., JL7T-18A802-EC). The service part number (e.g., JL7Z-18842-EC) is used for ordering new, but the engineering number on the physical part is best for matching used components.
- Physical Inspection: When you receive the part, inspect the touchscreen for deep scratches, cracks, or delamination. Check that all plastic mounting tabs are intact and the electrical connector pins are straight and free of corrosion.
- Consider the Source: Purchase from a reputable seller who offers a warranty and a clear return policy. This gives you protection in case the part is dead on arrival.
- Plan for Programming: Remember to factor in the potential cost of programming the module to your vehicle. Confirm with your local dealer or mechanic that they are able to perform a module configuration for a customer-supplied part.
Replacement Overview
The physical replacement of the rear control panel is a relatively simple job that can be done with basic trim removal tools. The entire process should take less than an hour.
- Disconnect the vehicle's battery to prevent any electrical shorts.
- Using a plastic trim removal tool, carefully pry away the plastic trim panels on the sides of the rear portion of the center console.
- Once the side trim is removed, you will see four bolts (typically 7mm or similar) that secure the console housing. Remove these bolts.
- The entire rear console assembly, including the control panel, can now be gently lifted out.
- There will be a single electrical wiring harness connected to the back of the control module. Press the release tab and unplug it.
- Installation is the reverse of removal. Plug in the new unit, bolt it into place, and snap the trim panels back on. Reconnect the battery and test for function, keeping in mind that programming may be required.
Cost Comparison
| Part Type | Estimated Cost |
|---|---|
| New OEM | $940 - $1,400 |
| New Aftermarket | Not Available |
| Used OEM | $150 - $350 |
| Shop Labor (Installation) | $75 - $150 |
| Shop Labor (Programming) | $100 - $250 |
Frequently Asked Questions (FAQ)
Does the rear control panel need to be programmed by a dealer?
Most likely, yes. Evidence suggests that for all features to work correctly with your vehicle's specific options, the module needs to be configured using dealer-level software. It is not a guaranteed plug-and-play part.
Can I replace the rear control panel myself?
Yes, the physical installation is straightforward for a DIYer. It involves removing a few trim pieces and four bolts. However, you will likely need to visit a shop for the final programming step.
Why are my rear climate controls locked?
The driver can lock out the rear controls from the main infotainment screen in the front. Before assuming the part is broken, check the front screen's climate settings to ensure the rear controls haven't been disabled.
Will a control panel from a different trim level Navigator work?
It might physically fit, but it's not recommended. A module from a vehicle with different options (e.g., without massage seats) may not operate all the features in a higher-trim vehicle, even after programming. It is best to match the part number from your original unit.
Technical Specifications
OEM Part Numbers: JL7T18A802EC JL7T19A164AC JL7Z18842EC JL7Z18842HA JL7Z18842KA JL7Z18842LA
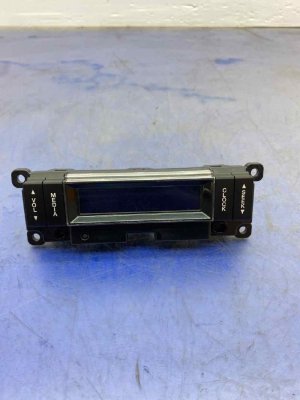
5.8-inch LCD touchscreen display for control of rear climate, audio, and seat functions.
We Have This Part in Stock

The information in this article is provided for general reference and educational purposes only. Vehicle specifications, procedures, and part compatibility can vary by production date, trim level, and region. Always consult your vehicle's factory service manual and verify part numbers before purchasing or performing repairs. Safety-critical components such as airbags, seat belts, and braking systems should be installed by a qualified professional.
- Lincoln Navigator: