

1988-1989 Honda Civic Rear Finish Panel: Restoring Fades and Finding a Replacement
This guide covers the common issues, replacement tips, and restoration options for the rear center finish panel on 1988-1989 Honda Civic Sedans.
- This panel fits ONLY the 1988-1989 Honda Civic Sedan (4-door) model.
- When buying used, the most critical factor is the condition of the mounting tabs on the back; broken tabs are a major red flag.
- Cosmetic fading is very common but can often be restored with trim products or a heat gun if the panel is structurally sound.
- New OEM parts are virtually nonexistent, making used OEM parts the primary replacement option.
Symptoms of Failure
Since the rear finish panel is a cosmetic part, "failure" relates to its physical and aesthetic condition rather than mechanical operation. The symptoms are purely visual.
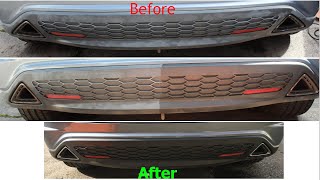
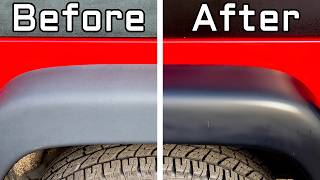
- Fading and Discoloration: The most common issue is the black plastic fading to a dull gray or chalky white due to prolonged sun and UV exposure. This significantly detracts from the vehicle's appearance.
- Cracks and Brittleness: After decades of exposure to temperature changes and sunlight, the plastic can become brittle. This makes it susceptible to cracking from minor impacts, such as closing the trunk too hard or from stress around the mounting points.
- Broken Mounting Tabs: The panel is secured by clips and nuts. These plastic mounting points can become brittle and break, causing the panel to become loose, rattle, or even fall off. This is a critical point to check when buying a used part.
- Scratches and Scuffs: Normal wear and tear can lead to scratches and scuffs, further degrading the panel's appearance.
Buying a Used 1988-1989 Civic Rear Finish Panel
Finding a new OEM finish panel is nearly impossible, making a used OEM part the only viable option for most owners. Here’s what to look for to ensure you get a good quality, compatible part.
Compatibility Warning: This finish panel (OEM part numbers 75520-SH4-A00 and 75520-SH4-A13) fits the 1988-1989 Honda Civic Sedan (4-door) ONLY. It will not fit the Hatchback, Coupe, or CRX models from the same generation, as their rear-end designs are different.
Inspection Checklist for Used Panels:
- Check All Mounting Tabs: This is the most critical inspection point. Carefully flip the panel over and inspect every mounting point for cracks or complete breaks. A panel with broken tabs will not sit flush or secure and may require custom fabrication to mount, which can be difficult.
- Look for Hairline Cracks: Hold the panel up to a light source and inspect it closely from both sides for any hairline cracks, especially around the trunk lock opening and screw holes. What looks like a small crack can quickly spread once installed on the vehicle.
- Assess Fading: While some fading is expected on a 30+ year-old part, look for a panel that is as dark and evenly colored as possible. Severely faded, chalky panels may be too far gone for restoration products to be effective.
- Verify Part Numbers: If possible, confirm the part number on the back of the panel matches 75520-SH4-A00 or a related number. This helps guarantee you have a genuine OEM part designed for your vehicle.
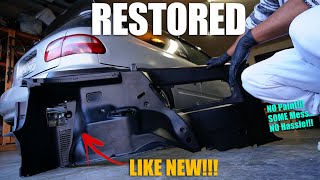
Pro Tip: Don't immediately dismiss a faded panel if it's structurally sound. If all mounting tabs are intact and there are no cracks, the black finish can often be restored using specialty trim restorer products or even careful application of heat.
🎬 See how to restore faded plastic in seconds using heatKnown Issues, TSBs, and Recalls
There are no Technical Service Bulletins (TSBs) or recalls issued by Honda or the NHTSA specifically for the rear finish panel, as it is a non-safety-related cosmetic part. Any recalls for the 1988-1989 Honda Civic pertain to other issues like seat belts or lighting systems.
Cost Comparison
Pricing for these panels can vary widely based on condition and availability, as new stock is largely depleted.
| Part Type | Estimated Cost | Notes |
|---|---|---|
| New OEM | $240 - $280+ | Extremely rare and likely discontinued. Prices reflect remaining old stock, if any can be found at all. |
| New Aftermarket | Not Available | There is no known aftermarket production for this specific panel. |
| Used OEM | $50 - $150 | Price is highly dependent on condition, especially the integrity of the mounting tabs. |
| Shop Labor for Installation | $50 - $100 | Installation is straightforward, typically taking less than an hour. |
Restoration Options for Faded Panels
If your panel is structurally intact but cosmetically faded, you have several restoration options:
- Trim Restorer Products: Products like Mothers Back-to-Black or Solution Finish 🎬 Watch: How to restore faded Honda plastic trim are designed to rehydrate and re-dye faded black plastic trim. This is often the easiest and most effective first step. Multiple applications may be needed for best results.
- Heat Gun Method: Carefully using a heat gun on a low setting can bring the oils back to the surface of the plastic, restoring a darker finish. This method requires caution to avoid melting or warping the plastic. Keep the heat gun moving and stay a safe distance from the panel.
- Painting: For a more permanent solution, the panel can be painted. Proper preparation is key: clean the panel thoroughly, scuff it with a fine-grit sandpaper, apply an adhesion promoter for plastics, and then use a satin or matte black trim paint.
Frequently Asked Questions (FAQ)
Will this finish panel fit my 1989 Civic Hatchback?
No, this panel is specifically designed for the 4-door Sedan model of the 1988-1989 Honda Civic. The Hatchback and CRX have different rear-end designs and use a different garnish.
How is the rear finish panel installed?
Installation involves opening the trunk and removing the inner liner to access the back of the panel. It is typically held in place by several 8mm nuts and plastic clips. After removing the nuts and disconnecting the trunk lock linkage, the panel can be carefully pried off from the outside.
Can I repair a broken mounting tab on a used panel?
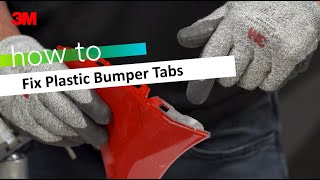
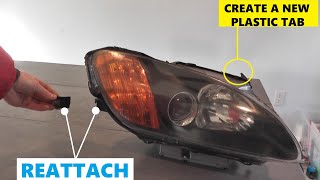
Yes, it is possible to repair broken tabs using a strong plastic epoxy or by plastic welding. 🎬 Watch: How to repair broken plastic mounting tabs However, the repair must be strong enough to withstand vibrations and the pressure of tightening the mounting nuts. For many, finding a panel with intact tabs is a more reliable solution.
My panel is loose. What is the likely cause?
A loose panel is almost always caused by broken mounting tabs or missing/loose mounting nuts on the inside of the trunk lid. You will need to remove the trunk liner to inspect the fasteners and the integrity of the panel's mounting points.
Helpful Videos
Technical Specifications
OEM Part Numbers: 75520-SH4-A00 75520-SH4-A13 75520-SH1-A01
Material: Black Plastic Fitment: Rear Trunk Lid, between taillights

The information in this article is provided for general reference and educational purposes only. Vehicle specifications, procedures, and part compatibility can vary by production date, trim level, and region. Always consult your vehicle's factory service manual and verify part numbers before purchasing or performing repairs. Safety-critical components such as airbags, seat belts, and braking systems should be installed by a qualified professional.
- Honda Civic: