

1997-2000 Dodge Avenger & Chrysler Sebring Coupe Rear Finish Panel: Cracks, Fitment, and Replacement
Your guide to diagnosing, replacing, and finding a quality used trunk lid center trim panel for your Avenger or Sebring coupe.
- This panel only fits the 1997-2000 Dodge Avenger Coupe and Chrysler Sebring Coupe, not sedans or convertibles.
- The most critical inspection point when buying a used panel is the condition of the mounting tabs on the back; broken tabs make the part unusable.
- New OEM and aftermarket panels are not available, making a good-condition used OEM part the only viable option.
- Replacement is an easy DIY job that takes less than an hour and only requires basic hand tools.
Symptoms of a Failing Rear Finish Panel
As a cosmetic exterior part, failure of the rear finish panel is always visual or physical. After more than two decades, the original plastic is often brittle and prone to damage. Here are the most common symptoms:
- Visible Cracks: The most frequent issue is stress cracks appearing in the plastic. These can start small, often around mounting points or the lock cylinder opening, and spread over time due to vibration, temperature changes, and sun exposure. Minor impacts that wouldn't dent a metal panel can easily crack this aged plastic.
- Fading and Discoloration: The plastic and any integrated red reflector material can fade due to long-term exposure to UV sunlight. The panel may look dull, hazy, or lighter than the surrounding taillights, creating an uneven appearance.
- Loose Fit or Rattling: On the back of the panel are several plastic mounting tabs and studs where nuts or clips attach. These tabs become extremely brittle with age and can snap off during trunk closure, car washes, or minor bumps. When they break, the panel will become loose, vibrate, and rattle while driving.
- Water Leaks into Trunk: While the panel itself isn't a primary seal, a loose or improperly seated panel can disrupt the seal around the trunk lock or third brake light (if applicable), potentially allowing water to find its way into the trunk lid and interior.
Compatibility Warning: This finish panel fits the 1997-2000 Dodge Avenger Coupe and the 1997-2000 Chrysler Sebring Coupe only. It will not fit the Chrysler Sebring sedan or convertible models of the same era, which have completely different trunk lids and taillights.
Buying a Used 1997-2000 Avenger Finish Panel: What to Check
Since new OEM panels are no longer produced by the manufacturer and aftermarket options are virtually nonexistent, finding a good-condition used OEM part is the only realistic solution. Inspecting a used panel carefully before purchase is critical.
The Ultimate Deal-Breaker: Mounting Tabs
This is the most important inspection point. Flip the panel over and carefully examine every mounting tab and stud. There are several points where it bolts to the trunk lid. If even one of these tabs is cracked or completely broken off, the panel will not sit securely. A panel with broken tabs is nearly worthless unless you are prepared to attempt a plastic epoxy repair, which may not hold long-term.
What to Inspect on a Used Panel:
- Check for Hairline Cracks: Hold the panel up to a light source and inspect it from both sides. Pay close attention to the areas around any screw holes or the center emblem. What looks like a minor scratch on the front could be a crack that goes all the way through.
- Assess Fading: Compare the color and clarity of the panel to photos of your own vehicle. Significant fading is irreversible. Ensure the red reflector (if present) is still vibrant and not cloudy.
- Look for Deep Scratches or Scuffs: Minor surface scratches can often be polished out, but deep gouges cannot. Run your fingernail over any marks; if it catches, the scratch is likely too deep to fix easily.
- Confirm OEM Markings: Look for a Chrysler, Dodge, or Mitsubishi logo and the part number (MR296323) molded into the back of the part. This ensures you are getting a genuine OEM part with the correct fit and material quality, not a poorly made imitation.
Pro Tip: When buying online, insist on clear, high-resolution photos of the back of the panel. Many sellers only show the front, hiding the broken mounting tabs that make the part unusable.
Known Issues, TSBs, and Recalls
There have been no official recalls or Technical Service Bulletins (TSBs) issued by Dodge, Chrysler, or the NHTSA for the rear finish panel on the 1997-2000 Avenger. The primary known issue, widely understood by owners of cars from this era, is the age-related degradation of the plastic. After 20+ years, UV exposure and heat cycles make the panel brittle and susceptible to cracking from minor stress.
Cost of Replacement (2026 Estimates)
The cost is primarily driven by the scarcity of the part. Labor for installation is minimal.
| Part Type | Estimated Cost | Notes |
|---|---|---|
| New OEM | N/A | This part is considered discontinued and is no longer available to order from dealers. |
| New Aftermarket | N/A | No direct-fit aftermarket replacements are commonly available for this specific panel. |
| Used OEM | $75 - $200 | Price depends heavily on condition, especially the integrity of the mounting tabs. Shipping can be costly due to size. |
| Shop Labor | $65 - $130 | Estimated 0.5-1.0 hour of labor. |
Replacing the Rear Finish Panel (DIY Guide)
Replacing the panel is a straightforward job that most DIY mechanics can complete in under an hour with basic tools.
- Difficulty: 2 out of 5
- Estimated Time: 30-45 minutes
- Tools Needed: Trim removal tool, 10mm socket with extension, flathead screwdriver.
Step-by-Step Instructions:
- Open the Trunk: Empty the trunk to give yourself room to work.
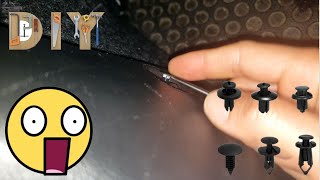
- Remove the Trunk Lid Liner: The inside of the trunk lid is covered by a fabric or cardboard liner. Use a trim removal tool to carefully pop out the series of plastic push-clips holding it in place. 🎬 Watch how to remove trunk panel clips using a screwdriver Once all clips are removed, the liner will come off.
- Expose the Fasteners: With the liner removed, you will see the back of the finish panel and the nuts that secure it. There will be several 10mm nuts holding the panel's studs.
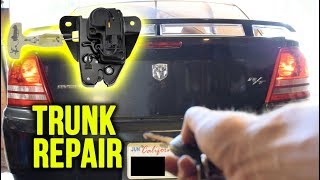
- Disconnect Electrical/Mechanical Components: If your panel houses the trunk lock cylinder, you may need to disconnect the linkage rod. 🎬 See this video guide on working with the trunk latch assembly If there are any lights, unplug their wiring harnesses.
- Unbolt the Old Panel: Use a 10mm socket to remove all the nuts holding the panel. Keep them in a safe place.
- Remove the Panel: Once all fasteners are removed, the panel should be loose. Gently push it out from the inside. There may be some light adhesive or clips holding it, so work it loose carefully to avoid scratching the paint.
- Install the New Panel: Clean the mounting surface on the trunk lid. Align the new panel's studs with the holes and gently press it into place.
- Secure the New Panel: From inside the trunk, hand-tighten the 10mm nuts, then snug them down with your socket. Do not overtighten, as this can crack the plastic. Reconnect any wiring or linkage.
- Test and Reassemble: Test the trunk lock and any lights. Re-install the trunk lid liner by pressing the push-clips back into their holes.
Frequently Asked Questions (FAQ)
Will the finish panel from a Mitsubishi Eclipse fit my Dodge Avenger?
The 1997-2000 Dodge Avenger coupe was built on the same platform as the second-generation (2G) Mitsubishi Eclipse (1995-1999). While many parts are interchangeable, the rear-end styling, including the taillights and finish panel, are different. You must use a panel specifically from a 1997-2000 Avenger or a 1997-2000 Chrysler Sebring coupe.
My panel is loose but not cracked. Can I fix it?
Yes, most likely. A loose panel is usually caused by broken mounting tabs on the panel itself or loose/missing nuts on the inside of the trunk lid. Remove the trunk liner to inspect the 10mm nuts. If they are tight and the panel is still loose, one or more mounting tabs have likely broken off the panel, requiring a replacement part.
Can I just glue a cracked panel back together?
While you can attempt a repair using a strong plastic epoxy, the results are often temporary and cosmetically imperfect. The vibration and temperature changes the trunk lid endures will likely cause the crack to reappear. For a long-term, clean repair, replacement is the best option.
Is there a way to prevent my new (used) panel from cracking?
The best prevention is gentle use. Close the trunk lid firmly but do not slam it. When installing, be careful not to overtighten the mounting nuts. Regularly applying a quality UV protectant designed for automotive plastics can also help slow down the process of the plastic becoming brittle from sun exposure.
Helpful Videos
Technical Specifications
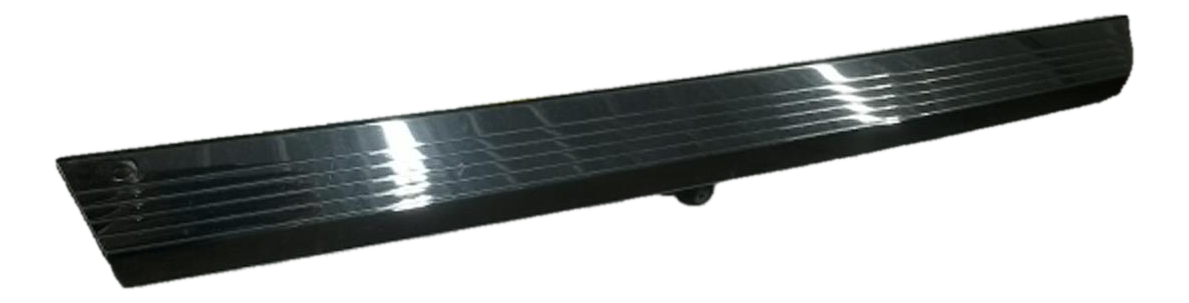
OEM Part Numbers: MR296323
Material: Plastic Location: Trunk Lid, Center Fitment: 2-Door Coupe Models Only
We Have This Part in Stock

The information in this article is provided for general reference and educational purposes only. Vehicle specifications, procedures, and part compatibility can vary by production date, trim level, and region. Always consult your vehicle's factory service manual and verify part numbers before purchasing or performing repairs. Safety-critical components such as airbags, seat belts, and braking systems should be installed by a qualified professional.
- Dodge Avenger:
- 🎬 Helpful Videos
- 🛍️ Shop This Part
- Symptoms of a Failing Rear Finish Panel
- Buying a Used 1997-2000 Avenger Finish Panel: What to Check
- The Ultimate Deal-Breaker: Mounting Tabs
- What to Inspect on a Used Panel:
- Known Issues, TSBs, and Recalls
- Cost of Replacement (2026 Estimates)
- Replacing the Rear Finish Panel (DIY Guide)
- Step-by-Step Instructions:
- Frequently Asked Questions (FAQ)
- 🎟️ Get 5% Off