

1991-1997 Toyota Previa Radiator: Overheating, Leaks, and the SADS Connection
Your guide to diagnosing cooling system problems in the unique mid-engine Previa, from radiator leaks to the complex accessory drive system.
- Overheating in a Previa is not always the radiator's fault; the unique Supplemental Accessory Drive System (SADS) that powers the fan is a common point of failure.
- Properly bleeding air from the cooling system after replacement is critical and notoriously difficult. Elevating the front of the van is essential.
- When replacing the radiator, you should also replace the radiator cap, thermostat, and inspect all hoses for wear.
- Radiators for supercharged models may be different. Verify compatibility before purchasing a used or new part.
Symptoms of a Failing Previa Radiator

A failing radiator in a Toyota Previa will show several clear signs. Recognizing them early can save you from a costly engine repair. Here’s what to look and listen for:
- Engine Overheating: The most obvious symptom is the temperature gauge climbing into the red zone or the overheat warning light coming on. This indicates the cooling system can no longer manage the engine's heat.
- Visible Coolant Leaks: You may find puddles of sweet-smelling, brightly colored fluid (typically green, pink, or orange) under the front of your van. This points to a leak in the radiator or its hoses.
- Low Coolant Levels: Frequently needing to add coolant to the reservoir suggests a leak somewhere in the system, even if it's not large enough to form a puddle.
- Steam or a Sweet Smell from the Engine Bay: If you see steam coming from under the hood or notice a sweet, syrupy smell, it's likely that coolant is leaking onto hot engine components and burning off.
- Discolored or Rusty Coolant: The coolant in your reservoir should be clean. If it appears brown, rusty, or sludgy, it indicates internal corrosion within the radiator, which can lead to clogs and reduced efficiency.
- Poor Heater Performance: The vehicle's heater uses hot coolant to warm the cabin. If your heater is blowing cold or lukewarm air, it could mean there's an issue with coolant circulation, possibly caused by a clogged radiator or air in the system.
Is It Really the Radiator? The SADS Connection

Before you replace the radiator, it's crucial to understand the Previa's unique engineering. Overheating isn't always caused by the radiator itself. The most common culprits for overheating in a Previa are coolant leaks, a failed thermostat, or a problem with the radiator fan.
The Previa uses a Supplemental Accessory Drive System (SADS), which is a driveshaft that runs from the mid-mounted engine to the front of the vehicle. This shaft powers the alternator, power steering pump, A/C compressor, and, most importantly, the cooling fan. If the rubber couplers on the SADS wear out, the fan may not spin at the correct speed, leading to insufficient airflow through the radiator and causing overheating, especially at low speeds or idle. A failing SADS often produces a rattling or ticking noise.
Pro Tip: Check the radiator fan's operation. When the engine is hot, the fan should engage and pull a strong flow of air through the radiator. Also, inspect the SADS shaft and its rubber couplers for cracks, play, or signs of wear. Addressing a SADS issue might solve your overheating problem without needing a new radiator.
Buying a Used 1991-1997 Previa Radiator

A used OEM radiator can be a cost-effective solution, but careful inspection is key. Given the age of these vehicles, a new aftermarket radiator might offer better longevity than a 25-year-old used part. However, a good-condition used OEM part will guarantee perfect fitment.
What to Inspect:
- Plastic End Tanks: Most Previa radiators have aluminum cores with plastic end tanks. These tanks become brittle over time and are a common failure point. Inspect them carefully for hairline cracks, especially around the hose connections and seams.
- Core and Fins: Look for white or greenish crusty residue, which indicates slow leaks. Check for significant physical damage or large areas of bent fins that could restrict airflow.
- Internal Condition: Look inside the inlet and outlet ports for a thick, gummy, or rusty residue. This could be a sign that a previous owner used "stop-leak" products, which can cause clogs and other problems.
- Transmission Cooler Lines: If you have an automatic transmission, ensure the integrated transmission cooler fittings are clean and not stripped or damaged.
Compatibility:
Radiators for supercharged models may be different from those for naturally aspirated models. Always verify the part number or check compatibility with the donor vehicle's specifications (e.g., 1994-1997 with supercharged option) to ensure a correct fit.
Replacement Overview & Special Procedures

Replacing the radiator on a Previa is a moderately difficult job that can take a DIY mechanic 2-4 hours. The biggest challenges are the unique cooling system layout and the bleeding procedure.
Key Steps:
- Drain the coolant from the radiator drain plug and the engine block drain plug (located near the oil pan).
- Remove the plastic under-engine cover to access the lower hose and transmission lines.
- Disconnect the upper and lower radiator hoses and the automatic transmission cooler lines (if applicable).
- Unbolt the two top mounts holding the radiator in place and lift the radiator out. 🎬 Watch this quick rundown on removing a Previa radiator
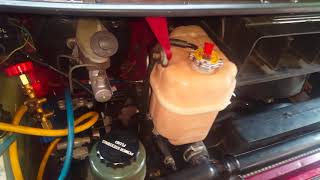
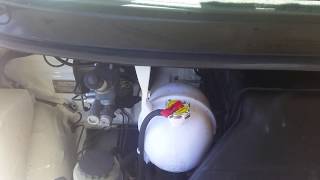
Warning: The cooling system on a mid-engine Previa is notoriously difficult to bleed air from. Trapped air can cause persistent overheating even with a new radiator. It is highly recommended to park the van with the front end elevated on ramps before refilling the system. Some models may have a small 12mm bleed bolt on the coolant jacket near the valve cover that can be loosened to release trapped air. Squeezing the large coolant hoses can also help work air bubbles out.
🎬 See how to properly bleed the cooling systemRelated Parts to Replace:
When replacing the radiator, it is highly recommended to also replace the following parts:
- Radiator Cap: A faulty cap can't hold pressure, leading to boiling and overheating.
- Thermostat: A new thermostat is cheap insurance against it failing in the closed position.
- Radiator Hoses: Replace the upper and lower hoses if they feel brittle, soft, or swollen.
Cost Comparison
Prices for a 1991-1997 Toyota Previa radiator can vary significantly based on the type of part and labor costs.
| Part Type | Estimated Cost |
|---|---|
| New OEM | $390 - $665 |
| New Aftermarket | $70 - $320 |
| Used OEM | $50 - $150 |
| Shop Labor | $183 - $269 |
Note: The OEM part number 16400-76131 appears to be discontinued, making new OEM parts difficult to find. Total replacement cost at a repair shop can range from $1,088 to $1,173.
Technical Specifications & Part Numbers
The following OEM part numbers have been associated with radiators for the 1991-1997 Toyota Previa. Always verify fitment with your vehicle's specific year and options.
- 16400-76080
- 16400-76081
- 16400-76091
- 16400-76110
- 16400-76130
- 16400-76131 (Primarily for 1994-1997 supercharged models)
Aftermarket part numbers include Spectra Premium 8011281 and Modine 432367.
Frequently Asked Questions (FAQ)
Why is my Previa overheating but the radiator isn't leaking?
Overheating without a visible leak can be caused by several issues: a faulty thermostat stuck closed, a failing radiator fan (or the SADS that drives it), a clogged radiator interior, or trapped air in the cooling system. On a Previa, a failing SADS is a common culprit.
How do I properly bleed the air from my Previa's cooling system?
Bleeding a Previa's cooling system is critical. The most effective method is to park the van on an incline or with the front wheels on ramps to make the radiator the highest point in the system. Fill the coolant slowly, and run the engine with the heater on full blast. Some owners have found a hidden air bleed bolt on the engine to help release trapped air. Using a spill-free funnel kit on the radiator neck is also highly effective.
Is a supercharged Previa radiator different from a non-supercharged one?
Yes, there can be differences. Parts diagrams and listings often specify whether a radiator is for a vehicle with or without the supercharged option. For example, part number 16400-76131 is often listed for 1994-1997 models with the supercharged engine. Always confirm compatibility before purchasing.
Can I use universal green coolant in my Previa?
It is highly recommended to use a coolant specifically designed for Asian vehicles, often referred to as "red" or "pink" coolant. Mixing coolant types can lead to gelling, which can clog the radiator and heater core. Zerex Asian Vehicle formula is a commonly cited compatible aftermarket coolant.
Helpful Videos
Technical Specifications
OEM Part Numbers: 16400-76080 16400-76081 16400-76091 16400-76110 16400-76130 16400-76131
Core Material: Aluminum, Tank Material: Plastic, Flow Type: Downflow. Dimensions vary by specific part number and manufacturer.

The information in this article is provided for general reference and educational purposes only. Vehicle specifications, procedures, and part compatibility can vary by production date, trim level, and region. Always consult your vehicle's factory service manual and verify part numbers before purchasing or performing repairs. Safety-critical components such as airbags, seat belts, and braking systems should be installed by a qualified professional.
- Toyota Previa:
- 🎬 Helpful Videos
- Symptoms of a Failing Previa Radiator
- Is It Really the Radiator? The SADS Connection
- Buying a Used 1991-1997 Previa Radiator
- What to Inspect:
- Compatibility:
- Replacement Overview & Special Procedures
- Key Steps:
- Related Parts to Replace:
- Cost Comparison
- Technical Specifications & Part Numbers
- Frequently Asked Questions (FAQ)
- 🎟️ Get 5% Off