

Toyota RAV4 Coolant Temperature Sensor Guide (1996-2003)
Understand the symptoms of a failing coolant temperature sensor and how to replace it on your first-generation RAV4.
- A failing coolant temp sensor on a 1996-2003 RAV4 often causes a Check Engine Light (P0115), poor gas mileage, and rough idling.
- Replacement is a simple DIY task, requiring about 30 minutes and a 19mm deep socket.
- Do not drive for an extended period with a bad sensor, as it can lead to poor performance and risks engine damage from overheating.
- An aftermarket sensor is a cost-effective alternative to the more expensive OEM part from a Toyota dealer.
Is Your RAV4's Coolant Temp Sensor Failing?

When the coolant temperature sensor on your 1996-2003 RAV4 starts to go bad, it sends incorrect data to the engine's computer. This can cause a range of noticeable problems. Recognizing these signs early can help you avoid poor performance and potential engine damage.
Symptoms of a Bad Coolant Temperature Sensor

- Check Engine Light: This is often the first warning. The computer will store a fault code, most commonly P0115, P0117, or P0118.
- Poor Fuel Economy: If the sensor wrongly tells the computer the engine is cold, the computer will inject more fuel than necessary, causing your gas mileage to drop. Some owners report a drop of 15% or more.
- Rough Idle or Stalling: An incorrect fuel mixture can make the engine idle poorly, hesitate, or even stall, especially when cold.
- Black Smoke from Exhaust: A rich fuel mixture can result in unburned fuel burning in the exhaust pipe, creating black smoke.
- Engine Overheating or Running Cold: The sensor might fail to turn on the cooling fans when needed, leading to overheating. Or, it might keep them on constantly, preventing the engine from reaching its ideal temperature.
- Inaccurate Temp Gauge: The temperature gauge on your dashboard might behave erratically, read as hot when the engine is not, or not move at all.
Choosing the Right Aftermarket Sensor

For a critical component like the ECT sensor, quality matters. While a genuine Toyota part from a dealer is always an option, a high-quality aftermarket part can offer the same performance for less money. Denso is the original equipment manufacturer (OEM) for many Toyota parts, so choosing a Denso-branded sensor is often identical to buying the Toyota part, just in a different box. Standard-fit aftermarket brands offer a cost-effective solution that meets original specifications for a reliable repair.
Cost of Replacing a Coolant Temperature Sensor (1996-2003 RAV4)
| Part Type | Estimated Cost |
|---|---|
| New Aftermarket | $15 - $40 |
| New OEM (Toyota) | $65 - $100 |
| Shop Labor | $90 - $150 |
Installation Tips

Replacing the coolant temperature sensor on a first-gen RAV4 is a straightforward DIY job for most home mechanics. The sensor is located near the thermostat housing, where the upper radiator hose connects to the engine. Always let the engine cool completely before starting. You will need a 19mm deep socket to remove and install the sensor. Expect a small amount of coolant to spill when you remove the old sensor; have a rag ready. After installing the new sensor, top off your coolant and check for leaks.
Frequently Asked Questions
Where is the coolant temperature sensor located on a 1996-2003 RAV4?
The main ECT sensor is located on the engine block near the thermostat housing, close to where the upper radiator hose connects. Be aware that there are often two sensors in this area; one for the computer (the ECT sensor) and one for the dashboard gauge. The ECT sensor for the computer typically has a two-wire connector.
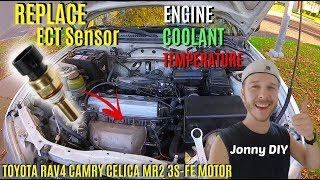
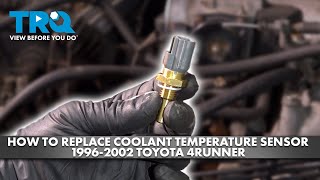
🎬 Watch this video to see the exact sensor location.What happens if I don't replace a bad coolant sensor?
Ignoring a faulty sensor can lead to persistently poor fuel economy, failed emissions tests, and rough engine performance. In a worst-case scenario, if the sensor fails to detect an overheating condition, it could lead to severe engine damage like a warped cylinder head.
Are there any recalls for the RAV4 coolant temperature sensor?
There are no specific recalls for the coolant temperature sensor on the 1996-2003 Toyota RAV4. Some later model year RAV4s had recalls related to coolant leaks from the engine block or issues with airbag inflators, but not the sensor itself.
What tools do I need to replace the sensor?
The primary tool needed is a 19mm deep socket wrench. You may also need pliers for hose clamps and a funnel for topping off coolant. It's a simple toolset for a quick job.
Helpful Videos
Technical Specifications
OEM Part Numbers: 89422-35010 89422-33030 89422-20010
The sensor is a thermistor that changes resistance based on temperature. It typically has a 2-wire plug-in connector and is installed with a 19mm deep socket.

The information in this article is provided for general reference and educational purposes only. Vehicle specifications, procedures, and part compatibility can vary by production date, trim level, and region. Always consult your vehicle's factory service manual and verify part numbers before purchasing or performing repairs. Safety-critical components such as airbags, seat belts, and braking systems should be installed by a qualified professional.
- Toyota RAV4: