

Chevrolet Beretta Engine Intake Manifold Temperature Sensor (1987-1996)
Fix common running problems like poor gas mileage and rough idle by understanding this critical sensor in your Beretta.
- A bad IAT sensor on your Beretta will most likely cause a Check Engine Light, poor fuel economy, and a rough idle.
- Before replacing the sensor, always inspect the two-wire electrical connector for corrosion or damage, as this is a common failure point.
- Replacement is a very simple DIY task that takes less than 30 minutes with basic tools.
- For a reliable, long-lasting repair, choosing a premium aftermarket brand like Standard Ignition is a wise investment over a basic economy part.
Is Your Beretta's Intake Air Temperature Sensor Failing?
The Intake Air Temperature (IAT) sensor is a simple thermistor, which means its electrical resistance changes with temperature. Over time, it can fail, get coated in grime, or its wiring can break down. When the sensor sends a wrong signal—or no signal at all—the engine's computer gets confused. It might think the air is -40°F on a hot day, causing it to inject far too much fuel. This condition, known as "running rich," leads to several noticeable problems.
Key Failure Symptoms:
- Check Engine Light: This is the most common sign. For 1996 models with OBD-II, you may see codes like P0112 (Circuit Low) or P0113 (Circuit High). Pre-1996 OBD-I models will set a corresponding code.
- Poor Fuel Economy: The computer incorrectly adds extra fuel, thinking the engine is operating in extreme cold, which significantly hurts your gas mileage.
- Rough Idle or Stalling: The incorrect air-fuel mixture can make the engine idle unevenly, stumble, or even stall, particularly when it should be fully warmed up.
- Hard Starting: If the sensor is sending a bad signal, the engine may struggle to start, especially in cold weather.
- Failed Emissions Test: An engine running too rich will produce high levels of carbon monoxide (CO), leading to an automatic failure on an emissions test.
Pro Tip: Check the Connector First
On many GM vehicles from this era, including the Beretta, the wiring connector for the sensor can corrode or break before the sensor itself fails. Before you buy a new sensor, carefully inspect the wiring pigtail connected to it. If the wires look green with corrosion, or if the plastic is brittle and cracked, you may only need to replace the connector.
Choosing the Right Aftermarket Sensor
For a vehicle like the 1987-1996 Beretta, OEM parts from GM may be difficult to find or discontinued. Fortunately, aftermarket sensors are readily available, affordable, and often a perfectly reliable choice. They generally fall into two tiers:
- Standard Replacement (Good): Brands like True Tech offer a budget-friendly option that meets basic requirements. While reviews for the brand are generally tied to repair shops rather than the parts themselves, they are positioned as an economical choice. For a simple sensor, this can be a viable option if cost is the primary concern.
- Premium Aftermarket (Better): Brands like Standard Ignition (Standard Motor Products) are well-regarded in the industry for producing high-quality parts that meet or exceed original specifications. They invest in testing and use quality materials, making them a trusted choice for professional technicians and DIYers looking for long-term reliability.
Estimated Replacement Costs
| Part Type | Estimated Cost | Notes |
|---|---|---|
| New Aftermarket | $19.54 - $42.24 | Readily available from brands like Standard Ignition and True Tech. |
| Shop Labor | $50 - $100 | Typically a very quick job (0.5 hours or less). |
| Total Professional Repair | $70 - $143 | Includes aftermarket part and labor. |
Frequently Asked Questions
Where is the IAT sensor located on my Beretta?
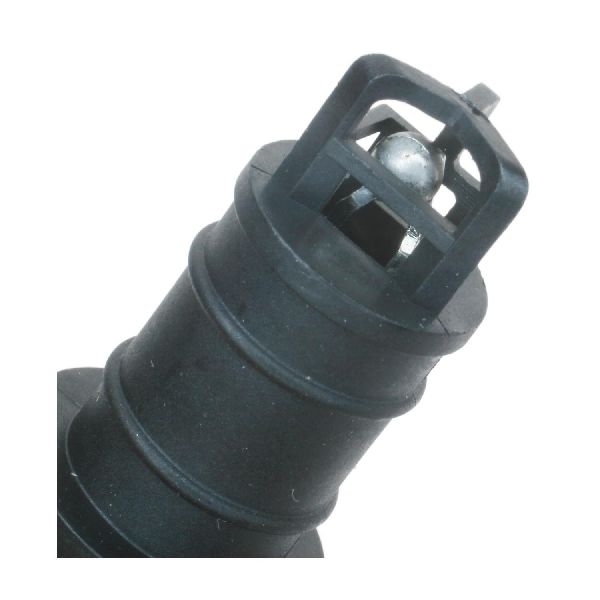
The IAT sensor is typically screwed into the intake manifold or located in the air intake ducting, somewhere between the air filter box and the throttle body. It's a small, two-wire sensor that is usually easy to spot and access.
Can I clean the IAT sensor instead of replacing it?
Sometimes, yes. If the sensor tip is covered in oil or carbon, you can try cleaning it carefully with a dedicated electrical parts or mass air flow sensor cleaner. However, if the sensor has failed internally, cleaning will not fix the problem and replacement is necessary.
Is this the same as the Engine Coolant Temperature (ECT) sensor?
No. While they are both temperature sensors, the IAT measures air temperature and the ECT measures coolant temperature. They send separate signals to the computer. A bad ECT sensor can cause similar symptoms, like poor fuel economy and a rich running condition, so proper diagnosis is key.
Is this a difficult DIY job?
No, this is an excellent job for a beginner. The sensor is usually in an easy-to-reach location. The process involves unplugging the electrical connector, unscrewing the old sensor, screwing the new one in, and reconnecting the plug. It typically requires only basic hand tools.
Technical Specifications
2-pin connector, threaded screw-in body. It is a Negative Temperature Coefficient (NTC) thermistor, meaning its resistance is high when cold and low when hot.
We Have This Part in Stock


The information in this article is provided for general reference and educational purposes only. Vehicle specifications, procedures, and part compatibility can vary by production date, trim level, and region. Always consult your vehicle's factory service manual and verify part numbers before purchasing or performing repairs. Safety-critical components such as airbags, seat belts, and braking systems should be installed by a qualified professional.
- Chevrolet Beretta: