

1984-1988 Toyota 4Runner Brake Light Switch Failures and Replacement
Don't get left in the dark; a faulty brake light switch is a safety hazard that's simple to fix.
- A faulty brake light switch is a critical safety issue; replace it immediately if your brake lights are not working.
- Symptoms include brake lights not working, staying on, or cruise control failure.
- Replacement is a simple DIY job that takes less than 30 minutes with basic tools.
- Proper adjustment of the new switch is essential for correct operation.
Is Your 4Runner's Brake Light Switch Failing?
A bad brake light switch is more than an inconvenience; it's a serious safety risk. If your brake lights don't work, drivers behind you won't know you're stopping, which can easily lead to a rear-end collision. On these first-generation 4Runners, the system is straightforward, making diagnosis relatively simple. The most common issues are either the brake lights not turning on at all or, less commonly, staying on and draining your battery.
Key Symptoms of a Bad Brake Light Switch
- Brake Lights Don't Work: The most obvious and dangerous symptom. The switch fails to complete the circuit when the pedal is pressed.
- Brake Lights Stay On: The switch can get stuck in the 'on' position, leaving your brake lights illuminated even when the vehicle is off. This will drain your battery.
- Intermittent Brake Lights: The lights may flicker or only work when the pedal is pressed hard, indicating a worn or failing switch.
- Cruise Control Issues: If equipped, the cruise control may not engage or may disengage unexpectedly.
Choosing the Right Aftermarket Brake Light Switch
For a vehicle like the 1984-1988 4Runner, finding an original OEM part from Toyota can be difficult and expensive. Thankfully, the aftermarket offers several reliable and affordable options. For a simple electro-mechanical part like a brake light switch, a quality aftermarket brand is a perfectly acceptable choice and can perform just as well as the original.
Aftermarket Brand Tiers
When shopping for a replacement, consider these brands known for their switches and sensors:
- Standard Ignition (SMP): Often considered a top-tier aftermarket brand, Standard produces parts that meet or exceed OEM specifications. They are a reliable choice for durability.
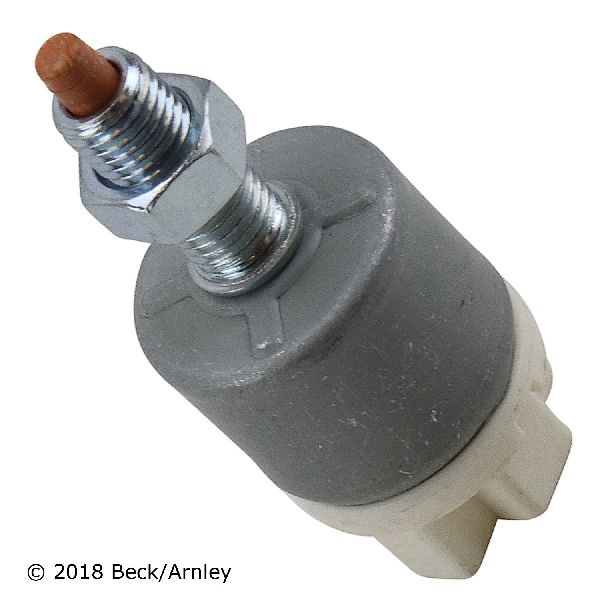
- Beck Arnley: This brand specializes in sourcing parts for import vehicles. They often re-package parts from the original OEM suppliers, so quality is typically very high and consistent.
- Rostra Powertrain: While well-known for transmission parts and cruise control systems, Rostra also manufactures a range of quality sensors and switches.
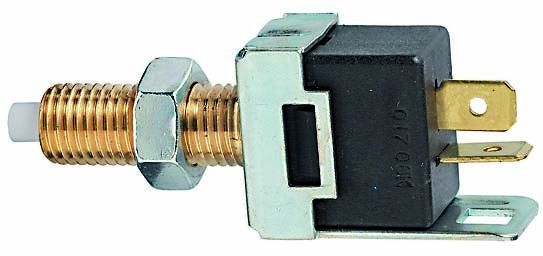
- Facet: An Italian manufacturer that has been around for many years. While generally considered a decent mid-range option, quality can sometimes be inconsistent depending on the specific part.
Pro Tip: Before replacing the switch, always check the simple things first. Make sure your brake light bulbs are good and check the 'STOP' fuse, which is often a 10A fuse. A blown fuse or bad bulbs can mimic the symptoms of a failed switch.
Installation Overview
Replacing the brake light switch is a job most owners can do themselves with basic tools in under 30 minutes.
- Locate the Switch: Find the switch mounted on a bracket just above the brake pedal arm. You will need to work in the driver's side footwell.
- Disconnect and Remove: Unplug the electrical connector. The switch is typically held in place by one or two nuts on its threaded body. Loosen these nuts to remove the old switch.
- Install the New Switch: Thread the new switch into the bracket.
- Adjust the Switch: This is the most important step. The switch needs to be adjusted so the plunger is fully depressed when the brake pedal is at rest (brake lights off), and immediately releases when you begin to press the pedal (brake lights on). Screw the switch in or out until you achieve this. There should be very little free play in the pedal before the lights activate. Tighten the locknut(s) to secure it in place.
- Test: Reconnect the electrical plug and test the brake lights to ensure they function correctly. Have a friend watch the lights or back up to a reflective surface.
| Brand | Typical Price Range |
|---|---|
| Beck Arnley | $25 - $55 |
| Standard Ignition | $20 - $45 |
| Rostra Powertrain | $15 - $35 |
| Facet | $13 - $30 |
Frequently Asked Questions
Where is the brake light switch located on a 1984-1988 4Runner?
It is located in the driver's footwell, mounted to the brake pedal support bracket, positioned so it makes contact with the brake pedal arm.
Can a bad brake light switch drain my battery?
Yes. If the switch fails in the 'on' or closed position, it will cause your brake lights to stay on constantly, even when the truck is turned off. This parasitic drain will deplete your battery, often overnight.
Do I need to adjust the new brake light switch?
Yes, proper adjustment is critical for safety. The switch is threaded and held by locknuts, allowing you to position it correctly. It must be set so the lights come on as soon as you press the pedal but remain off when your foot is off the brake.
Are there any recalls for the brake light switch on the first-gen 4Runner?
No specific recalls for the brake light switch were found for the 1984-1988 Toyota 4Runner. While Toyota has issued recalls for brake light switches on other models in later years, this specific generation is not listed.
Technical Specifications
OEM Part Numbers: 84210-12030 84340-69025 84210-12040
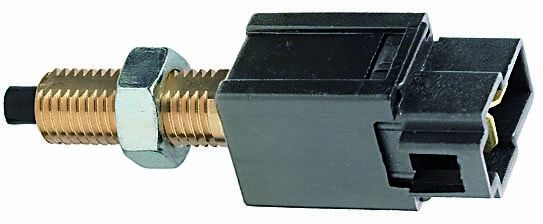
2-prong, plunger-activated switch, threaded body with adjustment nuts.
We Have This Part in Stock


The information in this article is provided for general reference and educational purposes only. Vehicle specifications, procedures, and part compatibility can vary by production date, trim level, and region. Always consult your vehicle's factory service manual and verify part numbers before purchasing or performing repairs. Safety-critical components such as airbags, seat belts, and braking systems should be installed by a qualified professional.
- Toyota 4Runner: