

Ford F-100 Headlight Switch Guide for 1974-1983 Models
Solve flickering lights and other electrical issues by finding the right replacement headlight switch for your classic Ford truck.
- Flickering lights, inoperative dash lights, and a hot switch are top signs of failure in an F-100.
- Standard Ignition (Standard Motor Products) is a widely trusted aftermarket brand for this part.
- Replacement is simple for a DIYer and involves pressing a release button on the switch body to remove the knob and shaft.
- There are no known recalls or TSBs from Ford or the NHTSA for the headlight switch on this specific vehicle range.
Is Your F-100 Headlight Switch Failing?
After decades of use, the original headlight switch in a 1974-1983 F-100 is a common failure point. The internal components wear out from heat and repeated use. This can cause a range of frustrating and dangerous lighting problems. If you're experiencing any of the symptoms below, a faulty switch is a likely culprit.
Top 5 Failure Symptoms
- Flickering or Intermittent Headlights: Lights that cut in and out while driving are a classic sign. This is often caused by a worn internal circuit breaker overheating.
- Headlights Don't Turn On/Off: You might pull the knob and only the parking lights come on, or the headlights refuse to turn on at all. Sometimes it takes wiggling the knob to get them to work.
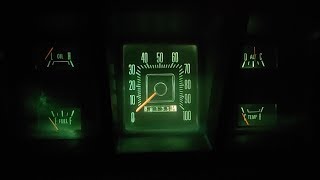
- Dash Lights Don't Work: If your dashboard and gauge lights are out, the dimmer portion of the switch (controlled by twisting the knob) may have failed.
- Strange Electrical Behavior: A bad headlight switch can cause bizarre issues, like turn signals malfunctioning only when the headlights are on.
- Switch is Hot to the Touch: A switch that feels very warm after use is a sign of high resistance and an impending failure. The connector plug can also show signs of being burnt or melted.
Pro Tip: Check Other Components First
Before replacing the switch, it's wise to rule out simpler issues. Check for bad ground wires, corroded headlight connectors, and test the floor-mounted high-beam dimmer switch, as these can sometimes cause similar problems.
Choosing the Right Aftermarket Headlight Switch
For a classic truck like the '74-'83 F-100, finding a new Original Equipment (OEM) part from Ford is highly unlikely. The market consists almost entirely of new aftermarket replacements. This is perfectly fine, as quality aftermarket brands produce reliable switches that meet or exceed original specifications.
Brand Quality: Standard Ignition vs. Rostra Powertrain
When shopping for a replacement, you'll likely encounter these brands:
- Standard Ignition (Standard Motor Products): Often referred to as SMP, this is a well-respected brand in the aftermarket world. They are known for making quality replacement electrical parts, and many professional mechanics use their products with confidence. Forum users frequently mention using Standard brand switches for these trucks with good results.
- Rostra Powertrain: While Rostra is an established brand, they are more commonly known for transmission components and accessories like cruise control systems. Information directly comparing their headlight switches to Standard is scarce.
Given the available information and community feedback, Standard Ignition is a trusted and commonly recommended choice for a replacement headlight switch for your F-100.
A Note on Upgraded Headlights
If you have installed high-wattage halogen or modern LED headlights, the original wiring and switch may not be able to handle the electrical load. This can cause the new switch's internal circuit breaker to trip, leading to flickering lights. For heavily modified lighting, consider using relays to take the load off the headlight switch.
How to Replace the F-100 Headlight Switch
Replacing the switch is a straightforward job that most DIY mechanics can handle in under an hour with basic tools. The general process involves disconnecting the battery, removing the dash bezel, and accessing the switch from behind.
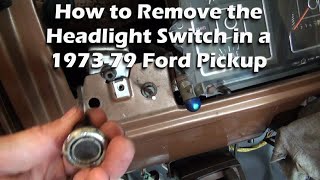
🎬 See this step-by-step replacement walkthrough for 1970s Ford trucks.The key step is removing the knob and shaft. To do this, you typically reach up behind the dashboard, press a small spring-loaded button on the body of the headlight switch, and pull the knob and shaft out from the front. After that, a special nut holds the switch to the dash. Once it's removed, you can unplug the wiring connector and install the new switch.
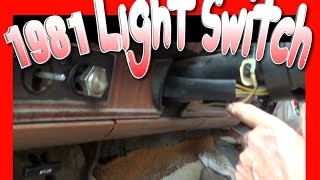
🎬 Watch: How to install a new switch on 1980s models.| Part Type | Estimated Cost |
|---|---|
| New Aftermarket | $32.43 - $60.01 |
| Shop Labor | $50 - $100 |
Frequently Asked Questions
Do I need to disconnect the battery to change the headlight switch?
Yes, absolutely. You should always disconnect the negative battery terminal before working on any part of your vehicle's electrical system to prevent short circuits or injury.
Why do my dash lights still not work after replacing the switch?
First, check the fuse for the instrument panel lights. It may have blown when the old switch failed. Also, ensure the new switch's wiring harness is plugged in securely and that all the bulbs in your instrument cluster are good.
How do I get the knob and shaft out of the old switch?
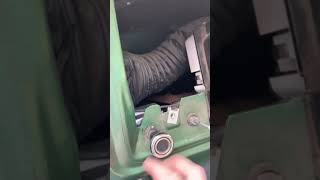
You must reach behind the dash and locate a small, spring-loaded button on the body of the switch itself. Press this button in, and while holding it, pull the knob from the front of the dash. The entire shaft will slide out.
🎬 Watch: A quick demonstration of removing the knob and shaft.Is there a recall on the 1974-1983 F-100 headlight switch?
No, searches of the National Highway Traffic Safety Administration (NHTSA) database and other records show no specific recalls for the headlight switch on the 1974-1983 Ford F-100. Recalls found were for much newer Ford models.
Helpful Videos
Technical Specifications
OEM Part Numbers: E1TB-11654-AA
Pull-type switch with integrated rheostat for dash light dimming. Features an internal circuit breaker.
We Have This Part in Stock


The information in this article is provided for general reference and educational purposes only. Vehicle specifications, procedures, and part compatibility can vary by production date, trim level, and region. Always consult your vehicle's factory service manual and verify part numbers before purchasing or performing repairs. Safety-critical components such as airbags, seat belts, and braking systems should be installed by a qualified professional.