

1964-1966 GMC I1000 Headlight Switch Replacement and Troubleshooting
Don't get left in the dark; learn the signs of a failing headlight switch and how to choose the right replacement for your classic GMC.
- A failing headlight switch is a critical safety issue and should be replaced immediately.
- Symptoms include flickering lights, no lights, or an inoperative dash light dimmer.
- Aftermarket brands like Standard Ignition offer reliable, high-quality replacements.
- Replacement is a simple DIY job that can be completed in under an hour with basic tools.
Common Symptoms of a Failing Headlight Switch
A faulty headlight switch can cause several issues, some of which can be a serious safety hazard. Because these trucks use the switch to send all power to the lights, the switch can wear out over time. Look for these common signs:
- Lights Don't Turn On: The most obvious sign is when your headlights or taillights fail to turn on at all.
- Flickering Lights: If your headlights or dash lights flicker, it often points to a loose or worn internal connection in the switch.
- Dash Lights Not Working: The dimmer function for the instrument panel is integrated into the headlight switch. If your dash lights are out but other lights work, the rheostat inside the switch has likely failed.
- Switch is Hot to the Touch: A switch that feels hot indicates a bad connection or an internal short, which is a fire hazard and needs immediate attention.
Choosing Your Aftermarket Headlight Switch
For a classic truck like the I1000, new original equipment (OEM) parts are no longer manufactured. Your options are new aftermarket parts or used original parts. Aftermarket parts are widely available and offer a reliable, cost-effective solution.
Brand Tiers: What's the Difference?
Standard Ignition: A well-known and respected brand in the aftermarket world. Standard Ignition parts are generally considered to be of high quality, often meeting or exceeding original specifications. They are a trusted choice for reliability and proper function. Many professional mechanics use this brand.
Replacement: This brand typically represents a more budget-friendly, economy-tier option. While they are designed to be a direct fit, the materials and internal components may not be as robust as higher-end brands. For a critical safety component like a headlight switch, a brand like Standard Ignition is often the recommended choice for long-term peace of mind.
Estimated Cost Comparison
| Part Type | Estimated Cost |
|---|---|
| New Aftermarket (Economy) | $27.74 - $40.00 |
| New Aftermarket (Mid-Range/Premium) | $40.00 - $54.85 |
| New OEM | Not Available |
| Used OEM | Varies by condition and availability |
| Shop Labor | $100 - $180 |
Pro Tip: Disconnect the Battery
Before starting any work on your truck's electrical system, always disconnect the negative battery terminal. This prevents accidental shorts that could damage components or cause injury.
Frequently Asked Questions (FAQ)
Can I install a new headlight switch myself?
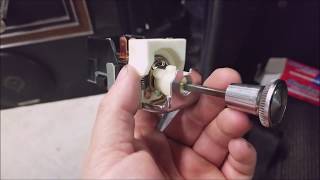
Yes, this is a very DIY-friendly job for most owners. The process involves reaching under the dash to press a release button on the switch body, which allows the knob and shaft to be removed. 🎬 Watch how to remove the headlamp rod and switch. After that, a special nut is unscrewed from the front of the dash, the switch is unplugged, and the new one is installed in reverse order. 🎬 See a step-by-step guide to replacing an old GM switch. The most difficult part is often just reaching the switch under the dashboard.
Is the GMC I1000 headlight switch the same as a Chevrolet C10?
Yes, during this era, GMC and Chevrolet trucks shared many components. The headlight switch for a 1964-1966 GMC I1000 is typically the same part used in the equivalent Chevrolet C/K series trucks, making it easier to find.
Why do my dash lights work but not my headlights?
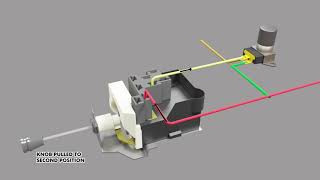
The switch has separate internal circuits for different lights. Power for the dash lights and headlights comes from different terminals on the switch. If one set of lights works but the other doesn't, it strongly suggests the switch itself has failed internally and needs to be replaced.
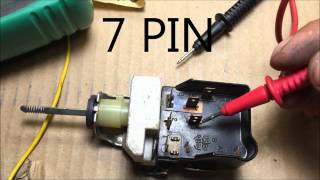
🎬 Learn how to test and troubleshoot your GM headlight switch.
Are there any recalls for the headlight switch on my truck?
No, there are no active recalls or technical service bulletins (TSBs) from the NHTSA for the headlight switch on 1964-1966 GMC trucks. Any issues you experience are due to the age and normal wear of the original components.
Can I install a new headlight switch myself?
Yes, this is a very DIY-friendly job for most owners. The process involves reaching under the dash to press a release button on the switch body, which allows the knob and shaft to be removed. 🎬 Watch how to remove the headlamp rod and switch. After that, a special nut is unscrewed from the front of the dash, the switch is unplugged, and the new one is installed in reverse order. 🎬 See a step-by-step guide to replacing an old GM switch. The most difficult part is often just reaching the switch under the dashboard.
Is the GMC I1000 headlight switch the same as a Chevrolet C10?
Yes, during this era, GMC and Chevrolet trucks shared many components. The headlight switch for a 1964-1966 GMC I1000 is typically the same part used in the equivalent Chevrolet C/K series trucks, making it easier to find.
Why do my dash lights work but not my headlights?
The switch has separate internal circuits for different lights. Power for the dash lights and headlights comes from different terminals on the switch. If one set of lights works but the other doesn't, it strongly suggests the switch itself has failed internally and needs to be replaced.
🎬 Learn how to test and troubleshoot your GM headlight switch.Are there any recalls for the headlight switch on my truck?
No, there are no active recalls or technical service bulletins (TSBs) from the NHTSA for the headlight switch on 1964-1966 GMC trucks. Any issues you experience are due to the age and normal wear of the original components.
Helpful Videos
Technical Specifications
Typically features an 8-terminal connector and a threaded stem for dash mounting. Includes an integrated rheostat for instrument panel dimming.
We Have This Part in Stock


The information in this article is provided for general reference and educational purposes only. Vehicle specifications, procedures, and part compatibility can vary by production date, trim level, and region. Always consult your vehicle's factory service manual and verify part numbers before purchasing or performing repairs. Safety-critical components such as airbags, seat belts, and braking systems should be installed by a qualified professional.