

2012-2015 Toyota Prius Plug-In Charging Cable Guide: Fixing Common Problems
Your guide to diagnosing charging failures and learning what to inspect when buying a used OEM charging cable for your Prius Plug-In.
- This part is the external portable charging cable (EVSE), not an internal vehicle component. A failure will prevent charging but will not stop the car from driving as a regular hybrid.
- Before replacing the cable, always test your car with a different charger (like a public one) to confirm the cable is the problem.
- When buying a used cable, the most critical inspection is checking the wall plug prongs for any signs of melting or burn marks, which indicate dangerous overheating.
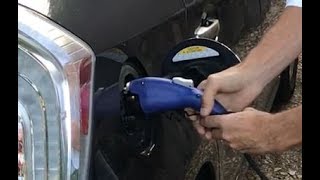
- Difficulty plugging the charger in is a known issue, often fixed by simply removing a red rubber gasket inside the connector with pliers.
Understanding Your Prius Plug-In Charging Cable

The component often called a 'power converter' or 'charger' for the 2012-2015 Prius Plug-In is actually the portable charging cable that came with the car from the factory. In technical terms, it's a Level 1 Electric Vehicle Supply Equipment (EVSE). Its job is to safely deliver 120-volt AC power from a standard wall outlet to the vehicle's onboard charger, which then converts the power to DC to charge the main hybrid battery.
This cable is essential for recharging the plug-in portion of the battery, which allows for electric-only driving. Without it, the car will still operate as a standard hybrid, but you won't be able to charge it from an outlet to maximize its electric range.
Symptoms of a Failing Charging Cable

When the charging cable fails, the symptoms are usually straightforward. The problem is often with the cable itself, the wall outlet, or the car's charge port, rather than the vehicle's complex internal electronics. Here are the most common signs:
- Car Won't Start Charging: You plug the cable into the car, but the charging indicator light next to the port does not light up, and the car does not begin to charge. You may not hear the typical 'click' of the relays engaging.
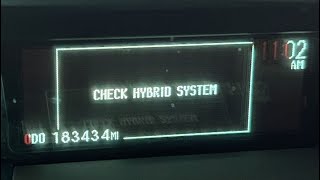
- Charging Stops Unexpectedly: The charge may begin, only to stop after a few seconds or minutes. In some cases, the vehicle's dashboard may display a message like "CHARGE RESULT: CHARGE STOPPED DUE TO SYSTEM MALFUNCTION".
- No Lights on the Control Box: The control box (the 'brick') in the middle of the cable has indicator lights for power and fault status. If these lights do not turn on, the unit may not be receiving power or may have an internal failure.
- Fault Light is On or Blinking: A red or amber fault light on the control box indicates a problem. This could be a ground fault, overheating, or an internal issue. One user noted that three blinks of the power light after pressing the 'test' button indicated a fault.
- Connector is Difficult to Plug In: If the J1772 connector on the end of the cable becomes very hard to insert into the car's port, it can prevent a proper connection.
Troubleshooting Steps

Before buying a new cable, follow these steps to isolate the problem. Many charging issues are not caused by a faulty cable.
- Test a Different Charger: This is the most important step. Try charging your car at a public charging station. If the car charges successfully, the problem is with your home setup (outlet or charging cable). If it still doesn't charge, the issue is likely with the vehicle's charge port or onboard charger.
- Check Your Wall Outlet: Standard outlets can wear out over time. The high, continuous power draw of an EV charger can cause a weak outlet to overheat, leading to charging failure. Try a different outlet in a different location, preferably on a different circuit.
- Inspect the Car's Charge Port: Look inside the vehicle's charge port for any debris, dirt, or bent/pushed-in pins. Sometimes dirt can prevent the plug from seating correctly.
- Reset the Cable: Unplug the charging cable from both the wall and the car. Wait a minute, then plug it back into the wall first, wait for the power light to stabilize, and then plug it into the car.
- Check for Scheduled Charging: The Prius Plug-In has a feature to schedule charging for specific times (e.g., for off-peak electricity rates). If a schedule is active, the car may not charge immediately when you plug it in. Check the vehicle's multi-information display to disable any schedules or select 'Charge Now'. 🎬 Watch: Official Toyota guide on Prius Plug-in charging basics
Pro Tip: If the plug is hard to insert, check for a deformed red rubber gasket inside the J1772 connector. This was a common issue, and Toyota's official fix was for technicians to simply remove the gasket with needle-nose pliers. Later models did not include this gasket.
Buying a Used OEM Charging Cable: What to Check

A used OEM charging cable can be a great value, but a thorough inspection is critical to avoid buying a damaged or unsafe unit. Here’s what to look for:
- Wall Plug Inspection: Examine the three prongs on the wall plug. Look for any signs of discoloration, melting, or dark burn marks. This is a clear sign the plug has overheated due to a poor connection and should be avoided.
- Cable Condition: Run your hands along the entire length of the cable. Feel for any deep cuts, cracks, or abrasions that expose the inner wiring. Check for flat spots that indicate the cable has been repeatedly run over.
- Control Box Integrity: Inspect the plastic housing of the control box. Look for cracks, signs that it has been pried open, or evidence of water intrusion. Shake it gently; you should not hear any rattling.
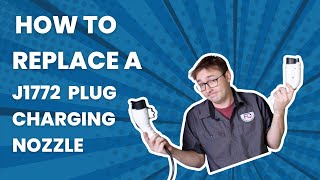
- J1772 Vehicle Connector: Look inside the vehicle-side plug. The pins should be straight and clean. Minor oxidation can sometimes be cleaned, but heavily corroded or bent pins are a major red flag. Ensure the latching mechanism on top of the handle moves freely and clicks. 🎬 See this walkthrough on replacing a damaged J1772 plug
- Part Number Verification: Ensure the part number is compatible. The latest part number, G9060-47130, replaces older versions like G9060-47010, G9060-47011, and G9060-47190.
Cost Comparison
Prices for a replacement charging cable can vary significantly. A faulty cable does not require professional installation, so labor costs are not a factor.
| Part Type | Estimated Cost |
|---|---|
| New OEM | $650 - $850 |
| Used OEM | $250 - $450 |
| New Aftermarket (Level 1) | $120 - $200 |
| Remanufactured | Not commonly available |
| Shop Labor | $0 (Plug-in part) |
Frequently Asked Questions (FAQ)
Can I use an extension cord with the charging cable?
Toyota and most safety agencies strongly advise against using an extension cord. If you must, use the shortest possible cord with a heavy-gauge wire (12-gauge or thicker) rated for outdoor use and at least 15 amps. A thin or underrated cord is a significant fire hazard.
🎬 Watch: Crucial safety tips before using an EV extension cordWhat do the lights on the charging cable's control box mean?
While specific indicators can vary slightly by part number, generally a solid green light means 'Power On' or 'Ready'. A flashing green or blue light often means 'Charging'. A red or amber light indicates a fault, such as a bad ground connection, overheating, or an internal failure. Always consult the label on the back of the control box for specific light definitions.
Can I use a faster Level 2 charger instead of the Toyota cable?
Yes. The 2012-2015 Toyota Prius Plug-In is compatible with any standard Level 2 (240-volt) charging station that uses the same J1772 connector. A Level 2 charger can fully charge the battery in about 1.5 hours, compared to about 3 hours on the Level 1 cable that comes with the car.
Is the charging cable waterproof? Can I charge in the rain?
The charging system is designed to be water-resistant and safe to use in the rain. The J1772 connector and the vehicle's charge port are designed to prevent water from reaching the electrical contacts when plugged in. However, the control box and the wall plug should be protected from direct water exposure and should never be submerged.
Helpful Videos

Technical Specifications
OEM Part Numbers: G9060-47010 G9060-47011 G9060-47130 G9060-47190 g906047010 g906047011 G906047190
Voltage: 120V AC Amperage: 12A Wall Connector: NEMA 5-15 (Standard 3-prong US outlet) Vehicle Connector: SAE J1772 Charging Level: Level 1
We Have This Part in Stock


The information in this article is provided for general reference and educational purposes only. Vehicle specifications, procedures, and part compatibility can vary by production date, trim level, and region. Always consult your vehicle's factory service manual and verify part numbers before purchasing or performing repairs. Safety-critical components such as airbags, seat belts, and braking systems should be installed by a qualified professional.
- Toyota Prius Plug-In: