

2005-2014 Honda Odyssey Power Inverter: Outlet Diagnosis and Replacement
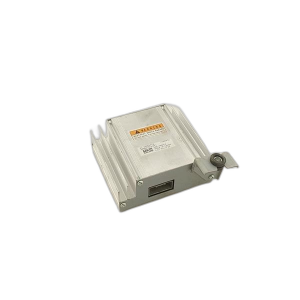
This guide covers common failure symptoms, diagnosis, and replacement details for the 115V AC power inverter found in select Honda Odyssey models.
- This inverter is for Odyssey models with the optional 115V outlet, typically EX-L and Touring trims with RES.
- Always check the fuse first when the outlet stops working, as it's the most common and cheapest fix.
- There are two generation-specific part numbers: 38500-SHJ-A61 (2005-2010) and 38500-TK8-A01 (2011-2014).
- When buying used, the most important check is for any signs of water damage or corrosion, as the part is located in a potentially damp area.
Symptoms of a Failing Power Inverter

When the power inverter fails, the most obvious symptom is a dead 115V outlet. However, other signs can point to an issue with the inverter itself or its related components.
- 115V Outlet is Completely Dead: Plugging in a device yields no power, and any indicator light on the outlet remains off. This is the most common symptom.
- Indicator Light On, But No Power: The light on the power outlet may illuminate, suggesting it's receiving a signal, but no power is delivered to the device. This can indicate an internal failure in the inverter.
- Blown Fuses: A short circuit within the inverter can cause its dedicated fuse to blow repeatedly. If you replace the fuse and it blows again as soon as you try to use the outlet, the inverter is likely the culprit.
- Visible Damage or Corrosion: Since the inverter is located in the driver-side rear quarter panel, it can be susceptible to water intrusion from a leaky window or body seam. Corrosion on the unit or its connectors is a clear sign of a problem.
Diagnosing the Power Inverter

Before condemning the inverter, follow these steps to rule out simpler issues:
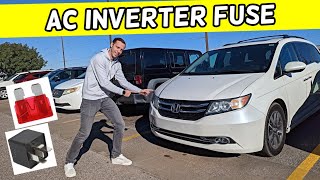
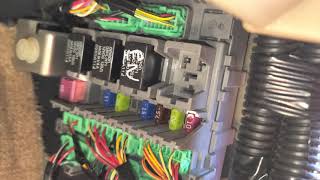
- Check the Fuses: The first and easiest step is to check the fuse for the power inverter. For 2011-2017 models, this is often a 30-amp fuse located in the rear fuse box on the left side of the cargo area. 🎬 Watch this quick video to find the 2011-2017 inverter fuse For 2005-2010 models, check the fuses in the passenger and driver-side interior fuse panels. 🎬 See how to locate the power outlet fuses on 2005-2010 models Always consult your owner's manual for the exact fuse location and rating.
- Test the Outlet: Use a known-good device or a multimeter to confirm there is no voltage at the outlet.
- Inspect the Inverter: Gain access to the inverter in the driver-side rear quarter panel by removing the interior trim. Visually inspect the inverter and its wiring connector for any signs of corrosion, burn marks, or physical damage. Ensure the connector is seated securely.
Pro Tip: A common cause of power outlet failure across many vehicles is a blown fuse. Because it's a simple and inexpensive fix, always start your diagnosis there before assuming a more complex part has failed.
Known Issues, TSBs, and Recalls

While there are no specific recalls or Technical Service Bulletins (TSBs) for the 2005-2014 Honda Odyssey power inverter itself, Honda did issue a recall (NHTSA Recall No. 20V066) for the 2018-2020 Odyssey models. This recall addressed a wiring harness for the third-row power outlet that could be pinched, creating a short circuit and fire risk. Although this doesn't apply to the 2005-2014 generation, it highlights the importance of ensuring wiring is correctly routed and protected from damage during installation.
Buying a Used Power Inverter: What to Look For

Purchasing a used OEM power inverter can be a cost-effective solution. Since this is an electronic component, careful inspection is key.
- Verify Part Numbers: Ensure the part number on the used inverter matches the one you are replacing. There are two main part numbers for this generation range:
- 38500-SHJ-A61: Fits 2005-2010 Honda Odyssey models.
- 38500-TK8-A01: Fits 2011-2014 Honda Odyssey models.
- Inspect for Water Damage: This is the most critical check. Look for any signs of corrosion, water stains, or a powdery white or green residue on the casing, and especially on the electrical connector pins. Do not purchase a unit with any signs of moisture exposure.
- Check the Connectors: Examine the electrical connector port for bent, broken, or corroded pins. The connection must be clean and solid to function correctly.
- Ask About the Source Vehicle: If possible, inquire about the mileage of the vehicle the part came from. A part from a lower-mileage vehicle is generally preferable.
- Why Used OEM is a Good Choice: A used OEM inverter was designed by Honda specifically for the Odyssey's electrical system and mounting location. It ensures a perfect fit and correct operation without the need for wiring modifications that might be required for a universal aftermarket inverter.
Warning: The initial information about this part being for the 'Canadian market' appears to be a misinterpretation. This inverter is for any North American 2005-2014 Honda Odyssey equipped with the optional 115V power outlet, most commonly found on EX-L and Touring trims with the Rear Entertainment System (RES). Always verify your vehicle has this option before purchasing a replacement.
Replacement Guide Overview
Replacing the power inverter is a straightforward task for a DIYer with basic tools. The main challenge is carefully removing the interior trim panels without breaking any clips.
- Difficulty: 2 out of 5
- Estimated Time: 0.5 - 1 hour
- Tools Needed: Socket set, plastic trim removal tools.
General Steps:
- Disconnect the Battery: Always disconnect the negative battery terminal before working on any electrical components.
- Access the Inverter: Remove the driver-side rear cargo area trim panel to expose the inverter. It is typically bolted to the vehicle's body structure.
- Remove the Old Unit: Disconnect the electrical wiring harness from the inverter. Then, unbolt the mounting hardware and remove the old unit.
- Install the New Unit: Bolt the new inverter in place, reconnect the electrical connector, and reinstall the interior trim panel.
- Test the System: Reconnect the battery and test the 115V outlet to ensure it is working correctly.
Cost Comparison
| Part Type | Price Range |
|---|---|
| New OEM (2011-2014) | $310 - $465 |
| New OEM (2005-2010) | $1,040 - $1,210 |
| New Aftermarket | Not commonly available as a direct-fit replacement. |
| Used OEM | $50 - $150 |
| Shop Labor | $100 - $200 |
Frequently Asked Questions (FAQ)
My 115V outlet isn't working. Is it definitely the inverter?
Not necessarily. The most common cause is a blown fuse. Always check the fuses related to the power outlets and inverter first. It could also be a problem with the outlet itself or the wiring in between. A systematic diagnosis is needed to pinpoint the exact cause.
Can I install this inverter in my Odyssey if it didn't come with one from the factory?
This is not recommended. Vehicles without the factory 115V outlet are typically missing the specific wiring harness needed to connect the inverter to the vehicle's electrical system. Adding it would require extensive and complex wiring modifications.
Why is the new OEM inverter for the 2005-2010 models so much more expensive?
The price for the 2005-2010 inverter (38500-SHJ-A61) is significantly higher from dealers, often exceeding $1,000. This is likely due to lower production numbers, limited remaining stock for an older part, and pricing strategies for legacy components. This makes finding a quality used OEM part an especially valuable option for owners of these model years.
What can I safely plug into the 115V outlet?
The outlet is designed for low-power devices, typically around 100-150 watts. It is suitable for charging laptops, phones, cameras, and running small electronics. It is not designed for high-draw appliances like hair dryers, coffee makers, or power tools, which can overload the inverter and blow a fuse. Check your owner's manual for the specific wattage limit.
Helpful Videos

Technical Specifications
OEM Part Numbers: 38500-SHJ-A61 38500-TK8-A01
Input: 12V DC, Output: 115V AC. Mounts in the left-hand (driver side) rear quarter panel.
We Have This Part in Stock



The information in this article is provided for general reference and educational purposes only. Vehicle specifications, procedures, and part compatibility can vary by production date, trim level, and region. Always consult your vehicle's factory service manual and verify part numbers before purchasing or performing repairs. Safety-critical components such as airbags, seat belts, and braking systems should be installed by a qualified professional.
- Honda Odyssey: