

2004-2006 Mazda RX-8 Power Brake Booster: The Critical Production Date Split
A hard brake pedal and hissing noise on your RX-8 often point to the brake booster, but a mid-2005 part change makes finding the right one tricky.
- A critical production date split exists for 2006 models: check your door jamb sticker for a build date on or before 06/01/2005 (early part) or after (late part).
- The primary symptoms of failure are a very hard brake pedal and a hissing sound from the pedal area when braking.
- Diagnosis is simple: with the engine off, pump the brakes until firm, then hold the pedal and start the engine. If the pedal doesn't sink, the booster is bad.
- This is a non-serviceable part. If it fails, the entire unit must be replaced; it cannot be rebuilt.
Critical Compatibility Warning: The 2006 Model Year Split
Warning: Mazda changed the power brake booster mid-production for the 2006 model year. You MUST check your vehicle's production date on the sticker inside the driver's door jamb before ordering this part.
- For models built ON OR BEFORE June 1, 2005: You need the early-style booster, OEM part number FE01-43-800C or FEY1-43-80Z. This applies to all 2004-2005 models and early 2006 models.
- For models built AFTER June 1, 2005: You need the late-style booster, OEM part number FEY1-43-80ZA.
The two parts are not directly interchangeable. Installing the wrong booster can lead to brake pedal height issues and improper brake function.
Symptoms of a Failing RX-8 Brake Booster
A failing brake booster is almost always caused by a tear in its internal rubber diaphragm. This creates a vacuum leak, leading to several distinct symptoms:
- Hard Brake Pedal: This is the most common and noticeable symptom. The pedal becomes very difficult to press, requiring significantly more leg strength to slow the car down. This is because you are no longer getting vacuum assistance.
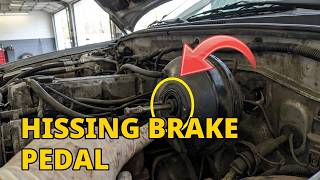
- Hissing Noise from Pedal: A distinct hissing or 'whooshing' sound can be heard from inside the cabin when you press the brake pedal. This is the sound of air being sucked through the tear in the diaphragm. The noise stops when you release the pedal. 🎬 Watch: Hear what a leaking booster diaphragm sounds like
- Increased Stopping Distance: Because you can't apply as much force to the brakes, your vehicle will take longer to stop.
- Engine Stalling or Rough Idle: The vacuum leak can allow unmetered air into the engine, disrupting the air-fuel mixture. This can cause the engine to stumble, idle roughly, or even stall completely when you apply the brakes.
How to Diagnose a Bad Brake Booster
You can confirm a bad brake booster with a simple test that takes less than a minute.
- With the engine OFF, pump the brake pedal 5-6 times. The pedal should become firm and hard to press as you deplete any residual vacuum.
- Hold firm pressure on the brake pedal with your foot.
- While still holding the pedal down, start the engine.
Result 1 (Good Booster): As the engine starts and creates vacuum, you should feel the brake pedal sink down about an inch or two under your foot. This indicates the booster is holding vacuum and working correctly.
Result 2 (Bad Booster): If the pedal does not move or remains hard when the engine starts, the booster is not providing assist and has failed the test.
Pro Tip: If you suspect a leak, you can also spray the booster, its seams, and the vacuum hose with soapy water while the engine is running. If you see bubbles form, you've found your vacuum leak.
Buying a Used 2004-2006 RX-8 Power Brake Booster
A recycled OEM power brake booster is an excellent, cost-effective alternative to expensive new parts. Unlike many other components, brake booster failure is not directly tied to mileage but rather to the age and condition of the internal rubber diaphragm. Heat and time are its main enemies.
- Verify Compatibility: This is the most important step. Double-check the production date of the donor vehicle or have the seller confirm the OEM part number stamped on the unit. Do not buy a booster without confirming it is the correct early (pre-06/2005) or late (post-06/2005) version for your car.
- Physical Inspection: Inspect the metal canister for any signs of heavy rust, dents, or damage. Check the vacuum port to ensure it's not cracked or broken.
- Check for Fluid Contamination: Look at the end of the booster where the master cylinder mounts. If there are signs of brake fluid leakage or staining, it could mean the master cylinder on the donor car was leaking. While the booster might still be good, a leaking master cylinder can damage the booster's diaphragm over time.
- Why Used OEM is a Good Choice: A used OEM Mazda booster is often a better choice than a cheap, new aftermarket part. The fitment, pushrod length, and vacuum characteristics are guaranteed to match factory specifications, which is critical for proper brake feel and performance.
Cost Comparison
Prices for a power brake booster can vary significantly. A recycled OEM part offers substantial savings over a new unit from the dealer.
| Part Type | Estimated Cost |
|---|---|
| New OEM (Mazda Dealer) | $125 - $280 (depending on early/late style) |
| New Aftermarket | $130 - $200 |
| Remanufactured (e.g., Cardone, Duralast) | $120 - $150 + Core Charge |
| Used OEM (Recycled) | $30 - $75 |
| Shop Labor for Installation | $160 - $235 |
Known Issues, TSBs, and Recalls
While the 2004-2006 Mazda RX-8 was subject to several recalls, none specifically address a defect with the power brake booster itself. Recalls were issued for the Takata airbags, fuel pump sealing rings, and front suspension lower control arms. There are also Technical Service Bulletins (TSBs) for various brake noises like squealing and clunking, but not for booster failure. This indicates that a failed brake booster on an RX-8 is typically considered a standard wear-and-tear repair, not a widespread factory defect.
Replacement Procedure Overview
Replacing the brake booster is a moderately difficult job that can be done by a skilled DIY mechanic. The basic steps involve:
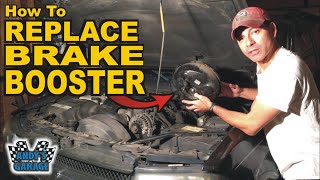
- Access the Booster: In the engine bay, the master cylinder is bolted to the front of the booster. It's often possible to unbolt the master cylinder and carefully move it aside without disconnecting the brake fluid lines, thus avoiding the need to bleed the entire brake system. 🎬 Watch: How to replace a brake booster like a pro
- Disconnect from Pedal: Inside the car, under the dashboard, you must disconnect the booster's pushrod from the top of the brake pedal. This usually involves removing a small clip and pin.
- Unbolt from Firewall: The booster is held to the firewall by four nuts, typically located around the pushrod connection under the dash.
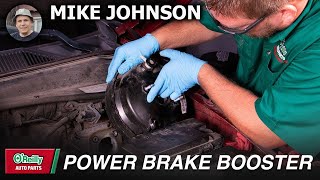
- Remove and Install: Disconnect the main vacuum hose from the booster in the engine bay. The old unit can then be removed and the new one installed by reversing the process. 🎬 See this step-by-step brake booster replacement walkthrough
Torque Specifications
Using the correct torque is critical for safety. Do not overtighten these components.
| Component | Torque Spec |
|---|---|
| Master Cylinder to Brake Booster Nuts | 12.5 N·m / 9 ft-lbs |
| Brake Booster to Firewall Nuts | 12.7 N·m / 9 ft-lbs |
| Push Rod Clevis Lock Nut | 26 N·m / 19 ft-lbs |
Frequently Asked Questions
Do I need to bleed the brakes after replacing the booster?
Only if you disconnect the hydraulic brake lines from the master cylinder. If you can unbolt the master cylinder and carefully set it aside without opening the hydraulic system, you will not need to bleed the brakes. However, if the lines are disconnected for any reason, a full brake bleed is mandatory.
Is rebuilding the brake booster an option?
No, the power brake booster is a sealed unit and is not considered serviceable. The internal diaphragm cannot be purchased separately. If the booster fails, the entire assembly must be replaced.
Can a bad brake booster check valve cause these symptoms?
Yes, sometimes. The check valve is a small, one-way valve in the vacuum hose that connects to the booster. If it fails, it can cause a loss of vacuum assist. It's a cheap and easy part to replace, and it's worth inspecting or replacing it before tackling the entire booster.
What's the difference between the early and late 2006 boosters?
The primary difference appears to be related to a corresponding change in the master cylinder design and potentially the length of the pushrod that connects to the brake pedal. Using the wrong booster can result in an incorrect pedal height and poor brake engagement. Always match the part to your vehicle's production date.
Helpful Videos
Technical Specifications
OEM Part Numbers: FE01-43-800C FEY1-43-80Z FEY14380Z FEY1-43-80ZA
Master Cylinder Nut Torque: 9 ft-lbs (12.5 N·m). Firewall Mounting Nut Torque: 9 ft-lbs (12.7 N·m).
We Have This Part in Stock


The information in this article is provided for general reference and educational purposes only. Vehicle specifications, procedures, and part compatibility can vary by production date, trim level, and region. Always consult your vehicle's factory service manual and verify part numbers before purchasing or performing repairs. Safety-critical components such as airbags, seat belts, and braking systems should be installed by a qualified professional.
- Mazda RX-8:
- 🎬 Helpful Videos
- 🛍️ Shop This Part
- Critical Compatibility Warning: The 2006 Model Year Split
- Symptoms of a Failing RX-8 Brake Booster
- How to Diagnose a Bad Brake Booster
- Buying a Used 2004-2006 RX-8 Power Brake Booster
- Cost Comparison
- Known Issues, TSBs, and Recalls
- Replacement Procedure Overview
- Torque Specifications
- Frequently Asked Questions
- 🎟️ Get 5% Off