

2007-2015 MINI Cooper & Clubman Parking Light: Fog Light vs. No Fog Light Guide
This essential guide clarifies the crucial difference between the standard parking light and the fog light assembly for second-generation MINI Cooper and Clubman models.
- This part is ONLY for MINI models WITHOUT factory-installed fog lights.
- It fits both the left and right sides of the 2007-2015 Cooper and 2008-2014 Clubman.
- Replacement is a simple DIY job accessed through a panel in the front wheel well.
- Broader lighting issues could be linked to a known recall on the Footwell Control Module (FRM) due to water damage.
Key Part Details & Vehicle Fitment

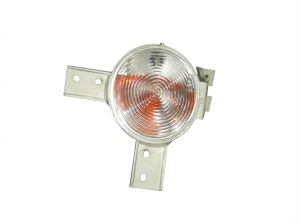
This guide covers the standard parking light assembly for the second-generation MINI platform. It is a single unit that fits both the driver and passenger side of the vehicle. It is specifically for models that do not have the optional factory fog lights installed.
Vehicles This Part Fits:
- 2007-2013 MINI Cooper Hatchback (R56)
- 2008-2014 MINI Cooper Clubman (R55)
- 2009-2015 MINI Cooper Convertible (R57)
- 2012-2015 MINI Cooper Coupe (R58)
- 2012-2015 MINI Cooper Roadster (R59)
Compatibility Warning: This part is ONLY for vehicles WITHOUT factory fog lights. The easiest way to check is to look at the toggle switch bank in the center console. If your vehicle does not have a switch to turn on front fog lights, this is likely the correct part for your car. Vehicles with fog lights use a different, two-bulb assembly in the same location.
Symptoms of a Failing Parking Light


Failure of the parking light assembly is typically straightforward and presents obvious symptoms. While the light itself is simple, issues can also stem from the vehicle's electrical system.
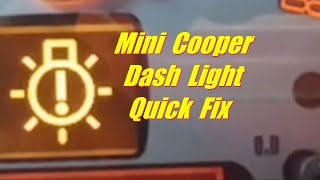
- Burnt-Out Bulb: The most common issue is a burnt-out bulb. This will cause the light to not illuminate and may trigger a "lamp out" warning light on the dashboard. The bulb is 🎬 See how to replace the bulb and clear dash warnings a standard 194 or W5W type.
- Condensation or Moisture Inside Lens: Cracks in the housing or a bad seal around the bulb socket can allow moisture to enter the assembly. This can look like fogging, condensation, or even standing water inside the lens. Over time, this moisture can cause corrosion on the bulb socket and lead to premature bulb failure.
- Cracked or Damaged Lens: Physical damage from road debris or minor impacts is common. A cracked lens is not only a cosmetic issue but also allows moisture to enter, leading to further problems.
- Flickering or Intermittent Operation: If the light flickers, it could be due to a loose bulb, a corroded socket, or a wiring issue. It can also be an early sign of failure in the Footwell Control Module (FRM), which controls the exterior lights.
Known Issues, Recalls, and TSBs

NHTSA Recall 23V-337: Footwell Control Module (FRM) Corrosion
While not a recall on the parking light itself, a significant recall (NHTSA ID: 23V-337) affects the lighting system of these MINIs. The Footwell Control Module (FRM), which controls the parking lights among other functions, is susceptible to corrosion from water intrusion. This is often caused by a clogged or detached sunroof drain hose, allowing water to enter the driver's side footwell where the module is located. This recall primarily affects vehicles registered in "Salt Belt" states.
Symptoms of a failing FRM include:
- Exterior lights (including parking lights) staying on or not working at all.
- Power windows becoming inoperable.
- Turn signals failing.
If you experience multiple, seemingly unrelated electrical issues like these, the FRM is a likely culprit and should be inspected by a dealer, as it may be covered under this recall.
Buying a Used Parking Light
A used OEM parking light is an excellent, cost-effective alternative to a new part, especially since this is primarily a cosmetic and simple functional component. Here’s what to inspect:
- Check for Lens Clarity: Inspect the lens for hazing, yellowing from UV damage, or significant pitting from road debris. Minor pitting is acceptable, but heavy damage can reduce light output and looks poor.
- Inspect for Cracks: Carefully check the entire assembly, especially around the edges and mounting points, for any cracks. Even a small hairline crack can let in moisture.
- Look for Signs of Moisture: Check for any water lines, mineral deposits, or a foggy film on the inside of the lens. This indicates the seal has failed in the past and the unit may leak.
- Examine the Bulb Socket: If possible, twist out the bulb socket and inspect the electrical contacts for any signs of green or white corrosion. A clean socket is a good sign.
- Verify Mounting Tabs: Ensure all mounting tabs and clips are intact and not broken. These are crucial for a secure fit in the bumper.
Replacement Procedure Overview
Replacing the parking light bulb or the entire assembly is a straightforward DIY task that does not require special tools or removing the bumper.
- Access the Light: Turn the front wheels to the side opposite of the light you are replacing to create space in the wheel well.
- Open the Access Panel: In the front of the wheel well liner, there is a small, circular access panel. Turn it counter-clockwise to remove it.
- Remove the Bulb Holder: Reach inside the bumper through the access hole and locate the back of the parking light. Twist the bulb holder counter-clockwise (about 45 degrees) and pull it out of the housing.
- Replace the Bulb: Pull the old bulb straight out of the socket and insert the new one. It's a good practice not to touch the new bulb with bare hands.
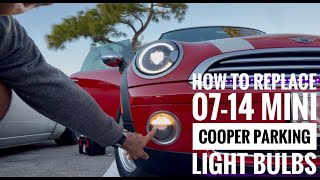
- Reinstall: Insert the bulb holder back into the light assembly and turn it clockwise to lock it in place. Test the light before closing the access panel. 🎬 Watch: Step-by-step guide to changing the parking light bulb
Pro Tip: If you are replacing the entire light assembly, it is held in by several clips. After removing the bulb socket, you can release these clips from inside the bumper and push the assembly out from the front of the bumper.
| Part Type | Estimated Cost |
|---|---|
| New OEM | $90 - $145 |
| New Aftermarket | $40 - $70 |
| Used OEM | $25 - $50 |
| Shop Labor (Bulb Only) | $25 - $50 |
| Shop Labor (Assembly) | $50 - $75 |
Frequently Asked Questions
Can I install this part if my MINI has fog lights?
No. This is a parking-light-only assembly. The fog light assembly is a different part that contains both a fog light bulb and a parking light bulb in one housing. You cannot interchange them without significant modification.
Is this part the same for the driver and passenger side?
Yes, the part is symmetrical and fits both the left and right side of the front bumper.
What bulb does this parking light use?
This assembly uses a single T10 wedge-style bulb, commonly known as a 194, 2825, or W5W bulb.
Can I upgrade this parking light to a fog light?
Yes, it is possible to replace the parking light assembly with an OEM fog light assembly. However, it requires the new fog light housings, wiring harnesses, and a switch. You will also likely need to have the vehicle's computer coded to recognize the new fog lights.
My light is foggy inside. Do I need to replace it?
Minor fogging that appears in damp weather and disappears when the lights are on is considered normal by MINI. However, if you see water droplets or the moisture never dries out, the seal has failed and the unit should be replaced to prevent electrical problems.
🎬 Watch: How to fix moisture and water in your lightsHelpful Videos
Technical Specifications
OEM Part Numbers: 63-17-2-751-293 63172751293 51-11-2-751-293 51112751293
Bulb Type: T10 / 194 / W5W Halogen
We Have This Part in Stock



The information in this article is provided for general reference and educational purposes only. Vehicle specifications, procedures, and part compatibility can vary by production date, trim level, and region. Always consult your vehicle's factory service manual and verify part numbers before purchasing or performing repairs. Safety-critical components such as airbags, seat belts, and braking systems should be installed by a qualified professional.
- MINI Cooper:
- MINI Cooper Clubman: