

2018-2024 Lincoln Navigator Parking Brake Switch: Diagnosing 'Service Park Brake' Warnings
This guide covers the common failures of the electronic parking brake switch, how to tell if the switch or wiring is the problem, and a complete replacement guide.
- The 'Service Park Brake' message can be caused by either the switch or corroded wiring at the rear brake calipers; always inspect the wiring first.
- Replacement is a DIY-friendly job but requires careful removal of the center console trim panel to avoid breaking clips.
- A used OEM switch is a reliable and cost-effective alternative to a new part, as aftermarket options are not readily available.
- The OEM part number is JL7Z-2B623-AA and is shared with the 2018-2024 Ford Expedition.
Symptoms of a Failing Parking Brake Switch


When the parking brake switch begins to fail, it typically creates clear and often annoying warnings on your instrument cluster. Because it's an electronic component, the symptoms are rarely subtle.
- "Service Park Brake" Message: This is the most common symptom. A persistent warning message will appear on your dashboard indicating a malfunction in the system.
- Flashing Parking Brake Light: The red "BRAKE" or parking brake symbol light on the dash may flash continuously instead of staying solid when applied.
- Inability to Engage or Disengage: The parking brake may refuse to apply when you pull the switch, or worse, it may get stuck in the 'on' position and refuse to release.
- Erratic Operation: In rare cases, the switch might send false signals, causing the "Service Park Brake" message to appear randomly while driving.
- 'Auto Hold' Feature Inoperative: Since the Auto Hold function relies on the same brake system, a fault in the parking brake system will almost always disable this feature.
Diagnosing the Problem: Switch vs. Wiring

Before you replace the switch, it's critical to understand that other issues can cause the exact same symptoms. On the 2018-2024 Navigator and its sibling, the Ford Expedition, a very common point of failure is the wiring harness leading to the electronic brake actuators on the rear calipers.
Pro Tip: Many owners have replaced the switch only to find the problem persists. The root cause is often corrosion or a broken wire in the harness near the rear wheels, where it is exposed to water, salt, and road debris. A diagnostic scan tool can help pinpoint the issue. Codes like P05E6 point towards the switch circuit, while codes like C2081 often indicate a problem with the caliper motor or its wiring.
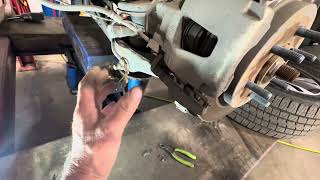
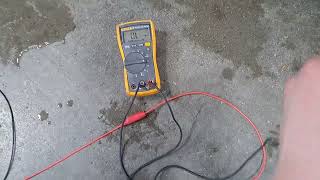
🎬 Watch: Diagnostic steps for a parking brake malfunctionHow to Check the Wiring
- Safely raise and support the rear of the vehicle.
- Visually inspect the wires going to the electric motor on each rear brake caliper.
- Look for any signs of green or white corrosion, chafed insulation, or broken wires, especially where the harness bends or is secured by clips.
- Gently wiggle the wires while observing the dashboard warnings (with the ignition on) to see if the fault is intermittent.
If you find damaged wiring, repairing that section of the harness is the correct fix. If the wiring appears to be in perfect condition, the switch itself is the more likely culprit.
Buying a Used Parking Brake Switch
Since this is a simple electronic switch without complex internal mechanics, a used OEM part is an excellent, cost-effective option. Failures are not extremely common, and a recycled part from a lower-mileage vehicle can provide the same performance as a new one for a fraction of the price.
What to Inspect:
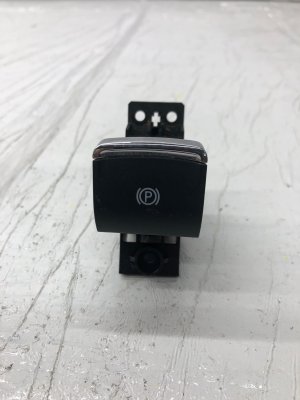
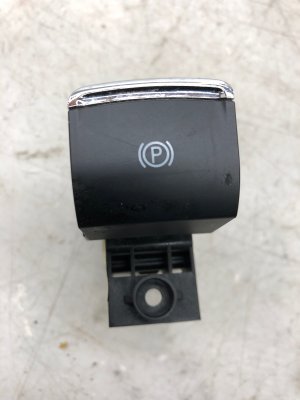
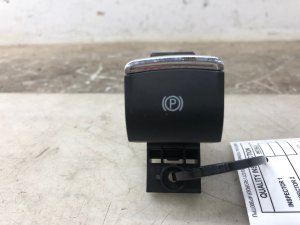
- Part Number Verification: The most critical step. Ensure the part number matches your original switch. The primary service part number is JL7Z-2B623-AA. The engineering number found on the part itself is often JL7T-2B623-ACW.
- Physical Condition: Check that the switch button has a crisp, tactile click when pulled and pushed. It should not feel loose, sticky, or broken.
- Connector Pins: Look at the electrical connector on the back. The pins should be straight, clean, and free of any corrosion or damage.
- No Signs of Liquid Damage: Inspect the housing for any staining or stickiness that might indicate a spilled drink, which is a common cause of failure for console-mounted electronics.
Choosing a used OEM switch over a new aftermarket one is often wise. As of now, there are no widely available direct-fit aftermarket versions of this specific electronic switch. A genuine Ford/Lincoln part ensures perfect fitment, connector compatibility, and correct electronic communication with the vehicle's control modules.
Known Issues, TSBs, and Recalls
While there are no recalls for the failure of the parking brake switch itself, there are several related service actions for the 2018-2024 Navigator's brake systems:
- NHTSA Recall 23V-199: A software issue where the electronic parking brake might not automatically engage when the vehicle is shifted to park. The fix is a PCM software update performed by a dealer.
- NHTSA Recall 25V-314: Affects some 2022-2024 models where a front hydraulic brake line could have been bent during assembly, potentially leading to a fluid leak and loss of front braking power. This does not affect the electronic parking brake function directly.
Replacement Guide (DIY Difficulty: 3/5)

Replacing the parking brake switch is feasible for a DIYer with basic tools, but it requires patience to avoid damaging the center console trim. The job takes approximately 30-60 minutes.
Warning: The center console trim is held in by strong clips. Use plastic trim removal tools to avoid scratching or breaking the expensive trim pieces.
Tools Needed:
- Plastic trim removal tool kit
- T20 Torx screwdriver or bit
Step-by-Step Instructions:
- Open the Center Console: Open the main armrest lid to get a better grip on the trim panel.
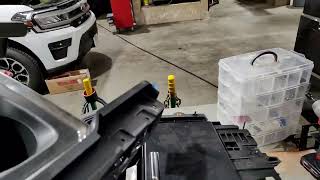
- Pry Up the Main Trim Panel: 🎬 See this video on disassembling the center console trim The large trim piece surrounding the gear selector, cupholders, and parking brake switch is one single assembly. Start at the rear edge near the armrest and use a plastic trim tool to gently pry upwards. Work your way around the sides, releasing the clips. You will hear loud popping sounds as the clips release.
- Lift and Disconnect: Once all clips are loose, lift the rear of the panel up and slide it back slightly to disengage the front tabs. Do not pull it all the way off yet. There are several electrical connectors underneath for the various switches.
- Disconnect Wiring: Carefully lift the panel to access the connectors. Locate the connector for the parking brake switch and depress the locking tab to unplug it. Disconnect any other wiring that prevents you from fully removing the panel.
- Remove the Old Switch: With the trim panel removed and placed on a soft surface, locate the parking brake switch. It is typically secured from underneath by three T20 Torx screws. Remove these screws and take the old switch out.
- Install the New Switch: Place the new switch into the trim panel and secure it with the three T20 Torx screws.
- Reconnect and Test: Before snapping the console back into place, reconnect the parking brake switch's electrical connector and any others you unplugged. Turn the vehicle's ignition to the 'On' position (without starting the engine) and test the new switch. Pull up to confirm the 'Service Park Brake' message is gone and the parking brake engages. Push down to ensure it releases.
- Reassemble Console: Once you've confirmed it works, align the trim panel by inserting the front tabs first, then press down firmly around the edges to re-engage all the retaining clips.
Cost of Replacement
The cost to replace the parking brake switch is relatively low, especially if you do it yourself. The main expense is the part itself.
| Part or Service | Estimated Cost |
|---|---|
| New OEM Switch | $44 - $75 |
| New Aftermarket Switch | Not Widely Available |
| Used OEM Switch | $25 - $50 (estimated) |
| Shop Labor Cost | $85 - $125 |
| Total Professional Replacement | $150 - $200 |
Can I drive with a bad parking brake switch?
Yes, but with caution. If the switch is broken and the parking brake is stuck OFF, you can drive the vehicle but you will not have a functional parking brake, which is a safety risk when parking on hills. If the brake is stuck ON, the vehicle is not drivable. If the system is giving intermittent warnings, it should be serviced promptly to avoid having the brake get stuck at an inconvenient time.
Do I need to program the new switch?
No. The parking brake switch is a simple plug-and-play component. No programming or calibration is required after installation.
Is the Ford Expedition parking brake switch the same?
Yes, the 2018-2024 Ford Expedition uses the same electronic parking brake switch as the Lincoln Navigator. The part number JL7Z-2B623-AA is shared between both vehicles, making them interchangeable.
What is the difference between the parking brake switch and the brake light switch?
They are completely different parts. The parking brake switch is on your center console and controls the electronic parking brake. The brake light switch (also called a stoplight switch) is located on the bracket of the brake pedal itself and its primary job is to turn on your brake lights when you press the pedal.
Helpful Videos
Technical Specifications
OEM Part Numbers: JL7Z-2B623-AA JL7T-2B623-ACW SW-9260
Location: Center Console. Type: Electronic Pull/Push Switch. Controls: Electronic Parking Brake (EPB) and Auto Hold system.
We Have This Part in Stock



The information in this article is provided for general reference and educational purposes only. Vehicle specifications, procedures, and part compatibility can vary by production date, trim level, and region. Always consult your vehicle's factory service manual and verify part numbers before purchasing or performing repairs. Safety-critical components such as airbags, seat belts, and braking systems should be installed by a qualified professional.
- Lincoln Navigator:
- 🎬 Helpful Videos
- 🛍️ Shop This Part
- Symptoms of a Failing Parking Brake Switch
- Diagnosing the Problem: Switch vs. Wiring
- How to Check the Wiring
- Buying a Used Parking Brake Switch
- What to Inspect:
- Known Issues, TSBs, and Recalls
- Replacement Guide (DIY Difficulty: 3/5)
- Tools Needed:
- Step-by-Step Instructions:
- Cost of Replacement
- 🎟️ Get 5% Off