

2017-2021 Jeep Compass Camera Failure: Fixes for Black Screens & Body Style Traps
Diagnose common black or blue screen issues, understand the critical 2017 body style difference, and learn how to replace your park assist camera.
- For 2017 models, you MUST verify you have the 'New Body Style' by checking that the 11th digit of the VIN is a 'T'.
- Black or blue screens are very common and often caused by software glitches or loose wiring in the liftgate, not necessarily a bad camera.
- Before buying a new part, try cleaning the camera's main electrical connector inside the liftgate trim panel, as this is a frequent and simple fix.
- Replacement is a straightforward DIY task that usually requires no special programming, just basic trim removal tools.
The Critical 2017 Body Style Warning

Warning: For the 2017 model year, Jeep sold two completely different versions of the Compass simultaneously. This camera ONLY fits the 'New Body Style' (also known as the MP platform), which was introduced in 2017. It will NOT fit the 'Old Body Style' (MK platform, also called the Compass Classic), which was a carryover from the previous generation.
The most reliable way to identify which 2017 model you have is by checking the 11th character of your Vehicle Identification Number (VIN):
- If the 11th VIN character is a 'T', you have the New Body Style and this camera will fit.
- If the 11th VIN character is a 'D', you have the Old Body Style and this camera will NOT fit.
Visually, the new style has a sleeker, more modern look similar to a smaller Grand Cherokee, while the old style is boxier. The initial data about vertical vs. horizontal door handles is a good visual clue but checking the VIN is the only guaranteed method.
Common Symptoms of a Failing Park Assist Camera

Failures with the Jeep Compass backup camera are extremely common and often start intermittently. You may notice one or more of the following symptoms:
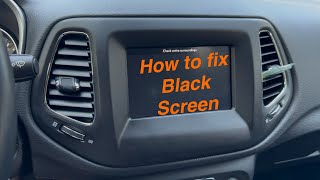
- Black or Blue Screen: When you shift into reverse, the Uconnect screen turns black or solid blue. A blue screen typically means the display is powered on but is not receiving a video signal from the camera. A black screen can mean a loss of power to the camera or a total system freeze. 🎬 Watch this quick troubleshooting video for a black screen issue Often, the "Check your entire surroundings" message will still be visible.
- Intermittent Operation: This is a classic sign of a wiring or connection issue. The camera may work one day but not the next. Many owners report that opening and slamming the liftgate can temporarily make the camera work again, which points directly to a loose connection or a broken wire in the harness that flexes with the liftgate.
- Flickering, Lines, or Distorted Image: The video feed may flicker, show static, have colorful lines running through it, or appear distorted before it fails completely.
- Delayed Image Display: The camera feed is slow to appear after shifting into reverse, or in some cases, it may pop up after you've already shifted back into drive and started moving forward.
Diagnosing the Problem: Is It Really the Camera?

Before you buy a replacement camera, it's important to know that the camera itself is not always the root cause. Software and wiring are frequent culprits.
Step 1: System Reset
Many electronic glitches can be solved with a simple reset. With the vehicle off, open the hood, disconnect the positive battery terminal, and touch it to a ground point on the chassis for 30 seconds. This drains the capacitors that hold the system's memory and can resolve temporary software freezes. Reconnect the terminal and test the camera.
Step 2: Check the Connector
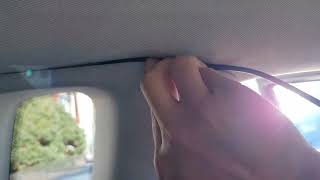
The most common physical failure point is the electrical connection. A popular and effective fix involves cleaning this connection. To do this, you must remove the main interior trim panel on the liftgate. It is held on by clips and can be gently pried off with a plastic trim removal tool. Once the panel is off, locate the camera's wiring connector, disconnect it, and inspect the pins for corrosion or damage. Spray both sides of the connector with electronic contact cleaner, let it dry, apply a small amount of dielectric grease to the seal, and reconnect it firmly. 🎬 Watch how to fix a Jeep Compass backup camera connection Test the camera again.
Step 3: Check for Broken Wires
If the problem is intermittent and related to opening/closing the liftgate, inspect the rubber boot that runs between the top of the liftgate and the vehicle body. The wires inside can become kinked or break from repeated flexing. This is a more involved repair that may require splicing the damaged wire.
Known Issues, Recalls, and Technical Service Bulletins (TSBs)

Jeep has acknowledged camera issues through several official communications.
- NHTSA Recall 24V-436 (Jeep Campaign 66B/79B): This massive recall affects over a million Stellantis vehicles, including the 2022-2023 Jeep Compass. It addresses a radio software issue that can prevent the rearview image from displaying. The fix for most vehicles was an Over-The-Air (OTA) software update, meaning it may have been fixed without a dealer visit. While this recall is for later models, it highlights the prevalence of software-related camera failures.
- TSB 08-106-19: This bulletin specifically addresses intermittent camera operation or a blue screen caused by outdated Uconnect software.
- TSB 08-074-18: This bulletin guides technicians to inspect wiring and connectors for signal loss issues, acknowledging the physical connection problems.
Buying a Used Park Assist Camera
A used OEM camera can be a cost-effective and reliable solution, especially since aftermarket units can have issues with image quality or compatibility. Here’s what to look for:
- Match the Part Number: This is the most important step. While several part numbers supersede each other, matching your original number is the safest bet. The latest part number appears to be 4672771AC, which replaces many others.
- Inspect the Lens: Check for deep scratches, hazing, or cloudiness on the camera lens. Minor scuffs are okay, but significant damage will permanently degrade the image quality.
- Check the Connector: Look closely at the electrical connector pins. They should be straight and free of any green or white corrosion. Avoid any camera with bent or broken pins.
- Ask About the Donor Vehicle: If possible, get the mileage from the vehicle the part came from. While these cameras don't have a specific mileage-based lifespan, a lower-mileage part is generally preferable.
Pro Tip: Given that many 'failures' are due to wiring or software, a used camera that has been tested and confirmed functional is often just as good as a new one, but at a fraction of the price.
Cost of Replacement
Prices can vary, but here is a general breakdown of what to expect:
| Part Type | Estimated Cost |
|---|---|
| New OEM (Dealer/Mopar) | $195 - $301 |
| New Aftermarket | $45 - $110 |
| Used OEM | $50 - $100 |
| Shop Labor for Installation | $100 - $150 |
Replacement Difficulty & Procedure

Replacing the camera is a straightforward DIY job for most people.
- Difficulty: 2 out of 5
- Estimated Time: 0.5 - 1 hour
- Tools Needed: Plastic trim removal tools, possibly a small socket set.
General Steps:
- Open the rear liftgate.
- Using a plastic pry tool, carefully release the clips holding the large interior trim panel to the liftgate and remove it. Start at one edge and work your way around.
- Locate the camera mounted in the exterior liftgate handle/trim piece.
- Disconnect the single electrical connector from the camera.
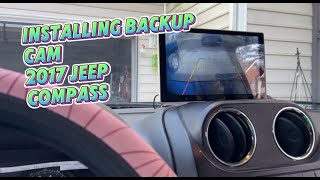
- The camera is typically held in place by two small screws or bolts. Remove them. 🎬 See this step-by-step video on replacing the backup camera
- Install the new camera, reconnect the electrical plug, and reinstall the trim panel by lining up the clips and pressing it firmly into place.
Pro Tip: Before you fully reinstall the trim panel, turn on the vehicle and put it in reverse to test the new camera. This ensures everything is working before you snap all the clips back into place.
Frequently Asked Questions
Do I need to program a replacement camera?
No. For a direct OEM-to-OEM swap on the 2017-2021 Compass, no special programming or calibration is typically required. It should be a plug-and-play installation.
Why is my screen blue but the 'Check Surroundings' message is still there?
This is a classic symptom of signal loss. The Uconnect system knows it should be in camera mode (and thus displays the warning text), but it's not receiving a video signal from the camera itself. This strongly points to a wiring or connector issue between the camera and the head unit.
Can a bad backup camera drain my battery?
While rare, it's possible. Some owners have reported that after fixing a loose battery terminal connection, their intermittent camera problems disappeared. A faulty camera or module could potentially cause a small parasitic draw, but it's more likely that an underlying electrical system issue is affecting both the battery and the camera.
Why did my camera start working after I slammed the trunk?
This is a tell-tale sign of a loose electrical connection or a partially broken wire. The vibration from slamming the liftgate temporarily re-establishes the connection. The most likely culprit is the main connector at the camera or a damaged wire in the harness that runs from the body to the liftgate.
Helpful Videos
Technical Specifications
OEM Part Numbers: 4672771AA 4672771AB 4672771AC 68245750AA 68245750AB 68245750AC 68245750AD
Mounts on the rear liftgate. Connects to the vehicle's main wiring harness to send a video signal to the Uconnect display.
We Have This Part in Stock


The information in this article is provided for general reference and educational purposes only. Vehicle specifications, procedures, and part compatibility can vary by production date, trim level, and region. Always consult your vehicle's factory service manual and verify part numbers before purchasing or performing repairs. Safety-critical components such as airbags, seat belts, and braking systems should be installed by a qualified professional.
- Jeep Compass:
- 🎬 Helpful Videos
- 🛍️ Shop This Part
- The Critical 2017 Body Style Warning
- Common Symptoms of a Failing Park Assist Camera
- Diagnosing the Problem: Is It Really the Camera?
- Step 1: System Reset
- Step 2: Check the Connector
- Step 3: Check for Broken Wires
- Known Issues, Recalls, and Technical Service Bulletins (TSBs)
- Buying a Used Park Assist Camera
- Cost of Replacement
- Replacement Difficulty & Procedure
- Frequently Asked Questions
- 🎟️ Get 5% Off