

2012-2018 Honda CR-V Park Assist Camera: Failures, Part Numbers, and Replacement
This guide covers the common black screen and fuzzy image failures for the 2012-2018 Honda CR-V backup camera, and explains the critical differences between part numbers and trim levels.
- Part number compatibility is critical. The 2012-2016 CR-V uses different cameras for LX/SE trims versus EX/EX-L/Touring trims.
- The most common failure symptoms are a black screen, flickering video, or a blurry image caused by internal moisture.
- Replacement is a straightforward DIY task that involves removing the rear liftgate trim panels.
- A used OEM camera is often a better choice than a new aftermarket one to ensure proper image quality and feature compatibility.
Known Issues and Vehicle Generation Differences
The 2012-2018 Honda CR-V spans two distinct vehicle generations, which use different park assist cameras. It is critical to identify your vehicle's generation and trim level before purchasing a replacement part.
- 4th Generation (2012-2016): These models often use cameras with part numbers beginning in 39530-T0A-xxx. A key issue with this generation is the difference in cameras between lower and higher trim levels. The camera for an LX or SE trim is often a single-view unit and is not interchangeable with the multi-view camera found on EX, EX-L, and Touring models. Installing the wrong camera can result in a non-functional or improperly working display.
- 5th Generation (2017-2018): These models use cameras with part numbers starting with 39530-TLA-xxx. While multi-angle cameras became more standard, compatibility is still tied to the specific part number and the vehicle's factory-installed features.
Warning: There are no major recalls for the park assist camera system on the 2012-2018 Honda CR-V itself. However, Honda has issued recalls and Technical Service Bulletins (TSBs) for similar issues on other models and later model years, often related to faulty wiring harnesses or software glitches that cause black or flickering screens. For example, TSB 25-071 was released for 2023-2025 models to fix a black and white image issue with a software update. While not directly applicable, these issues highlight common failure points in Honda camera systems.
Symptoms of a Failing Park Assist Camera
When the park assist camera begins to fail, you will notice obvious issues with the video feed on your dashboard screen. Here are the most common symptoms:
- Black or Blank Screen: The most common failure. When you shift into reverse, the screen goes black or shows a 'No Signal' message, while other infotainment functions work normally. This often points to a failed camera unit or a connection issue.
- Flickering or Intermittent Image: The video feed may cut in and out, or flicker between a clear image and a black screen. This often suggests a loose connection or a frayed wire in the liftgate harness.
- Blurry, Foggy, or Distorted Image: The image quality may degrade, appearing fuzzy or out of focus. This is often caused by moisture getting inside the camera housing and clouding the lens from within.
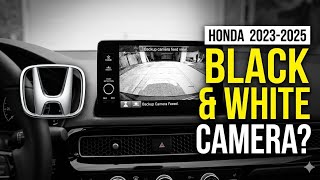
- Black and White Image: The camera may lose its ability to process color, displaying only a monochrome image. 🎬 Watch: Fix a backup camera stuck in black and white On newer Hondas, this has been identified as a software issue, but on older models, it can indicate a failing camera sensor.
- Parking Guidelines Disappear or are Incorrect: If the on-screen guidelines vanish or don't align properly, it can indicate a problem with the camera or its connection to the vehicle's computer.
Buying a Used Park Assist Camera
A used OEM camera can be a reliable and cost-effective solution, provided you know what to look for. Cheap aftermarket cameras often suffer from poor image quality, incorrect viewing angles, and may not support all factory features like multi-view modes.
Inspection and Verification Checklist:
- Verify the Part Number: This is the most important step. The part number is printed on a sticker on the camera housing. Match it exactly to your original camera. Do not rely on year and model alone. The initial data provided lists 39530-T0A-A01 for 2012-2013 models and 39530-TLA-A01 for 2017+ models as common examples.
- Confirm the Donor Vehicle's Trim Level: Ask the seller for the trim level (LX, EX, EX-L, etc.) of the vehicle the camera came from. For 2012-2016 models, an LX camera will not work correctly in an EX-L.
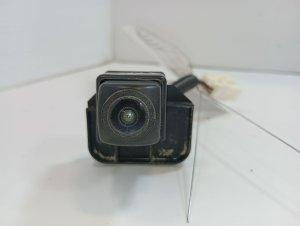
- Inspect the Lens: Look for a clear, scratch-free lens. Avoid any camera that shows signs of hazing, yellowing, or moisture behind the lens, as this indicates the seal has failed.
- Check the Connector: The electrical connector and its pins should be clean, straight, and free of corrosion. Bent or damaged pins will prevent the camera from working.
- Examine the Housing: The plastic housing should be free of cracks or significant damage that could compromise its weather resistance.
Cost Comparison for Replacement
Prices can vary based on your location and the supplier. The following table provides an estimated cost breakdown:
| Part Type | Estimated Cost | Notes |
|---|---|---|
| New OEM | $185 - $385 | Offers perfect compatibility and is backed by a manufacturer warranty. Prices for the 4th gen (T0A) are generally higher than the 5th gen (TLA). |
| New Aftermarket | $30 - $130 | Widely available, but image quality, viewing angle, and feature support (like multi-view) can be inconsistent. |
| Used OEM | $50 - $150 | A cost-effective option that retains original quality and function, provided you verify the part number and condition. |
| Shop Labor | $100 - $200 | Most independent shops will charge for 1 to 1.5 hours of labor to remove the liftgate trim and replace the camera. |
Step-by-Step Replacement Guide (DIY Difficulty: 2/5) 🎬 See this step-by-step camera replacement walkthrough
Replacing the park assist camera is a manageable DIY project for most people with basic tools. The process involves removing trim panels to access the camera.
Tools Needed:
- Plastic trim removal tool kit
- Socket set (typically 8mm or 10mm)
- Small screwdriver or pick
Procedure:
- Open the Rear Liftgate: Ensure the vehicle is off.
- Remove the Inner Liftgate Trim Panel: Start by removing any pull handles or screws. Then, use a plastic trim tool to carefully pry around the edges of the large plastic panel on the inside of the liftgate to release the retaining clips.
- Remove the Exterior Garnish: The camera is mounted in the exterior trim piece (garnish) above the license plate. From the inside of the liftgate, locate the nuts (usually 4-6 of them) that hold this piece on. Remove them with a socket.
- Disconnect and Remove the Camera: With the garnish loose, you can access the back of the camera. Press the release tab on the electrical connector and pull it off. The camera itself is often held to the garnish with two small screws. Remove them and take out the old camera.
- Install the New Camera: Secure the new camera to the garnish with the screws, reconnect the electrical plug, and reinstall the garnish onto the liftgate.
- Test and Reassemble: Before snapping the large interior trim panel back on, turn the vehicle on and shift to reverse to confirm the new camera is working. Once confirmed, reinstall the interior trim panel.
Pro Tip: The plastic clips holding the trim panels can be brittle and may break during removal. It's a good idea to have a few spare clips on hand before you start the job.
Frequently Asked Questions
Why is my CR-V's backup camera screen just black?
A black screen is the most common symptom of a failed camera. It can be caused by a dead camera unit, a blown fuse, or a disconnected/damaged wire between the camera and the head unit. Start by checking the fuse, then inspect the wiring in the liftgate for any obvious damage before replacing the camera itself.
Can I upgrade my base model (LX) camera to a multi-view camera from an EX-L?
This is generally not a simple plug-and-play swap. The multi-view cameras used in higher trims (like the EX and EX-L) communicate differently with the infotainment system. Attempting to install a multi-view camera in a vehicle originally equipped with a single-view camera will likely result in it not working at all.
Do I need to program or calibrate the camera after installation?
If you are replacing the camera with an identical used or new OEM part number, no programming or calibration is typically required. The system is designed to be plug-and-play. However, if you install an incorrect or some aftermarket cameras, you may lose features or it may not function.
Why is the image from my new aftermarket camera so blurry and the colors are off?
Many lower-cost aftermarket cameras use cheaper image sensors and lenses compared to the original Honda equipment. This results in lower resolution, poor performance in low light, and less accurate color representation. For the best image quality, a new or used OEM camera is the recommended choice.
Helpful Videos
Technical Specifications
OEM Part Numbers: 39530-T0A-A01 39530-T0A-A011-M1 39530-TLA-A01 39530-TLA-A11 39530-TLA-A51 39530T0AA01 39530T0AA11 39530TLAA01
Varies by part number. Connects via a multi-pin connector (typically 8-pin). Power is supplied by the vehicle's electrical system (often 6V-12V).
We Have This Part in Stock



The information in this article is provided for general reference and educational purposes only. Vehicle specifications, procedures, and part compatibility can vary by production date, trim level, and region. Always consult your vehicle's factory service manual and verify part numbers before purchasing or performing repairs. Safety-critical components such as airbags, seat belts, and braking systems should be installed by a qualified professional.
- Honda CR-V:
- 🎬 Helpful Videos
- 🛍️ Shop This Part
- Known Issues and Vehicle Generation Differences
- Symptoms of a Failing Park Assist Camera
- Buying a Used Park Assist Camera
- Inspection and Verification Checklist:
- Cost Comparison for Replacement
- Step-by-Step Replacement Guide (DIY Difficulty: 2/5)
- Tools Needed:
- Procedure:
- Frequently Asked Questions
- 🎟️ Get 5% Off