

2016 Range Rover Sport Surround Camera Module: Fixing Faults, Programming, and Replacement
This guide covers diagnosing a faulty Park Assist Camera Control Module, the mandatory programming required after replacement, and how to distinguish module failure from common camera issues.
- Programming is mandatory. A new or used module will not work until it is configured and calibrated to your vehicle by a dealer or qualified independent shop.
- This module is only for vehicles with the optional 360-degree Surround Camera System. Verify your vehicle has this feature before buying.
- A "Camera System Fault" message combined with DTC U0264-00 is the strongest indicator that the control module itself has failed.
- If only one camera is out, the problem is likely the camera itself (often due to water damage) or its wiring, not the main control module.
Symptoms of a Failing Camera Control Module
When the camera control module begins to fail, you will notice significant issues with the 360-degree camera display. Because the module is the central processor, a failure can affect all cameras at once.
- "Camera System Fault" Message: A warning message explicitly stating a system fault will often appear on the instrument cluster.
- Black or Blue Screen: When selecting reverse or activating the camera system, the entire screen may be black, blue, or show a distorted image instead of the camera feeds.
- All Cameras Inoperative: None of the camera views (front, rear, or side) will be available. The camera button on the touchscreen may be greyed out and unresponsive.
- Intermittent Operation: The system may work sporadically, cutting out and returning without warning. This can sometimes be caused by loose connections to the module, which is located under the driver's seat.
- Red Border on Screen: In some cases, the system may display a red border around the 360-degree vehicle graphic to indicate a fault has been detected.
Diagnostic Trouble Codes (DTCs)
A professional scan tool that can read Jaguar Land Rover (JLR) specific codes is essential for accurate diagnosis. Generic OBD-II readers may not see these detailed codes.
| Code | Description | Common Cause |
|---|---|---|
| U0264-00 | Lost Communication With Camera Module | This code, stored in the Instrument Cluster, is a primary indicator of a failed camera control module. A Land Rover Technical Service Bulletin (TSB) specifically advises replacing the module when this code is present. |
| B12BD-49 to B12C1-49 | Front/Rear/Mirror Camera Fault | These codes point to a failure of an individual camera or its wiring, not necessarily the main control module. Water intrusion in the camera housing is a common cause. |
| U3000-49 | Control Module Internal Electronic Failure | A more generic code indicating an internal failure within the module itself. |
Pro Tip: Before condemning the control module, check the individual cameras. A recall on later models (N778/N901) highlights that water getting into the camera housings is a very common issue that can cause a black or distorted image, mimicking a module failure. If only one camera view is out, the problem is likely the camera itself or its wiring, not the module.
Known Issues, Recalls, and Technical Service Bulletins (TSBs)
While there are no specific recalls for the camera module on the 2016 model year, related TSBs and recalls for the camera system provide important diagnostic clues.
- TSB LTB00962NAS3 (and similar): This bulletin addresses symptoms like a blue screen, "Camera System Fault" messages, and a greyed-out camera button. It directly instructs technicians to replace the Camera Control Module (CCM) if DTC U0264-00 is found.
- Recall N778 / N901: Affecting 2018-2022 models, these recalls were for water entering the rear camera, causing the image to fail. While not for the 2016 model, this shows a pattern of camera failure from water damage that owners should be aware of.
- Loose Connections: Forum members have reported that intermittent camera issues can sometimes be traced to loose wiring connectors at the module under the driver's seat, occasionally caused by a rear passenger's feet kicking them.
Buying a Used Park Assist Camera Control Module
Purchasing a used OEM module is a cost-effective repair strategy, but it's crucial to understand the requirements. A used module is not a plug-and-play part.
- Verify the Part Number: The most important step is to match the part number exactly. The primary part number for this vehicle is FW93-14F026-BM. This may be superseded by newer numbers like LR094043. Always confirm compatibility with the seller by providing your vehicle's VIN.
- Inspect the Connectors: When you receive the part, carefully inspect all electrical connector pins. Look for any signs of corrosion, moisture damage, or bent pins, which could indicate a faulty unit.
- Factor in Programming Costs: A used module must be programmed to your vehicle. It will not work by simply installing it. You will need to take the vehicle to a Land Rover dealer or a qualified independent shop with JLR-specific diagnostic tools (like SDD or Pathfinder) to have the module configured and the cameras calibrated. Budget for this additional cost.
- Why Used OEM is a Good Choice: Aftermarket versions of this specific, complex module are virtually nonexistent. A used OEM module that has been properly tested is the most reliable and affordable alternative to a brand new dealer part. It contains the correct hardware and is designed to integrate perfectly with the vehicle's systems once programmed.
Warning: Do not attempt to diagnose by swapping in a module from another vehicle. Land Rover explicitly warns against this, as it can cause new faults in both the test vehicle and the donor vehicle without confirming the original problem.
Programming and Calibration Requirements
This is the most critical part of the replacement process. Failure to program the module will result in a non-functional camera system.
- Module Configuration: After installation, a technician must use a JLR-approved diagnostic tool to connect to the vehicle. They will run a "Configure New Module" routine. This process writes your vehicle's specific Car Configuration File (CCF) to the replacement module, telling it which options (like surround cameras, tow assist, etc.) are installed.
- Camera Calibration: Once the module is configured, a camera calibration must be performed. This procedure uses special mats placed around the vehicle or relies on road driving to align the video feeds from all cameras, ensuring a correct and seamless 360-degree view without distorted or misaligned areas.
- Who Can Perform the Programming?
- Land Rover Dealerships: They have the required SDD/Pathfinder tools and training.
- Independent JLR Specialists: Many independent shops that specialize in Land Rover have the same tools and can perform this service, often at a lower cost.
- Remote Programming Services: Some companies offer remote coding if you have the proper OBD-II interface cable, allowing a technician to program the module over the internet.
Replacement Location and Procedure
The Park Assist Camera Control Module is located on the floor under the driver's seat.
- Disconnect the vehicle's battery.
- Move the driver's seat fully up and forward to gain access to the module area from the rear passenger footwell.
- Remove the module's protective cover (usually held by small clips or scrivets).
- Carefully disconnect the multiple electrical connectors from the module. There are often seven connectors.
- Remove the two nuts holding the module bracket to the floor and remove the old module.
- Installation is the reverse of removal. Install the new (used) module, connect all wiring, and secure the cover.
- Reconnect the battery. The vehicle can be driven, but the camera system will be inoperative until it is programmed.
Cost Comparison
Prices can vary by location and supplier, but this provides a general estimate.
| Part / Service | Estimated Cost |
|---|---|
| New OEM Module | $700 - $900 |
| Used OEM Module | $100 - $200 |
| Shop Labor (Replacement) | $120 - $180 (Approx. 1 hour) |
| Shop Labor (Programming & Calibration) | $200 - $400 (Approx. 1.5-2.5 hours) |
Frequently Asked Questions (FAQ)
Can I install a used camera module myself and then drive to the dealer?
Yes. The physical installation is manageable for a DIYer. The vehicle will drive normally without the camera system functioning. You can then schedule an appointment with a dealer or specialist shop for the required programming and calibration.
My screen is black, but only for the rear camera. Is the module bad?
Probably not. If only one camera view is failing, the issue is most likely with that specific camera or its wiring harness. Water intrusion into the camera itself is a very common failure point. The control module is more likely to be the cause when all camera views fail simultaneously.
What tools are needed to program the module?
Programming requires proprietary Jaguar Land Rover diagnostic software. For a 2016 model, this is called Symptom Driven Diagnostics (SDD). Newer vehicles use a system called Pathfinder. These are professional-grade tools and are not something a typical DIY mechanic would own.
Does the module have to be from another Range Rover Sport?
While the part number is used across several Land Rover models from the same era (like the Evoque and Discovery Sport), it is always safest to source a part from the exact same model and year range. Regardless of the source vehicle, it will still need to be reprogrammed to your specific vehicle's VIN and configuration file (CCF).
Technical Specifications
OEM Part Numbers: FW93-14F026-BL FW93-14F026-BM LR060918 LR072223 LR075250 LR081553 LR094043 T4N13408
Location: Under driver's seat. Connectors: Typically 7 electrical connectors.
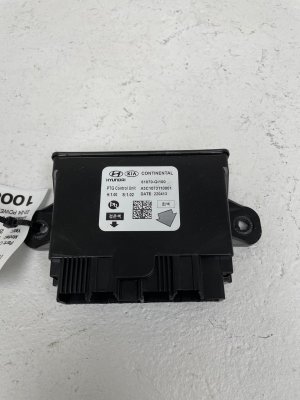
We Have This Part in Stock





The information in this article is provided for general reference and educational purposes only. Vehicle specifications, procedures, and part compatibility can vary by production date, trim level, and region. Always consult your vehicle's factory service manual and verify part numbers before purchasing or performing repairs. Safety-critical components such as airbags, seat belts, and braking systems should be installed by a qualified professional.
- Land Rover Range Rover Sport:
- 🛍️ Shop This Part
- Symptoms of a Failing Camera Control Module
- Diagnostic Trouble Codes (DTCs)
- Known Issues, Recalls, and Technical Service Bulletins (TSBs)
- Buying a Used Park Assist Camera Control Module
- Programming and Calibration Requirements
- Replacement Location and Procedure
- Cost Comparison
- Frequently Asked Questions (FAQ)
- 🎟️ Get 5% Off