

2010-2016 Panamera 4.8L V8 Oxygen Sensors: A Guide to Part Numbers, Codes, and Replacement
This definitive guide decodes the four different oxygen sensors used on the Panamera 4.8L V8, helping you diagnose check engine lights and choose the correct part.
- Part number verification is critical. The 4.8L V8 uses different upstream sensors for Naturally Aspirated and Turbo models. Always confirm the part number with your VIN.
- Codes P0420 and P0430 do not always mean a bad catalytic converter. A failing downstream O2 sensor can also trigger these codes and should be considered as a first diagnostic step.
- Used OEM (Bosch) sensors are a reliable, cost-effective option. They are superior to cheap, new aftermarket sensors that lack the specific calibration for the Panamera's ECU.
- Replacement is a feasible DIY job for those with moderate experience, with all four sensors accessible from the top of the engine bay after removing a heat shield.
The Most Common Problem: Identifying the Correct Sensor

The biggest challenge when replacing an oxygen sensor on a 2010-2016 Porsche Panamera is identifying the correct part. Porsche used different sensors for the front (upstream) and rear (downstream) positions, and critically, different parts for Naturally Aspirated (S, 4S, GTS) and Turbocharged (Turbo, Turbo S) versions of the 4.8L V8 engine. Installing the wrong sensor, even if it physically fits, can cause persistent check engine lights and performance issues.
Warning: Always verify the exact part number from your specific vehicle or by using your VIN with a parts catalog before ordering. Forum posts and even some parts websites have conflicting information. Bank 1 is the passenger side (Right) and Bank 2 is the driver side (Left) for the US market.
Panamera 4.8L V8 Oxygen Sensor Part Numbers
Below is a breakdown of the known OEM part numbers. Note that Porsche often updates part numbers; the latest number will supersede previous versions.
| Position | Engine Type | Part Number(s) | Typical OE Brand |
|---|---|---|---|
| Front (Upstream), Left (Driver Side, Bank 2) | Turbo / Turbo S | 97060612302 (replaces 97060612301) | Bosch |
| Front (Upstream), Right (Passenger Side, Bank 1) | Turbo / Turbo S | 97060612401 / 97060612402 | Bosch |
| Rear (Downstream), Left (Driver Side, Bank 2) | Naturally Aspirated & Turbo | 97060617302 (replaces 97060617301) | Bosch |
| Rear (Downstream), Right (Passenger Side, Bank 1) | Naturally Aspirated & Turbo | 97060617402 (replaces 97060617401) | Bosch |
| Front (Upstream), Left/Right | Naturally Aspirated (S, 4S, GTS) | 97060612801 / 97060612901 | Bosch |
Note: The Naturally Aspirated front sensors differ from the Turbo models. The rear sensors are often listed as compatible with both engine types. This complexity makes verifying part numbers essential.
Symptoms of a Failing Oxygen Sensor

A bad oxygen sensor will almost always trigger a Check Engine Light (CEL). Beyond that, you may notice more subtle performance issues.
- Check Engine Light (CEL): This is the most common symptom. Codes often point to heater circuit malfunctions, slow response, or catalyst inefficiency.
- Poor Fuel Economy: A failing upstream sensor can send incorrect data to the ECU, causing the engine to run too rich and waste fuel.
- Rough Idle or Engine Hesitation: Incorrect air-fuel mixture can lead to drivability problems like surging or stumbling.
- Failed Emissions Test: The vehicle's onboard diagnostics will fail an emissions inspection if O2 sensor-related fault codes are present.
Common Diagnostic Trouble Codes (DTCs)
- P0140 / P0141 (Bank 1, Sensor 2): These codes indicate a fault with the downstream (post-cat) sensor on the passenger side, often related to the sensor's internal heater circuit.
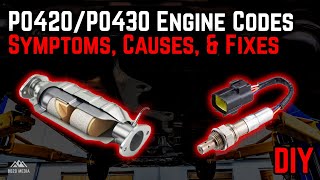
- P0420 (Bank 1) / P0430 (Bank 2): These codes mean "Catalyst System Efficiency Below Threshold." While they can indicate a failing catalytic converter, they are frequently caused by a lazy or failing downstream oxygen sensor that can no longer accurately report the converter's status. It is wise to diagnose the O2 sensors before replacing expensive catalytic converters. 🎬 Watch: Understanding P0420 and P0430 codes before you buy parts.
- P2270 / P2272: "O2 Sensor Signal Stuck Lean Bank 1/2 Sensor 2".
- P2096 / P2098: "Post Catalyst Fuel Trim System Too Lean Bank 1/2". These codes were noted in a Porsche TSB for a later model but point directly to failing rear O2 sensors.
Buying a Used Oxygen Sensor: What to Check

A low-mileage used OEM oxygen sensor can be a reliable and cost-effective alternative to expensive new parts, and a much safer bet than a cheap aftermarket sensor. Here’s what to inspect:
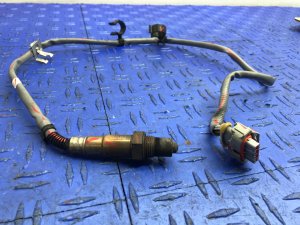
- Verify the Part Number: This is the most important step. Match the OEM number stamped on the sensor housing or connector to the one you need. Do not rely on visual similarity alone.
- Inspect the Electrical Connector: Check for any signs of corrosion (green or white powder), bent pins, or cracks in the plastic housing. The connector should be clean and undamaged.
- Examine the Wiring Harness: Look for any cuts, melting, or brittleness in the wire insulation. The wires should be flexible and intact from the sensor body to the connector.
- Check the Sensor Tip: A properly functioning sensor should have a light tan or grayish deposit on the tip. Avoid sensors with heavy, black, oily soot (indicating an engine burning oil) or a white, chalky appearance (coolant contamination). Physical damage to the protective cage is a major red flag.
- Ask About Mileage: While sensors don't have a fixed lifespan, lower mileage is always better. A sensor from a vehicle with under 80,000 miles is preferable.
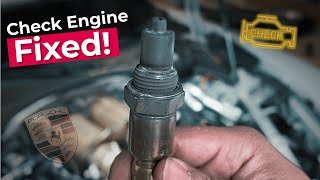
Pro Tip: Porsche uses Bosch as the Original Equipment Manufacturer (OEM) for these sensors. A used sensor with a Bosch logo and the Porsche part number is an excellent value. It is often a better choice than a new, non-OEM aftermarket sensor, which may not be calibrated to the exact specifications 🎬 See how to save hundreds by using the right OEM sensors. of the Panamera's sensitive ECU.
Cost Comparison for a Single Oxygen Sensor
| Part Type | Estimated Price Range | Notes |
|---|---|---|
| New OEM (Dealer) | $300 - $420 | Highest cost, but guaranteed correct part and latest revision. |
| New OE (Bosch) | $70 - $150 | The same part as OEM without the Porsche logo. Excellent quality and value. |
| New Aftermarket | $40 - $100 | Quality and compatibility can vary widely. May cause persistent codes. |
| Used OEM | $40 - $90 | Cost-effective choice if properly inspected from a low-mileage vehicle. |
| Shop Labor | $200 - $900+ | Dealer labor rates are very high. An independent shop will be more affordable. Price varies based on which of the four sensors is being replaced. |
Installation Guide & Difficulty

Replacing the oxygen sensors on a Panamera 4.8L V8 is a moderately difficult DIY job that can be done with common tools and a special socket.
- Difficulty Rating: 3 out of 5
- Estimated Time: 1.5 - 2.5 hours
- Tools Required: Ratchet, 10mm socket/wrench, 22mm slotted oxygen sensor socket, pick tools (for clips), anti-seize compound.
Basic Replacement Steps
- Access the Sensors: All four sensors are accessed from the top of the engine bay. Remove the plastic engine cover and the metal stabilizer bar that runs across the top of the engine.
- Remove Heat Shield: Unbolt and remove the aluminum heat shield over the catalytic converter/exhaust manifold. This will expose both the upstream and downstream sensors for that bank.
- Disconnect Electrical Connector: Carefully trace the sensor wire to its connector. Unclip it from any mounting points and disconnect it. This should be done before trying to unscrew the sensor to prevent twisting and damaging the wires.
- Remove the Old Sensor: Using a 22mm oxygen sensor socket, break the old sensor loose and unscrew it from the exhaust pipe. These can be very tight, so a good quality tool and some penetrating oil may be necessary.
- Install the New Sensor: Apply a small amount of anti-seize lubricant to the threads of the new sensor, being careful not to get any on the sensor tip. Thread it in by hand to avoid cross-threading, then tighten it to specification with the socket. 🎬 Watch this step-by-step walkthrough of the O2 sensor replacement process.
- Reconnect and Reassemble: Plug in the new sensor's electrical connector, re-secure the wiring, and reinstall the heat shield, stabilizer bar, and engine cover. The check engine light should clear on its own after a few drive cycles (20-50 miles).
Known Issues, Recalls, and TSBs

While there are no specific recalls for oxygen sensors on the 2010-2016 Panamera, there is one major safety recall for this generation you should be aware of.
- NHTSA Recall 19V322000: This recall addresses a condition where water can enter the air conditioner blower control unit, potentially causing an electrical short and increasing the risk of a fire. The fix involves a dealer installing a new relay harness and resealing the unit. You can check if your vehicle is affected by entering your VIN on the NHTSA website.
Frequently Asked Questions (FAQ)
Can I replace just one bad oxygen sensor?
Yes, you can replace only the failed sensor. However, oxygen sensors degrade over time. If one has failed due to high mileage (over 80k-100k miles), the others are likely nearing the end of their service life. For best performance, it's often recommended to replace them in pairs (e.g., both upstream sensors or both downstream sensors).
My mechanic says my P0420 code means I need a new catalytic converter. Is that true?
Not always. A P0420 or P0430 code means the downstream oxygen sensor is detecting that the catalytic converter isn't working efficiently. This can be because the converter is bad, OR because the downstream sensor itself is old and slow, giving a false reading. It's often more cost-effective to replace the downstream O2 sensor first, clear the codes, and see if the problem returns before committing to a very expensive catalytic converter replacement.
Will a cheap universal oxygen sensor work?
It is not recommended. Universal sensors require you to cut and splice wires, which can introduce connection problems. More importantly, they are not precisely calibrated for the Panamera's engine management system and can lead to incorrect fuel trim, poor performance, and persistent check engine lights. Using a used OEM or new OE Bosch sensor is a much more reliable option.
Do I need a special tool to replace an oxygen sensor?
It is highly recommended. An oxygen sensor socket is a special deep socket with a slot down the side to accommodate the sensor's wire. While some people manage with a standard 22mm wrench, the sensors are often in tight spaces and torqued down firmly, making the special socket the right tool for the job.
Helpful Videos
Technical Specifications
OEM Part Numbers: 97060612302 97060612301 97060612402 97060612401 97060617302 97060617301 97060617402 97060617401 97060612801 97060612901
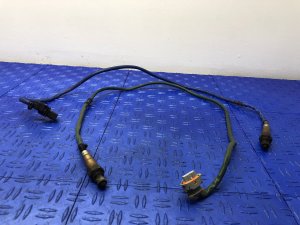
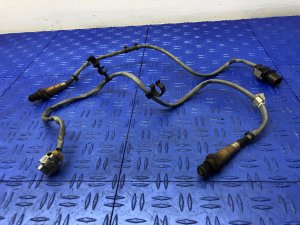
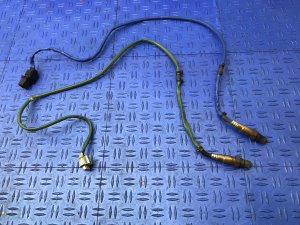
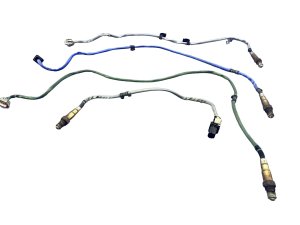
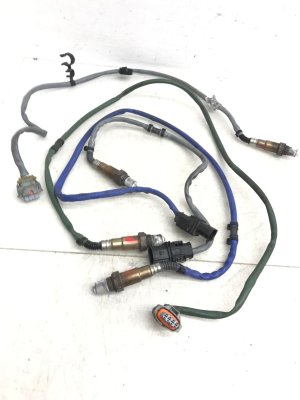
Four sensors required for 4.8L V8 models. Upstream sensors are wide-band type with 5 or 6 wires. Downstream sensors are narrow-band type with 4 wires. Thread size is 18mm, and the hex size for removal is 22mm.
We Have This Part in Stock

The information in this article is provided for general reference and educational purposes only. Vehicle specifications, procedures, and part compatibility can vary by production date, trim level, and region. Always consult your vehicle's factory service manual and verify part numbers before purchasing or performing repairs. Safety-critical components such as airbags, seat belts, and braking systems should be installed by a qualified professional.
- Porsche Panamera:
- 🎬 Helpful Videos
- 🛍️ Shop This Part
- The Most Common Problem: Identifying the Correct Sensor
- Panamera 4.8L V8 Oxygen Sensor Part Numbers
- Symptoms of a Failing Oxygen Sensor
- Common Diagnostic Trouble Codes (DTCs)
- Buying a Used Oxygen Sensor: What to Check
- Cost Comparison for a Single Oxygen Sensor
- Installation Guide & Difficulty
- Basic Replacement Steps
- Known Issues, Recalls, and TSBs
- Frequently Asked Questions (FAQ)
- 🎟️ Get 5% Off