

2018-2025 Honda Odyssey Oxygen Sensor: Decoding Failures and Check Engine Lights
This guide explains the four different oxygen sensors on your V6 Odyssey, how to diagnose them, and why a fuel injector issue might be the real culprit behind your check engine light.
- A known fuel injector issue (Honda TSB 20-039) on 2018-2019 models is a common root cause of O2 sensor and catalytic converter failure.
- Your Odyssey has four oxygen sensors that are not interchangeable; you must get the correct one for the specific location (Bank 1/2, Upstream/Downstream).
- Using an OEM sensor (new or used) or a high-quality OEM supplier like Denso or NTK is strongly recommended over cheap aftermarket sensors to avoid compatibility issues.
- The downstream sensor may be listed as part of a large, expensive converter assembly, but it can be unscrewed and replaced individually.
Identifying the Four Oxygen Sensors

The 3.5L V6 engine in the 2018-2025 Honda Odyssey has two exhaust manifolds, one for each bank of cylinders. Each bank has its own catalytic converter and two oxygen sensors, making four in total. They are not interchangeable, so it's critical to identify the correct one before ordering a replacement.
| Sensor Name & Location | Common Name | Function | Typical Location |
|---|---|---|---|
| Bank 1, Sensor 1 (B1S1) | Upstream, Rear (by firewall) | Measures air/fuel mixture from the rear cylinders. | In the exhaust manifold or pipe before the rear catalytic converter. Often the most difficult to access. |
| Bank 1, Sensor 2 (B1S2) | Downstream, Rear (by firewall) | Monitors the efficiency of the rear catalytic converter. | Screwed into the rear catalytic converter assembly, after the converter itself. |
| Bank 2, Sensor 1 (B2S1) | Upstream, Front (by radiator) | Measures air/fuel mixture from the front cylinders. | In the exhaust manifold or pipe before the front catalytic converter. Generally easier to access. |
| Bank 2, Sensor 2 (B2S2) | Downstream, Front (by radiator) | Monitors the efficiency of the front catalytic converter. | Screwed into the front catalytic converter assembly, after the converter itself. |
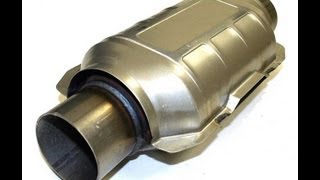
Warning: Honda sells the downstream oxygen sensor (Bank 1, Sensor 2) as part of a large, expensive assembly with the rear catalytic converter (Part No. 18150-5MR-A51). However, the sensor itself can be unscrewed and replaced individually. You do not need to replace the entire assembly unless the catalytic converter has also failed.
Known Issues: Faulty Fuel Injectors Destroying Sensors

A significant known issue for 2018-2019 Honda Odyssey models involves faulty fuel injectors. Honda issued Technical Service Bulletin (TSB) 20-039 for this problem. 🎬 Watch: Honda's free fuel injector replacement process The faulty injectors can cause a rich fuel condition, leading to fouled spark plugs, misfires, and contamination of the oxygen sensors and catalytic converters.
If your Odyssey has a check engine light with codes for an oxygen sensor or catalytic converter inefficiency (like P0420 or P0430), it is crucial to check if the fuel injectors are the root cause. Simply replacing the O2 sensor without addressing a faulty injector will likely lead to the new sensor failing prematurely.
Symptoms of a Failing Oxygen Sensor


The most obvious sign of a bad O2 sensor is a check engine light on your dashboard. However, other performance issues can appear even before the light comes on.
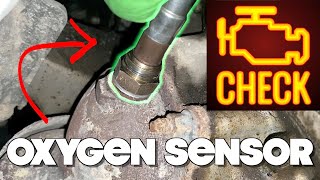
- Check Engine Light: This is the most common symptom. The stored codes will point to a specific sensor or circuit.
- Poor Fuel Economy: A failing upstream (A/F) sensor can send incorrect data, causing the engine to use more fuel than necessary. You might notice you're filling up the tank more often.
- Rough Idle or Misfires: An incorrect air-fuel mixture can lead to engine hesitation, stumbling, or a rough feeling at idle.
- Failed Emissions Test: The O2 sensors are a primary component of the emissions system. A failing sensor will almost always cause the vehicle to fail a smog check.
Common Diagnostic Trouble Codes (DTCs)
If the check engine light is on, a code scanner will likely show one of the following codes related to the O2 sensors:
- P0130-P0135: Issues with Bank 1, Sensor 1 (Upstream, Rear)
- P0136-P0141: Issues with Bank 1, Sensor 2 (Downstream, Rear)
- P0150-P0155: Issues with Bank 2, Sensor 1 (Upstream, Front)
- P0156-P0161: Issues with Bank 2, Sensor 2 (Downstream, Front)
- P0420: Catalyst System Efficiency Below Threshold (Bank 1) - Often related to a bad downstream O2 sensor or a failing catalytic converter. 🎬 Watch: How to diagnose P0420 and P0430 codes
- P0430: Catalyst System Efficiency Below Threshold (Bank 2) - Often related to a bad downstream O2 sensor or a failing catalytic converter.
Buying a Used Oxygen Sensor
A used OEM oxygen sensor can be a reliable and cost-effective alternative to expensive new parts, especially when compared to low-quality aftermarket options. Here’s what to look for:
- Verify Compatibility: Double-check that the sensor is for the correct location (Bank 1/2, Sensor 1/2). They are physically different and electronically incompatible. Match the part number exactly if possible.
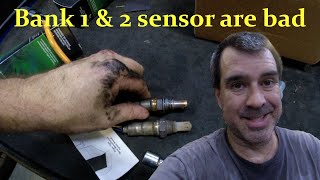
- Inspect the Wiring and Connector: Do not buy a sensor with cut or frayed wires. Ensure the plastic connector is not cracked or broken and that the pins inside are not corroded or bent.
- Examine the Sensor Tip: The tip that enters the exhaust stream should be free of heavy, oily, or black, sooty deposits. A light gray or tan coating is normal, but a thick, oily residue suggests the donor vehicle had severe engine problems (like the fuel injector issue mentioned above), and the sensor may be compromised.
- Check the Threads: The threads should be clean and undamaged. Stripped or cross-threaded threads will make installation impossible.
- Why Used OEM is Often Better: The engine computer in your Odyssey is finely tuned to work with the specific resistance and response time of the original equipment (OEM) sensors, which are typically made by Denso or NTK. Cheap aftermarket sensors often have different specifications, which can lead to persistent check engine lights, poor performance, and incorrect fuel trim readings even when the sensor is brand new. A low-mileage used OEM sensor is often a more reliable choice.
Installation Guide
Replacing an oxygen sensor is a manageable DIY job for most people with the right tools, but access can be tight, especially for the rear (Bank 1) sensors.
🎬 See this walkthrough: Replacing Bank 1 O2 sensors- Difficulty: 2/5 for front sensors, 4/5 for the rear upstream sensor.
- Estimated Time: 0.5 - 1.5 hours per sensor.
- Required Tools:
- 22mm (or 7/8") Oxygen Sensor Socket (this has a slot for the wire)
- Ratchet and various extensions
- Penetrating oil (like PB Blaster or Kroil)
- Anti-seize compound (for the new sensor's threads)
- Torque wrench
General Replacement Steps
- Let the exhaust cool down completely.
- Locate the faulty sensor. Trace the wire from the sensor to its electrical connector and disconnect it.
- Spray the base of the sensor where it screws into the exhaust pipe with penetrating oil. Let it soak for at least 15-30 minutes. Stubborn sensors may need multiple applications or heat from a torch (use extreme caution).
- Place the O2 sensor socket over the sensor and use a ratchet to loosen it.
- Lightly coat the threads of the replacement sensor with anti-seize compound. Be careful not to get any on the sensor tip.
- Thread the new sensor in by hand to avoid cross-threading, then tighten it with the torque wrench to the manufacturer's specification (typically around 33 ft-lbs).
- Route the wire and plug in the electrical connector. Ensure the wire is secured away from hot exhaust components.
- If the battery was disconnected, you may need to perform an idle relearn procedure. Otherwise, start the vehicle and check that the check engine light has turned off (you may need to clear the codes with a scanner).
Cost Comparison
Prices can vary, but this gives a general idea of the cost for a single oxygen sensor.
| Part Type | Estimated Cost |
|---|---|
| New OEM Sensor | $150 - $250 |
| New Aftermarket (Denso/NTK) | $80 - $150 |
| New Aftermarket (Budget) | $30 - $70 |
| Used OEM Sensor | $40 - $80 |
| Shop Labor (per sensor) | $100 - $200 |
Pro Tip: The upstream Air/Fuel Ratio sensors are typically more expensive than the downstream monitoring sensors.
Frequently Asked Questions (FAQ)
What's the difference between an Air/Fuel Ratio Sensor and an Oxygen Sensor?
They are both types of oxygen sensors, but they have different jobs. 'Air/Fuel Ratio Sensor' is the name for the upstream sensor (Sensor 1) that provides wide-range readings for precise fuel control. 'Oxygen Sensor' is often used to refer to the downstream sensor (Sensor 2), which is a simpler switch-type sensor that just monitors if the catalytic converter is working.
Can I clean my old oxygen sensor instead of replacing it?
While some people attempt to clean O2 sensors, it is generally not a reliable or long-lasting repair. The sensing element inside can become contaminated or simply wear out. Given the labor involved in removing the sensor, replacement is the recommended solution.
Why did my check engine light come back after replacing the O2 sensor?
This can happen for a few reasons. The most likely cause on these Odysseys is an underlying issue, such as the faulty fuel injectors described in TSB 20-039. Other causes include using a cheap, incompatible aftermarket sensor, an exhaust leak near the sensor, or a wiring problem between the sensor and the engine computer.
Do I need to replace all four sensors at once?
No, you only need to replace the sensor that has failed. They do not need to be replaced in pairs or sets. However, they have a similar lifespan, so if one fails due to high mileage, another may not be far behind.
Helpful Videos
Technical Specifications
OEM Part Numbers: 18150-5MR-A51 (Rear Converter Assembly) 36532-6A0-A01 (Bank 1, Sensor 2) 36531-6A0-A01 (Bank 2, Sensor 2) 36531-RLV-A01 (Bank 1, Sensor 1) 36531-RCA-A02 (Bank 2, Sensor 1)
Socket Size: 22mm (7/8"). Thread Pitch: M18x1.5. Upstream sensors are wideband Air/Fuel Ratio type; downstream sensors are switching-type Zirconia.
We Have This Part in Stock

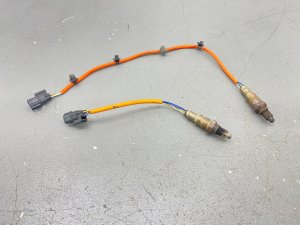
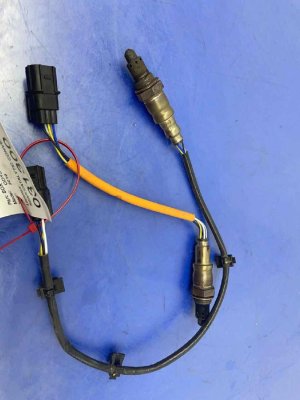
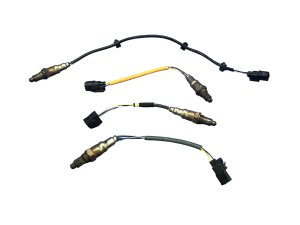
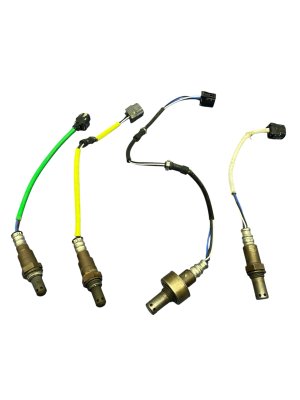

The information in this article is provided for general reference and educational purposes only. Vehicle specifications, procedures, and part compatibility can vary by production date, trim level, and region. Always consult your vehicle's factory service manual and verify part numbers before purchasing or performing repairs. Safety-critical components such as airbags, seat belts, and braking systems should be installed by a qualified professional.
- Honda Odyssey:
- 🎬 Helpful Videos
- 🛍️ Shop This Part
- Identifying the Four Oxygen Sensors
- Known Issues: Faulty Fuel Injectors Destroying Sensors
- Symptoms of a Failing Oxygen Sensor
- Common Diagnostic Trouble Codes (DTCs)
- Buying a Used Oxygen Sensor
- Installation Guide
- General Replacement Steps
- Cost Comparison
- Frequently Asked Questions (FAQ)
- 🎟️ Get 5% Off