

Genesis G70, Kia K900 & Stinger 3.3T Upstream Oxygen Sensor: Bank 2 Failure, Diagnosis, and Replacement
Diagnose a faulty upstream oxygen sensor on your 3.3L twin-turbo engine and understand related issues like the Stinger wiring harness recall before you buy a replacement.
- This guide is for the upstream, driver's side oxygen sensor (Bank 2, Sensor 1), OEM part number 39210-3L010.
- On 2018 Kia Stingers, a wiring harness recall (SC170) can cause identical symptoms and must be checked before replacing the sensor.
- Ignoring a failed oxygen sensor can lead to costly catalytic converter damage over time.
- A used OEM sensor is often a more reliable choice than a cheap new aftermarket part due to better compatibility with the factory ECU.
Symptoms of a Failing Upstream Oxygen Sensor


A failing Bank 2 (driver's side) upstream oxygen sensor in the Genesis G70, Kia K900, or Kia Stinger will typically trigger the Check Engine Light. The vehicle's computer relies on this sensor for critical fuel adjustments, and a bad signal can cause noticeable performance issues. You may experience one or more of the following symptoms:
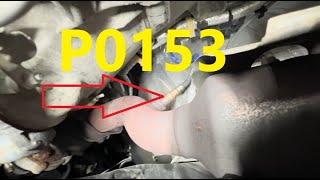
- Check Engine Light: This is the most common symptom. The ECU will store diagnostic trouble codes (DTCs) specific to the Bank 2, Sensor 1 circuit. Common codes include P0150, P0151, P0152, P0153, P0154, and P0155. 🎬 Watch: Understanding P0153 codes and how to fix slow sensor response.
- Poor Fuel Economy: If the sensor sends a false 'lean' signal (too much oxygen), the ECU will inject excess fuel, causing your gas mileage to drop significantly.
- Rough Idle and Misfires: An incorrect air-fuel mixture disrupts smooth combustion, leading to a shaky or vibrating idle and potential engine misfires.
- Sluggish Acceleration: With the ECU unable to properly manage the fuel mixture, engine power and throttle response can feel noticeably reduced.
- Black Smoke or Rotten Egg Smell: A rich-running condition caused by a bad sensor can lead to unburned fuel exiting the exhaust, which may appear as black smoke or create a sulfur-like, rotten egg smell as it damages the catalytic converter.
Warning: Driving for an extended period with a faulty upstream oxygen sensor can lead to expensive damage. The incorrect air-fuel mixture can overheat and destroy the catalytic converter, a much more costly repair.
Known Issues and Recalls

While the oxygen sensors themselves are not subject to a specific recall, other vehicle issues can cause identical symptoms or lead to sensor failure. It is crucial to rule these out before replacing the sensor.
2018 Kia Stinger Front Wiring Harness Recall (SC170)
For 2018 Kia Stinger models, a significant safety recall (NHTSA Campaign: 18V-754, Kia Recall: SC170) was issued for the front wiring harness. A sharp edge on the left fender apron panel in the engine bay could chafe and damage the harness insulation, leading to an electrical short.
This is highly relevant because the Bank 2 (driver's side) oxygen sensor wiring is part of this harness. Symptoms of this wiring damage include an illuminated Check Engine Light and the vehicle entering a reduced-power 'limp mode,' which can easily be misdiagnosed as a failed oxygen sensor. Before replacing the sensor on a 2018 Stinger, it is essential to have a dealer verify that this recall has been performed and to inspect the harness in that area for any signs of damage.
3.3T Turbocharger Oil Pipe Leak Recall
A recall was also issued for the 2019-2023 Genesis G70, 2019-2020 Kia K900, and 2018-2023 Kia Stinger for a left turbocharger oil feed pipe that could crack and leak oil onto the exhaust manifold. While not directly related to sensor electronics, leaking oil can contaminate the sensor's exterior and wiring, potentially causing damage or inaccurate readings over time.
Buying a Used Oxygen Sensor
A used OEM oxygen sensor can be a reliable and cost-effective alternative to expensive new dealer parts and questionable aftermarket options. For a sensitive component like an air-fuel ratio sensor, sticking with the original equipment manufacturer (OEM) design is often the best choice for compatibility and performance. Here’s what to check:
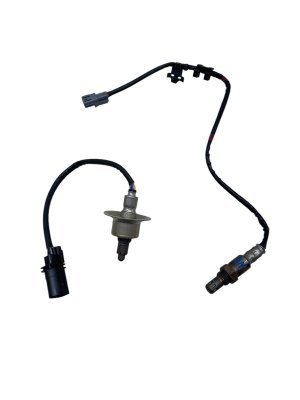
- Verify the Part Number: The most critical step. Ensure the part is stamped with the correct OEM number, 39210-3L010. This specific part is for Bank 2 (Driver's Side), Sensor 1 (Upstream). Do not confuse it with the Bank 1 sensor or the downstream sensors, as they are not interchangeable.
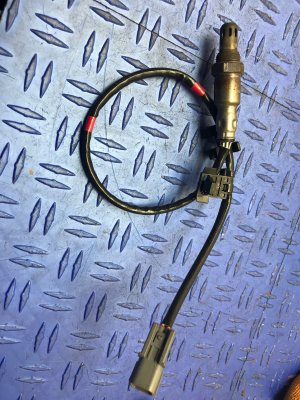
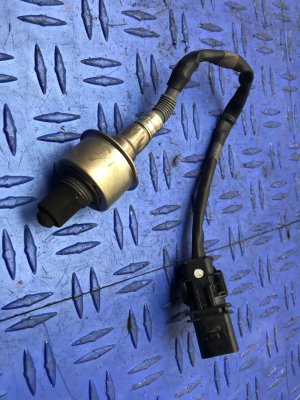
- Inspect the Wiring and Connector: Carefully examine the entire length of the wire pigtail and the plastic electrical connector. Look for any signs of cuts, melting, abrasion, or stretched wires. The connector should be free of cracks, and the locking tab should be intact.
- Check the Sensor Tip: The sensor tip should be free of any heavy, oily residue, which could indicate it came from an engine with severe internal problems. A light gray or tan coating is normal. Avoid sensors that are caked in black, sooty carbon.
- Consider Mileage and Source: A sensor from a lower-mileage, collision-damaged vehicle is an ideal candidate. Ask the seller for the VIN and mileage of the donor vehicle if possible.
- Why Used OEM vs. New Aftermarket: OEM sensors are designed and calibrated specifically for your vehicle's ECU. While some high-quality aftermarket brands like NGK or Bosch are reputable, many cheaper aftermarket sensors can have different heater resistances or slower response times, leading to persistent check engine lights or poor performance. A good, tested used OEM part is often more reliable than a new, low-quality aftermarket sensor.
Cost Comparison for Oxygen Sensor Replacement
| Part Type | Estimated Cost |
|---|---|
| New OEM (Dealer) | $275 - $460 |
| New Aftermarket | $50 - $160 |
| Used OEM | $75 - $125 |
| Shop Labor | $75 - $150 |
Replacement Overview

Replacing the Bank 2, Sensor 1 oxygen sensor is a moderately difficult job that a DIYer with the right tools can perform.
- Difficulty: 3 out of 5. The main challenge is the sensor being seized in the exhaust pipe due to extreme heat and corrosion. Access can also be tight.
- Location: The Bank 2 (driver's side) upstream sensor is located in the exhaust manifold or the upper section of the downpipe, just after the turbocharger. You will access it from the engine bay.
- Tools Required:
- Ratchet with extensions
- 22mm Oxygen Sensor Socket (this has a slot for the wire)
- Penetrating oil (e.g., PB Blaster)
- Anti-seize compound (many new sensors come with it pre-applied)
- Torque wrench
Pro Tip: To avoid a seized sensor, liberally spray the base of the old sensor with penetrating oil while the exhaust is warm (not hot). Let it soak for at least 30 minutes, or even overnight if possible, before attempting removal. This can save you from a stripped thread and a much bigger headache.
Frequently Asked Questions
How do I know which of the four oxygen sensors is bad?
You must use an OBD-II scanner to read the trouble codes. Codes P0150 through P0155 point to the Bank 2, Sensor 1 (Upstream Left) sensor. Codes in the P013x range point to Bank 1 (Passenger Side), and codes like P0137 or P0157 point to the downstream (Sensor 2) sensors.
Can I clean an oxygen sensor instead of replacing it?
While some online sources suggest cleaning a sensor, it is generally not a reliable or long-term solution. The delicate internal sensing elements can become contaminated or simply wear out. If the sensor is failing electronically, cleaning will have no effect. Replacement is the only guaranteed fix.
What is the difference between an upstream and a downstream oxygen sensor?
The upstream sensor (Sensor 1) is for fuel control. It reads the raw exhaust gas and helps the ECU make rapid adjustments to the air-fuel ratio. The downstream sensor (Sensor 2), located after the catalytic converter, primarily monitors the converter's efficiency. They are different types of sensors and are not interchangeable.
Do I need to reset the computer after replacing the oxygen sensor?
Yes, after replacing the sensor, you should use an OBD-II scanner to clear the stored trouble codes. This will turn off the check engine light. The ECU will then begin to use the data from the new sensor to adjust fuel trims.
Helpful Videos
Technical Specifications
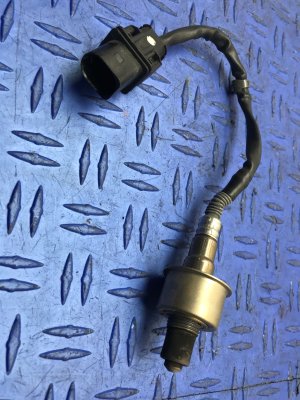
OEM Part Numbers: 39210-3L010
Position: Upstream Left (Bank 2, Sensor 1). Type: Air-Fuel Ratio Sensor (Wideband). Connector: Vehicle-specific 5-pin connector.
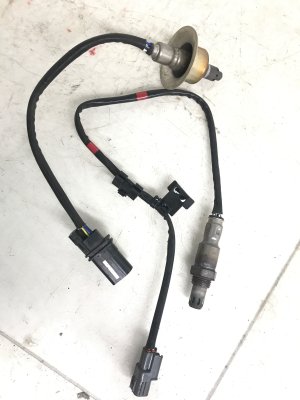
We Have This Part in Stock

The information in this article is provided for general reference and educational purposes only. Vehicle specifications, procedures, and part compatibility can vary by production date, trim level, and region. Always consult your vehicle's factory service manual and verify part numbers before purchasing or performing repairs. Safety-critical components such as airbags, seat belts, and braking systems should be installed by a qualified professional.
- Genesis G70:
- Kia K900:
- Kia Stinger:
- 🎬 Helpful Videos
- 🛍️ Shop This Part
- Symptoms of a Failing Upstream Oxygen Sensor
- Known Issues and Recalls
- 2018 Kia Stinger Front Wiring Harness Recall (SC170)
- 3.3T Turbocharger Oil Pipe Leak Recall
- Buying a Used Oxygen Sensor
- Cost Comparison for Oxygen Sensor Replacement
- Replacement Overview
- Frequently Asked Questions
- 🎟️ Get 5% Off