

2017-2026 Pacifica & Voyager Oxygen Sensors: A Guide to the Four Different O2 Sensors
This guide explains the critical differences between the four unique oxygen sensors on your Chrysler Pacifica or Voyager, and how to choose the right one to fix your check engine light.
- These vehicles use four different, non-interchangeable oxygen sensors. You must identify the correct one by its location (Bank 1/Rear vs. Bank 2/Front, and Upstream vs. Downstream) before buying.
- Accessing the rear sensors (Bank 1) against the firewall is very difficult and labor-intensive compared to the easily accessible front sensors (Bank 2).
- Only use OEM Mopar sensors or OEM-supplier brands like NTK and Denso. The vehicle's computer is sensitive and often rejects other aftermarket brands, causing persistent issues.
- Before replacing a sensor, especially on the rear bank, inspect the area above it for oil leaks from the valve cover or oil filter housing, as leaking oil will destroy the new sensor.
Symptoms of a Failing Oxygen Sensor


The most common sign of a bad O2 sensor is a steady Check Engine Light on your dashboard. While you might not notice other issues at first, a failing sensor will cause problems over time. If the faulty sensor is an upstream one, the engine computer gets bad information and can no longer manage the fuel mixture correctly, leading to poor performance and increased fuel consumption. A bad downstream sensor is less critical for engine operation, but it means the system can't tell you if your expensive catalytic converter has stopped working.
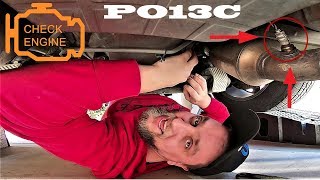
- Check Engine Light: This is the most common symptom. A scan tool will reveal specific codes that point to the exact sensor that has failed. Common codes include P0031, P0132, P0137, P0152, P0153, P0157, and P0158.
- Poor Fuel Economy: An incorrect air-fuel mixture caused by a bad upstream sensor will make your engine burn more gasoline than necessary.
- Rough Engine Performance: You may notice a rough or unstable idle, hesitation when you accelerate, engine misfires, or a general loss of power.
- Rotten Egg Smell or Black Smoke: In some cases, an overly rich fuel mixture can lead to a sulfur or "rotten egg" smell from the exhaust, and can even cause black smoke.
- Failed Emissions Test: A vehicle with a faulty O2 sensor will not pass a state emissions inspection.
The Four-Sensor System: A Critical Guide

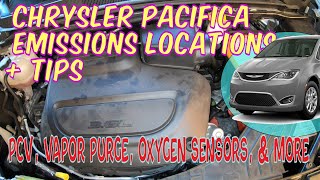
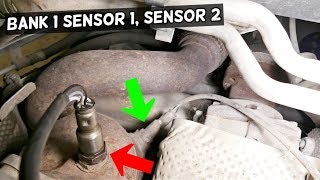
The 3.6L V6 engine used in the Chrysler Pacifica and Voyager is mounted sideways 🎬 Watch: Locate your Pacifica's emissions components and oxygen sensors (transversely). This means one cylinder bank faces the radiator (Bank 2) and the other faces the firewall (Bank 1). Each bank has its own upstream and downstream oxygen sensor, for a total of four. These four sensors are not interchangeable. You must replace the failed sensor with a new one that has the correct part number for that specific location.
Warning: Bank 1, located against the firewall, is notoriously difficult to access. Bank 2, near the radiator, is much easier to reach. Professional repair costs and DIY difficulty vary greatly depending on which sensor has failed.
| Location | Common Name | Function | Common DTCs |
|---|---|---|---|
| Bank 1, Sensor 1 (Rear/Firewall, Upstream) | B1S1 | Controls fuel mixture for rear cylinders. Critical for performance. | P0031, P0132, P0133 |
| Bank 1, Sensor 2 (Rear/Firewall, Downstream) | B1S2 | Monitors rear catalytic converter efficiency. | P0137, P0138, P0141 |
| Bank 2, Sensor 1 (Front/Radiator, Upstream) | B2S1 | Controls fuel mixture for front cylinders. Critical for performance. | P0152, P0153, P0155 |
| Bank 2, Sensor 2 (Front/Radiator, Downstream) | B2S2 | Monitors front catalytic converter efficiency. | P0157, P0158, P0161 |
Known Issues, TSBs, and Recalls

Oil Leaks Causing Sensor Failure
A well-known issue with the 3.6L Pentastar engine is the potential for oil leaks from the valve covers or the oil filter housing assembly. On the rear bank (Bank 1), leaking oil can drip directly onto the hot oxygen sensor and its electrical connector. This oil contamination will ruin the sensor and cause it to fail prematurely. If you are replacing a Bank 1 sensor, it is critical to inspect the area above it for any signs of fresh oil and repair the leak first.
Pacifica Plug-in Hybrid (PHEV) Recall
There is a specific safety recall (NHTSA 18V-740) for some 2017-2018 Chrysler Pacifica PHEV models. The remedy involves reprogramming the Powertrain Control Module (PCM). As part of this recall procedure, if the technician finds diagnostic trouble codes P0420 or P0430 (catalyst inefficiency), the dealer is instructed to replace the catalytic converters and the oxygen sensors. If you own a PHEV model from these years, check with a Chrysler dealer to see if this recall applies to your vehicle.
As of mid-2026, there are no widespread recalls or Technical Service Bulletins (TSBs) for oxygen sensor failures on the standard gasoline-powered Pacifica or Voyager models.
Buying a Used Oxygen Sensor
Oxygen sensors are sensitive electronic parts, but a low-mileage used OEM sensor is often a better choice than a cheap, new aftermarket part. The engine computers in these vans are known to be very sensitive to the brand of O2 sensor used, and using the wrong brand can lead to persistent check engine lights and performance problems.
- Trust OEM Brands Only: Stick to original Mopar parts or the direct OEM suppliers, which are typically NTK (a brand of NGK) or Denso. Many technicians report that other aftermarket brands do not communicate correctly with the Chrysler PCM. A used sensor from one of these trusted brands is a reliable option.
- Match the Part Number Exactly: This is the most important rule. Because the four sensors are different, you MUST match the part number from your old sensor to the number on the used part. Do not buy a sensor based on a generic description like "downstream" or "upstream." Verified part numbers for these vehicles include 5149171AB, 5149180AB, and their predecessors.
- Physical Inspection: When buying a used sensor, check for the following:
- Connector: The plastic connector should be free of cracks, and the pins inside should be straight and clean with no corrosion.
- Wiring: The wires should be flexible with no cuts, burns, or exposed copper.
- Threads: The threads that screw into the exhaust should be clean and undamaged.
- Sensor Tip: Inspect the tip for contamination. A light tan or grayish coating is normal. Avoid sensors with a heavy, black, sooty buildup (from a rich-running engine) or a white, ashy coating (from coolant or oil burning).
- Mileage: O2 sensors are wear items. Look for a used sensor from a vehicle with under 80,000 miles for the best remaining service life. Modern sensors can last over 100,000 miles, but their performance degrades over time.
Replacement Overview & Difficulty
- Difficulty Rating: 2/5 (Front/Bank 2) to 4/5 (Rear/Bank 1)
- Tools Needed: Jack and jack stands, penetrating oil, ratchet, and a special 7/8" (or 22mm) slotted oxygen sensor socket. 🎬 Watch: Step-by-step guide on how to replace an oxygen sensor
Replacing the front (Bank 2) sensors is straightforward for a DIY mechanic. They are easily accessible from the engine bay or from underneath the vehicle. However, replacing the rear (Bank 1) sensors is significantly more difficult due to the extremely tight space between the engine and the firewall. Even for professionals, accessing the Bank 1 sensors can be time-consuming. For any of the sensors, it is crucial to apply a generous amount of penetrating oil to the threads and let it soak before attempting removal, as they are often seized in the exhaust pipe from heat and rust.
Pro Tip: When installing the new or used sensor, apply a small amount of high-temperature anti-seize compound to the threads, being careful not to get any on the sensor tip itself. This will make future removal much easier.
Cost of Replacement
The cost to replace an oxygen sensor varies widely depending on the sensor's location and whether you do the work yourself.
| Part or Service | Estimated Cost |
|---|---|
| New OEM (Mopar) Sensor | $120 - $190 per sensor |
| New Aftermarket (NTK/Denso) Sensor | $50 - $90 per sensor |
| Used OEM Sensor | $25 - $60 per sensor |
| Shop Labor (Professional Installation) | $135 - $215 per sensor |
| Total Professional Replacement | $520 - $630 (for one sensor) |
Frequently Asked Questions (FAQ)
Do I have to replace all four oxygen sensors at once?
No, you only need to replace the specific sensor that has failed and triggered the trouble code. However, if your vehicle has high mileage (over 100,000 miles), the other sensors may be nearing the end of their service life. Some mechanics recommend replacing them in pairs (e.g., both upstream sensors at the same time).
Are the oxygen sensors the same for the gas and Plug-in Hybrid (PHEV) Pacifica?
Some part numbers are shared between both the standard 3.6L gas engine and the 3.6L PHEV engine. However, fitment can be very specific. The only way to guarantee compatibility is to match the OEM part number from the sensor you are replacing. Do not assume a sensor will fit just because it is for a Pacifica.
Do I need to reset the computer after replacing an O2 sensor?
After replacing the sensor, the Check Engine Light should turn off on its own after a few drive cycles. However, it is best practice to use an OBD-II scan tool to clear the trouble codes from the computer's memory immediately after the repair.
Why is it so important to use an OEM/Mopar or NTK/Denso sensor?
The Powertrain Control Module (PCM) in Chrysler vehicles is calibrated to the specific voltage signals and warm-up times of the original factory sensors. Many aftermarket sensors, while they may fit physically, do not operate within these exact specifications. This can cause the computer to reject the new sensor, leading to a persistent Check Engine Light, poor performance, and wasted money.
Helpful Videos
Technical Specifications
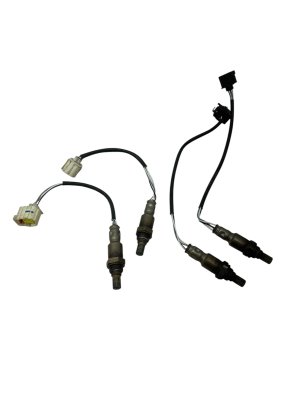
OEM Part Numbers: 5149171AA 5149171AB 5149180AA 5149180AB 68066160AA
The 3.6L V6 engine uses four heated, 4-wire, narrow-band oxygen sensors. The mounting thread size is M18x1.5 and requires a 22mm (7/8") wrench or socket for removal. Wire harness lengths vary by location.
We Have This Part in Stock



The information in this article is provided for general reference and educational purposes only. Vehicle specifications, procedures, and part compatibility can vary by production date, trim level, and region. Always consult your vehicle's factory service manual and verify part numbers before purchasing or performing repairs. Safety-critical components such as airbags, seat belts, and braking systems should be installed by a qualified professional.
- Chrysler Pacifica:
- Chrysler Voyager:
- 🎬 Helpful Videos
- 🛍️ Shop This Part
- Symptoms of a Failing Oxygen Sensor
- The Four-Sensor System: A Critical Guide
- Known Issues, TSBs, and Recalls
- Oil Leaks Causing Sensor Failure
- Pacifica Plug-in Hybrid (PHEV) Recall
- Buying a Used Oxygen Sensor
- Replacement Overview & Difficulty
- Cost of Replacement
- Frequently Asked Questions (FAQ)
- 🎟️ Get 5% Off