

2003-2009 4Runner Overhead Console: Fixing Broken Sunglass Holders & Lights
This guide covers common failures, part variations, and how to choose the right used overhead console for your 2003-2009 Toyota 4Runner.
- The most common failure is the sunglass holder latch breaking, causing the door to hang open.
- Compatibility is critical: you must match the console to your 4Runner's sunroof, HomeLink, and (for 2006-09) Bluetooth microphone options.
- Replacement is a very easy DIY job, typically taking less than 20 minutes with basic tools.
- When buying a used console, carefully inspect the sunglass holder latch and all plastic mounting tabs for cracks or damage.
Common Failure Symptoms
The overhead console on the 2003-2009 Toyota 4Runner is generally reliable, but a few common issues can occur over time, primarily related to its plastic components and integrated electronics.
Sunglass Holder Door Broken or Won't Latch
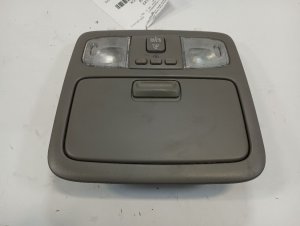
By far the most common problem is the failure of the sunglass holder's latching mechanism. The small plastic latch or the spring-loaded hinge can break, causing the door to hang open or not close securely. This is often due to age, heat cycles making the plastic brittle, or repeated use. In some cases, the small pins that act as the hinge can slide out, which can sometimes be repaired by simply pushing them back into place.
Map Lights Flicker or Don't Work
Inoperative map lights are another frequent issue. This can be as simple as a burned-out bulb, which is an easy fix. However, if replacing the bulb doesn't solve the problem, the issue could be a faulty switch within the console, a bad connection at the wiring harness, or a problem with the circuit board itself. Sometimes the contacts for the bulb or switch become corroded or bent, leading to intermittent operation or flickering. Aftermarket LED upgrade kits are a popular modification for brighter, more reliable lighting.
🎬 Watch: How to replace map light bulbsConsole is Loose or Rattling
Owners may notice the entire console assembly becoming loose and rattling against the headliner. This is typically caused by broken or weakened mounting clips or screws that have backed out. The console is primarily held in place by two screws (often 8mm or 10mm) inside the sunglass compartment and several plastic clips at the rear. If the plastic tabs on the console housing break, it may not sit securely even with the screws tightened.
Variant and Compatibility Guide
Choosing the correct overhead console is critical, as several variations were produced for the 2003-2009 4Runner. Using the wrong console may result in features not working or the unit not fitting at all. Always verify the options on your specific vehicle before purchasing a replacement.
Warning: The most important factors are the presence of a sunroof and, for later models, the factory Bluetooth microphone. A console for a sunroof model will not fit a vehicle without one, and vice-versa.
Key differences include:
- Sunroof vs. No Sunroof: The console's shape and mounting are different between models with and without a factory sunroof. The sunroof version includes the tilt/slide switch.
- HomeLink Garage Door Opener: Higher trim levels (like the Limited) often included a three-button HomeLink system. Base models did not, and the wiring may not be present to add it easily.
- Bluetooth Microphone (2006-2009): Starting in 2006, some models came with a factory Bluetooth option, which placed a small microphone grille on the overhead console. Consoles for these vehicles have a different part number and internal wiring.
- Color: The most common color is gray, but the exact shade can vary slightly by year and due to sun exposure. Fawn (a tan/beige color) was also available on some models.
Buying a Used Overhead Console
A used OEM console is often the best value, as new aftermarket units are not widely available and new OEM units can be expensive. When buying a used part, a thorough inspection is key to avoiding common problems.
What to Check Before You Buy:
- Confirm Compatibility: Double-check that the used console matches your 4Runner's configuration: Sunroof, HomeLink, and Bluetooth Microphone. Ask the seller for the part number or the VIN of the vehicle it came from.
- Inspect the Sunglass Holder: This is the most critical inspection point. Open and close the sunglass door multiple times. Ensure it latches securely and doesn't feel loose or flimsy. Look closely at the plastic latch and the hinge area for any stress marks or cracks.
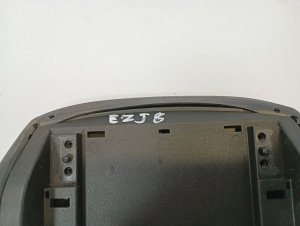
- Check All Mounting Points: Carefully examine the screw holes inside the sunglass holder area and the plastic clip tabs on the rear of the console. These are common break points. A console with broken tabs will rattle and never fit securely.
- Examine the Switches: Press all the buttons (map lights, sunroof, HomeLink). They should have a positive, tactile click and not feel mushy or stuck.
- Look for Plastic Damage: Check the entire housing for cracks, deep scratches, or discoloration. Years of sun exposure can make the plastic brittle.
Cost Comparison
Prices for a 2003-2009 4Runner overhead console can vary significantly based on condition and source.
| Part Source | Estimated Price Range |
|---|---|
| New OEM | $180 - $400+ (can be discontinued) |
| New Aftermarket | Not commonly available |
| Used OEM (Salvage/Online) | $50 - $150 |
| Shop Labor for Installation | $50 - $100 |
Replacement Guide
Replacing the overhead console is a straightforward DIY task that requires minimal tools and time.
- Difficulty: 1/5 (Very Easy)
- Time: 15-20 minutes
- Tools Needed: Phillips screwdriver or 8mm/10mm socket/driver, small flathead screwdriver or plastic trim tool.
Step-by-Step Instructions:
- Open the sunglass holder compartment completely.
- Locate the two screws inside the compartment that secure the front of the console to the roof structure. Remove them.
- Gently pull down on the front edge of the console (where you just removed the screws).
- Once the front is loose, slide the entire assembly forward (towards the windshield) slightly to disengage the rear retaining clips from the headliner.
- Carefully lower the console to expose the electrical connector(s). Press the release tab on the connector(s) and unplug the wiring harness. Some vehicles may have an unused plug tucked into the headliner; this is normal.
- To install the new console, simply reverse the process. Plug in the electrical connector, slide the rear clips into their slots in the headliner, and then pivot the front up and reinstall the two screws. Do not overtighten the screws.
Known Issues, TSBs, and Recalls
There are no specific recalls or Technical Service Bulletins (TSBs) from Toyota or the NHTSA that directly address the overhead console itself. The most relevant recall for this vehicle generation is for potential accelerator pedal entrapment by floor mats (NHTSA Recall 11V-113), which does not involve the console. Other common 4th generation 4Runner issues like frame rust or melting dashboards are unrelated to this part.
Technical Specifications and Part Numbers
Part numbers are specific to the color and feature set. Always verify with a dealer or trusted parts source if you are unsure.
- 63670-0W020-B0: Gray, with sunroof, without HomeLink, without microphone.
- 63670-0W021-B0: Supersedes 63670-0W020-B0. Gray, with sunroof, without HomeLink, without microphone.
- 63670-0W010-E0: Fawn (tan), without sunroof, without HomeLink, without microphone.
Pro Tip: Part numbers can be confusing. The final two characters (e.g., B0, E0) often designate the color code. When in doubt, match the features (sunroof, etc.) and color from the donor vehicle to your own.
Frequently Asked Questions (FAQ)
How do I fix just the broken sunglass holder latch?
Unfortunately, Toyota does not sell the latch or door as a separate part. Some owners have fabricated their own simple fixes using magnets or Velcro. Aftermarket replacement latches are sometimes sold on sites like eBay, but they are not OEM parts. In most cases, the most effective solution is to replace the entire console assembly with a used one.
Can I upgrade to a console with a garage door opener (HomeLink)?
Maybe. Some owners report that the wiring for the HomeLink unit is present in the headliner on vehicles that didn't originally come with it, making it a plug-and-play swap. However, this is not guaranteed for all trim levels or years. Before buying a HomeLink console, it's best to remove your existing one and check for an extra, unused wiring plug in the headliner.
What bulb type do the map lights use?
The original map light bulbs are typically size 194 wedge-style incandescent bulbs. Many owners choose to upgrade these to brighter, longer-lasting 194-size LED bulbs. When installing LEDs, note that they are often polarized; if a bulb doesn't light up, remove it, flip it 180 degrees, and reinstall it.
My console fell down while driving. What happened?
This usually happens when the plastic mounting points for the two screws inside the sunglass holder break off. The console is then held only by the rear clips, which can let go with vibration. The best fix is to replace the console, as gluing the broken plastic tabs is rarely a permanent solution.
Helpful Videos

Technical Specifications
OEM Part Numbers: 63670-0W020-B0 63670-0W021-B0 636700W020B0 636700W021B0 63670-0W010-E0
Map Light Bulb Type: 194 Wedge
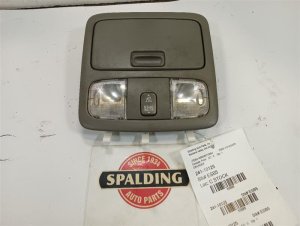
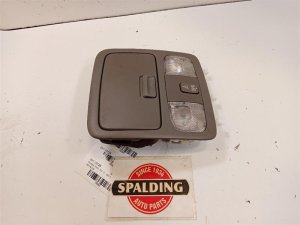
We Have This Part in Stock

The information in this article is provided for general reference and educational purposes only. Vehicle specifications, procedures, and part compatibility can vary by production date, trim level, and region. Always consult your vehicle's factory service manual and verify part numbers before purchasing or performing repairs. Safety-critical components such as airbags, seat belts, and braking systems should be installed by a qualified professional.
- Toyota 4Runner:
- 🎬 Helpful Videos
- 🛍️ Shop This Part
- Common Failure Symptoms
- Sunglass Holder Door Broken or Won't Latch
- Map Lights Flicker or Don't Work
- Console is Loose or Rattling
- Variant and Compatibility Guide
- Buying a Used Overhead Console
- What to Check Before You Buy:
- Cost Comparison
- Replacement Guide
- Step-by-Step Instructions:
- Known Issues, TSBs, and Recalls
- Technical Specifications and Part Numbers
- Frequently Asked Questions (FAQ)
- 🎟️ Get 5% Off