

2017-2023 Tesla Model 3 Overhead Console: Fixing Rattles & Button Issues
Your guide to diagnosing faulty buttons, stopping annoying rattles, and choosing the right used overhead console for your Model 3.
- Before buying a used console, you MUST verify if your car has ultrasonic alarm sensors in the original unit and match it.
- Rattling is the most common complaint and can often be fixed with inexpensive foam or felt tape without replacing the part.
- Replacement is a very easy DIY job, requiring only a plastic trim tool and about 15 minutes.
- A faulty console can disable your hazard lights, dome lights, and the microphones for hands-free calling.
Symptoms of a Failing Overhead Console


A problem with the overhead console can show up in several ways. Because it integrates lighting, switches, and microphones, a failure can impact multiple systems. You might also get a vehicle alert on the touchscreen, such as VCLEFT_a333_overheadConsoleMIA, which means the console is not communicating with the vehicle.
1. Dome Lights or Hazard Switch Not Working
The most obvious sign of failure is when the dome/map lights or the hazard button stop working. The buttons may feel normal but produce no response. This could be due to a failure in the button's internal switch or a problem with the console's circuit board or connector.
2. Annoying Rattles or Buzzing Noises
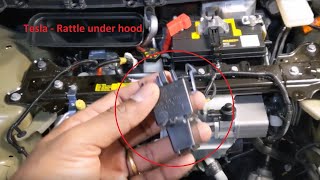
One of the most common complaints from Model 3 owners is a persistent rattle or buzz coming from the overhead console area. This is often caused by vibrations between plastic components that lack sufficient padding from the factory. In some cases, the plastic clips that hold the console to the headliner bracket can become loose or deformed, causing the entire assembly to vibrate against its mounting point.
3. Poor Microphone Quality
If people you're calling complain that your voice is muffled, distant, or cuts out, the microphones in the overhead console may be failing. Since these microphones are essential for both hands-free Bluetooth calls and using voice commands, a failure can be very disruptive.
Compatibility Warning: Tesla used different overhead consoles depending on the vehicle's features, specifically the presence of ultrasonic alarm sensors. Before purchasing a replacement, you must verify which version your car has.
Known Issues, Recalls, and Service Bulletins

While there are no specific NHTSA recalls for the overhead console itself, some related issues and common complaints are well-documented by owners and Tesla service centers.
Overhead Console Rattles
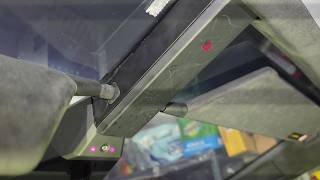
Rattles are a frequent issue, often addressed by Tesla Service by adding foam or felt tape to contact points within the console housing or between the console and its mounting bracket. This is a simple fix that can often be performed by the owner. A service video shows a technician replacing a deformed white plastic clip that was no longer holding the console tightly.
Ultrasonic Sensor Variations
Starting in late 2022, Tesla began removing ultrasonic sensors from new Model 3 and Model Y vehicles, transitioning to its camera-based "Tesla Vision" system for features like Park Assist. This creates a major compatibility point. A console from a vehicle with ultrasonic sensors will not be a direct match for a newer vehicle without them, and vice-versa. 🎬 Watch: Tesla removes ultrasonic sensors on new Model 3 and Y Always match the part number from your original unit.
Buying a Used Overhead Console
Purchasing a used OEM overhead console is a cost-effective way to fix a broken unit. However, careful inspection is key to getting a good part.
How to Verify Compatibility
- Match the Part Number: This is the most reliable method. Remove your existing console and find the part number sticker. Common part numbers include 1092573-00-M and 1092573-00-L.
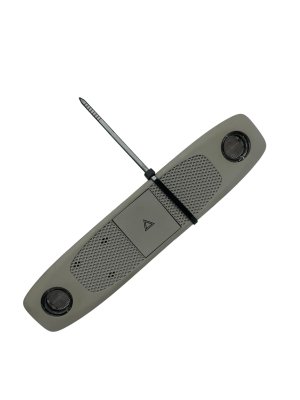
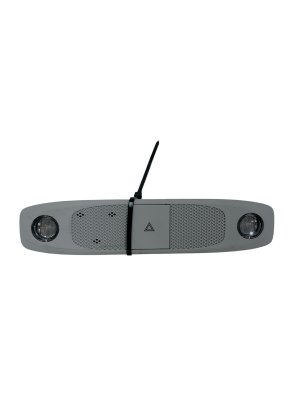
- Check for Ultrasonic Sensors: Look at the grilles on the console. If your car has the factory alarm system, you should see small, circular sensor heads inside the grilles. Ensure the replacement unit has these if your original does, or that it doesn't if your original doesn't.
- Inspect the Button Layout: While most North American Model 3s have a standard layout (left dome, right dome, hazard), some international versions had an e-Call/SOS button. Ensure the button configuration is identical to yours.
What to Inspect Physically
- Check for Cracks and Scratches: Inspect the plastic housing and light lenses for any cosmetic damage.
- Test the Buttons: Press each button. They should have a firm, tactile click and return to their original position without sticking.
- Examine the Clips: Check the plastic mounting clips on the back of the console. Ensure they are not cracked, broken, or deformed, as this can lead to rattles.
- Look for Water Damage: If possible, inspect the circuit board for any signs of corrosion or water stains, which could indicate a leak from the windshield or roof glass.
Replacement Difficulty: 1/5 (Very Easy)

Replacing the overhead console is a straightforward task that most DIYers can complete in under 15 minutes with a single tool.
Estimated Time: 0.25 hours
Tools Needed: Plastic trim removal tool
Step-by-Step Replacement Guide
- Using a plastic trim tool, carefully pry downwards on the edge of the console closest to the windshield. Tesla service documents caution against prying against the headliner to avoid damage.
- The console is held in by two main clips. Once they release, the unit will hinge downward.
- Support the console with one hand and disconnect the single electrical connector.
- To install the new console, simply connect the electrical plug, align the console into the opening, and push it firmly upwards until the clips click securely into place.
Pro Tip: Before snapping the new console in place, add small pieces of felt or Tesa tape to the plastic clips and any contact points on the housing. This will help prevent future rattles.
Cost Comparison
Prices for a Model 3 overhead console can vary significantly between new and used options.
| Part Source | Estimated Cost |
|---|---|
| New OEM | $220 - $250 |
| Used OEM | $45 - $125 |
| Shop Labor | $50 - $100 |
Frequently Asked Questions (FAQ)
Why is my Tesla's overhead console rattling?
Rattles are typically caused by vibration between hard plastic parts or from loose mounting clips. The factory sometimes does not use enough felt or foam padding to dampen these vibrations. The fix is to add padding yourself or have a service center do it.
Will replacing the overhead console fix poor microphone quality on calls?
Yes, in most cases. The microphones for voice commands and Bluetooth calls are integrated into the overhead console assembly. If the microphones have failed, replacing the entire unit is the correct repair.
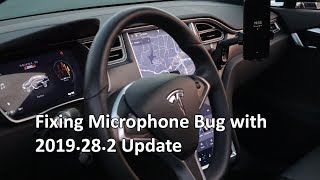
🎬 See how to fix a Tesla Bluetooth microphone that stopped workingCan I add the factory alarm by swapping to a console with ultrasonic sensors?
No, simply swapping the console is not enough. The vehicle's body controller and software configuration must also support the feature, and additional wiring may be required. It is best to replace your console with one that matches the original features.
Is any programming required after installing a new overhead console?
No, a like-for-like replacement is typically plug-and-play. No special programming or calibration is needed. However, some official Tesla procedures mention reinstalling firmware as a final step, though this is not commonly required for a simple component swap.
Helpful Videos

Technical Specifications
OEM Part Numbers: 1092573-00-M P1092573-00 1092573-00-L 1092573-00-K
Houses dome lights, hazard switch, microphones, and optional ultrasonic alarm sensors. Connects via a single electrical plug.
We Have This Part in Stock

The information in this article is provided for general reference and educational purposes only. Vehicle specifications, procedures, and part compatibility can vary by production date, trim level, and region. Always consult your vehicle's factory service manual and verify part numbers before purchasing or performing repairs. Safety-critical components such as airbags, seat belts, and braking systems should be installed by a qualified professional.
- Tesla 3:
- 🎬 Helpful Videos
- 🛍️ Shop This Part
- Symptoms of a Failing Overhead Console
- 1. Dome Lights or Hazard Switch Not Working
- 2. Annoying Rattles or Buzzing Noises
- 3. Poor Microphone Quality
- Known Issues, Recalls, and Service Bulletins
- Overhead Console Rattles
- Ultrasonic Sensor Variations
- Buying a Used Overhead Console
- How to Verify Compatibility
- What to Inspect Physically
- Replacement Difficulty: 1/5 (Very Easy)
- Step-by-Step Replacement Guide
- Cost Comparison
- Frequently Asked Questions (FAQ)
- 🎟️ Get 5% Off