

2015-2019 Hyundai Sonata Overhead Console: Fixing Sunroof & Light Switch Failures
A complete guide to diagnosing and replacing the overhead console panel, focusing on common button failures and ensuring you buy the right used part for your Sonata.
- The most common failure is the sunroof switch, followed by the map light switches.
- Verify compatibility by options (sunroof, Blue Link) and interior color code (TRY for gray, TTX for black) before buying a used part.
- Replacement is extremely easy, requiring only a Phillips screwdriver and about 15 minutes.
- A used OEM part is often a better choice than a new aftermarket one for perfect color, fit, and finish.
Symptoms of a Failing Overhead Console Panel

When the overhead console begins to fail, the symptoms are usually straightforward and related to the buttons it houses. Because the internal components are often part of a single circuit board, one failure can sometimes affect other functions.
- Sunroof Switch Not Working: The most common failure. The sunroof may not open, close, or tilt, or it may work only intermittently. Sometimes the switch feels physically broken or loose.
- Map Lights or Dome Light Inoperative: The individual map lights or the main dome light may not turn on when the button is pressed. This can also manifest as the lights not turning on when a door is opened if the 'door' setting is selected.
- Lights Stay On: In some cases, a faulty switch can cause the interior lights to remain on, draining the battery. This is often due to an internal short or a melted plastic component inside the switch mechanism that prevents it from turning off properly.
- Flickering Lights: The map lights might flicker when driving or when the button is pressed, indicating a loose connection or failing component on the console's circuit board.
- Unresponsive Blue Link / SOS Buttons: For models equipped with these features, the buttons may not respond when pressed, which can be a critical safety issue in an emergency.
Pro Tip: Before assuming the console is bad, always check the basics first. A blown fuse in the interior fuse panel can cause the lights and sunroof to stop working. Check your owner's manual for the correct fuse location, often labeled 'DOME' or 'ROOF'.
Known Issues, TSBs, and Recalls for 2015-2019 Sonata

While there are no direct recalls for the overhead console panel itself on the 2015-2019 Sonata, there are some related issues and service bulletins worth noting.
- Panoramic Sunroof Recall (NHTSA #16V-727): Some 2015-2016 Sonatas were recalled because the panoramic sunroof panel could detach from the vehicle. This was due to a bonding issue with the wind deflector, not the console switch. However, interference from a detached deflector could damage the sunroof mechanism.
- Turn Signal Recall (NHTSA #21V-703): A recall was issued for 2015-2017 Sonatas because a software issue in the Smart Junction Box (SJB) could cause turn signals to activate in the opposite direction. While not directly related to the overhead console, it highlights the complexity of the vehicle's body electronics, which the console is a part of.
- Melted Switch Internals: A widely reported issue, though not subject to a recall, is the internal plastic of the light switch assembly melting over time from the heat generated by the circuit. This causes a small divot to form, preventing the switch from properly disengaging and often causing the lights to stay on.
Buying a Used 2015-2019 Sonata Overhead Console: A Buyer's Checklist

Purchasing a used OEM overhead console is a smart, cost-effective solution. The fit, color, and finish will be a perfect match for your car, something that is rarely true for aftermarket parts. Here’s what to check before you buy.
1. Verify Compatibility by Part Number and Options
Not all consoles are the same. The biggest difference is whether the car has a panoramic sunroof. A console for a sunroof model will have the large sunroof switch; a base model console will not.
- Check the Part Number: The original part number is printed on a sticker on the top of the console housing. Match this number to the replacement part if possible.
- Match the Options: Does your car have a panoramic sunroof? Does it have Blue Link/SOS buttons? Ensure the used console has the exact same button layout as your original.
2. Decode the Color Code
Hyundai uses a three-letter suffix on its part numbers to indicate the interior color. For the 2015-2019 Sonata, the most common colors are gray and black/charcoal.
- -TRY: This suffix typically denotes a standard gray interior color.
- -TTX: This suffix often indicates a black or dark charcoal interior color.
The interior color code for your specific vehicle can be found on the VIN sticker, usually located on the driver's side door jamb. Always verify this before purchasing to ensure a perfect match.
3. Physical Inspection Checklist
- Inspect All Buttons: Press every button (map lights, sunroof, SOS). They should have a firm, positive click and not feel loose, sticky, or broken.
- Check the Housing: Look for cracks in the plastic housing, especially around the mounting screw holes and the clips that hold it to the headliner.
- Examine the Sunglass Holder: Open and close the sunglass holder. Make sure the latch engages properly and it doesn't fall open on its own, which was an issue on some earlier Hyundai models.
- Look at the Connectors: Ensure the electrical connector sockets on the back are clean, with no signs of corrosion, bent pins, or heat damage.
Warning: Be wary of consoles from vehicles with water damage. Moisture is the number one killer of these electronic components, leading to corrosion and unpredictable failures.
Cost Comparison: New vs. Used
Replacing the overhead console can vary significantly in cost depending on the source of the part.
| Part Source | Estimated Cost |
|---|---|
| New OEM | $230 - $520 |
| New Aftermarket | $60 - $100 (Limited availability, may have quality issues) |
| Used OEM | $50 - $150 |
| Shop Labor | $40 - $60 |
Step-by-Step Replacement Guide (Difficulty: 1/5)

Replacing the overhead console is a simple DIY job that typically takes less than 15 minutes and requires only basic tools.
- Open the Sunglass Holder: Open the sunglass storage compartment completely.
- Remove Mounting Screws: Inside the sunglass holder, you will see two Phillips head screws. Remove both screws.
- Pry the Console Down: Gently pull down on the front edge (closest to the windshield) of the console. It is held in by clips. A plastic trim removal tool can help prevent scratching the headliner.
- Disconnect Electrical Connectors: Carefully lower the console to expose the wiring. There will be one or more electrical connectors attached to the back. Press the release tab on each connector and pull it out.
- Install the New Console: Connect the electrical plugs to the new console. You should hear a click.
- Position and Secure: Align the console with the opening in the headliner, ensuring the rear tabs slide into place first. Push the front of the console up until the clips snap into place.
- Reinstall Screws: Re-insert and tighten the two Phillips screws inside the sunglass holder. Do not overtighten. 🎬 Watch: See a console replacement walkthrough
- Test All Functions: Turn the car on and test every button on the console—map lights, sunroof, etc.—to ensure everything works correctly.
Warning: While not strictly necessary for a simple swap, it is always a good practice to disconnect the negative battery terminal before working on any vehicle electronics to prevent accidental shorts.
Frequently Asked Questions
Do I need to have the new console programmed by a dealer?
No. The overhead console is a simple switch assembly and does not require any programming or calibration. It is a plug-and-play part.
My sunroof doesn't work right after installing the new console. What should I do?
Sometimes, after disconnecting power, the sunroof motor needs to be reset. The procedure is simple: with the console installed, press and hold the sunroof 'close' switch for at least 10 seconds until the sunroof glass tilts and moves slightly. Release the switch, and it should now be reset and operate normally.
Can I just replace the broken sunroof switch instead of the whole console? 🎬 See this step-by-step sunroof switch replacement guide
Yes, it is possible, but it is an advanced repair. The individual switch is soldered to the main circuit board inside the console. For most people, replacing the entire console assembly is a much faster and easier repair.
Why are my interior lights staying on even with the new console?
If a new console doesn't fix lights that stay on, the problem may be with a faulty door jamb switch. The car may not be detecting that a door is closed, which keeps the dome light circuit active. Check the dashboard display to see if it shows a door is open when all doors are shut.
Helpful Videos
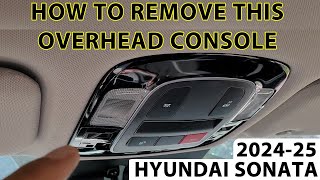
Technical Specifications
OEM Part Numbers: 92810-C2000-TRY 92810-C2100-TRY 92810-C2100-TTX 92810-C3100 92810C2000TRY 92810C2100TRY 92810-C2000-TTX 92810-C2500-TRY
Fits 2015-2019 Hyundai Sonata models. Variants exist for vehicles with and without panoramic sunroof and with and without Blue Link/SOS buttons. Color codes TRY (Gray) and TTX (Black) are common.
We Have This Part in Stock



The information in this article is provided for general reference and educational purposes only. Vehicle specifications, procedures, and part compatibility can vary by production date, trim level, and region. Always consult your vehicle's factory service manual and verify part numbers before purchasing or performing repairs. Safety-critical components such as airbags, seat belts, and braking systems should be installed by a qualified professional.
- Hyundai Sonata:
- 🎬 Helpful Videos
- 🛍️ Shop This Part
- Symptoms of a Failing Overhead Console Panel
- Known Issues, TSBs, and Recalls for 2015-2019 Sonata
- Buying a Used 2015-2019 Sonata Overhead Console: A Buyer's Checklist
- 1. Verify Compatibility by Part Number and Options
- 2. Decode the Color Code
- 3. Physical Inspection Checklist
- Cost Comparison: New vs. Used
- Step-by-Step Replacement Guide (Difficulty: 1/5)
- Frequently Asked Questions
- 🎟️ Get 5% Off