

OBD-II Code U3006: Control Module Input Power 'A'
What U3006 means, why it triggers, and how to fix it
- Code U3006 indicates a control module is receiving voltage outside the normal 9V to 16V operating range, causing it to shut down.
- Test your battery and alternator first; a resting voltage below 12.4V or a running voltage below 13.7V causes 80% of U3006 codes.
- Perform a voltage drop test on the module's power and ground wires before replacing any computers; readings above 0.2V indicate a wiring fault.
- Look for manufacturer-specific suffixes on your scanner, such as U3006-16 for low voltage or U3006-17 for high voltage, to instantly narrow your diagnostic path.
What Does U3006 Mean?

Code U3006 means a specific control module is not receiving the correct electrical power. This power feed, designated as 'Input Power A', is essential for the module's operation. When voltage drops below 9V, spikes above 16V, or disappears entirely, the module shuts down and triggers this code. Think of it as a localized power outage for one of your car's mini-computers.
Technical definition: The SAE definition for U3006 is "Control Module Input Power 'A'". This indicates a control module detected a fault in its primary voltage supply circuit. The 'A' designates a specific power input, as complex modules use multiple inputs for redundancy. The code sets when internal voltage monitoring senses voltage outside the specified operating range (typically <9V or >16V) for a predetermined time threshold.
Can I Drive With U3006?
Yes, But With Caution. Yes, but driving is ill-advised due to unpredictable electrical faults. If the affected module controls safety systems like ABS, airbags, or exterior lighting, do not drive. A failing ABS module disables anti-lock braking in emergencies. A failing Body Control Module (BCM) causes exterior light loss or sudden engine stalling. Limit driving strictly to reaching a repair shop.
Common Causes
- Weak or Failing Battery (Very Common) — A battery that is old, discharged, or has a dead cell is the most frequent cause. Modern vehicles require highly stable voltage; a weak battery fails to provide this during startup, starving modules of power and triggering the code.
- Corroded or Loose Battery Terminals (Common) — Corrosion or a loose connection at the battery terminals acts as a physical roadblock for electricity. This prevents stable current flow to the entire vehicle, causing a severe voltage drop at the module.
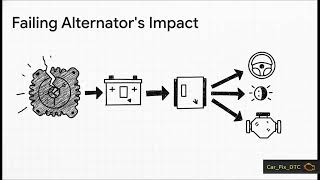
- Faulty Alternator (Common) — A failing alternator fails to maintain the required 13.7V-14.7V system voltage while the engine runs. This overall voltage drop starves modules of power and triggers U3006.
- Blown Fuse or Faulty Fuse Block (Common) — A blown fuse instantly cuts power to the module. Faulty fuse blocks with internal corrosion or hairline cracks in main power distribution plates also interrupt power delivery.
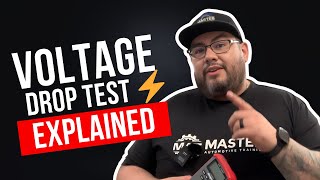
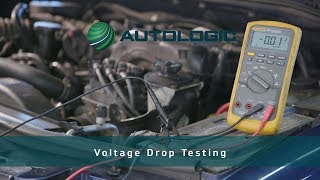
- Damaged Wiring or Poor Ground (Less Common) — Frayed wires, rodent damage, or a corroded chassis ground wire create high electrical resistance. The module requires both a solid power feed and a clean ground connection to complete the circuit. 🎬 Learn how to properly test for voltage drop in your circuits.
- Parasitic Battery Drain (Less Common) — A faulty component or improperly installed aftermarket accessory drawing power while the vehicle is off drains the battery. This creates a low-voltage state that triggers U3006 upon the next startup.
- Faulty Control Module (Rare) — The control module itself can fail internally. An internal fault, like a bad voltage regulator, causes the module to misread input voltage and set the code despite receiving adequate power.
Symptoms

- Warning Lights on Dashboard — The check engine light illuminates, accompanied by warning lights related to the affected system (ABS, VSA, traction control, or airbags).
- Vehicle Stalling or Not Starting — If the Powertrain Control Module (PCM) or Body Control Module (BCM) loses power, the vehicle stalls while driving or fails to crank.
- Loss of Specific Functions — You lose the function of power windows, door locks, exterior lights, or climate control, depending on which module is starved of power.
- Intermittent Electrical Issues — Functions work sporadically before failing completely, heavily indicating a loose connection or a cracked fuse.
- Excessive Battery Drain — The battery dies after the vehicle sits for a few hours or days, indicating a module is failing to 'sleep' and continuously drawing power.
- Logged 'U' Code in Specific Module (scan-tool only — no driver-felt sign) — The U3006 code is stored in the memory of the affected module (e.g., BCM, ABS), requiring a full-system scan tool to read.
Common Fixes & Costs
- Replace Battery — Parts: $150-$300, Labor: $50-$100, ~0.5 hr book time (DIY)
- Clean or Replace Battery Terminals — Parts: $10-$30, Labor: $50-$100, ~0.5 hr book time (DIY)
- Replace Blown Fuse — Parts: $5-$15, Labor: $0-$50, ~0.2 hr book time (DIY)
- Repair Wiring or Ground Connection — Parts: $10-$50, Labor: $150-$400, ~2.0 hr book time (Intermediate)
- Replace Control Module — Parts: $300-$1200, Labor: $150-$400, ~1.5 hr book time (Professional)
DIY vs Professional
- Replace Battery — Beginner:
Tools: Wrench set, socket set, battery terminal cleaner, safety glasses. - Clean or Replace Battery Terminals — Beginner:
Tools: Wrench set, terminal cleaner tool, wire brush, anti-corrosion spray. - Replace Blown Fuse — Beginner:
Tools: Fuse puller, needle-nose pliers. - Repair Wiring or Ground Connection — Beginner:
Tools: Multimeter, wire strippers, crimp tool, heat shrink tubing, wiring diagrams. - Replace Control Module — Beginner:
Tools: Socket set, trim removal tools, advanced OBD-II scanner with programming capabilities.
Used vs. New Parts: Buying Guide
When a used part is worth it: For a high-cost fix like a BCM or ABS module, a used part from a reputable salvage yard offers significant savings on older, high-mileage vehicles.
Donor-vehicle mileage cap: roughly under 100000 miles for the part to have meaningful remaining life.
Donor quality checklist:
- Verify the part number on the used module exactly matches the original.
- Ensure the donor vehicle was not scrapped due to flood or fire damage.
- Obtain the donor vehicle's VIN to check compatibility.
Decision logic:
- If The part is a simple fuse or battery terminal → Always buy new; cost savings are negligible.
- If The part is a control module requiring programming → Confirm a local shop can program a used module to your VIN. Some manufacturers block used module programming.
- If The vehicle is less than 5 years old → Buy a new OEM part to ensure longevity and warranty compliance.
Warranty tradeoff: Used parts include a 30-90 day warranty covering only the part. New aftermarket parts offer 1-year to lifetime warranties. New OEM parts carry a 1-2 year warranty.
Worst-case if a used part fails: $300-$800. If a used module is defective or locked, you lose the part cost plus the labor spent attempting installation and programming.
Cost of Not Fixing It
- Short-Term (Days to Weeks): Intermittent failure of module-controlled functions (lights, windows). High risk of the vehicle stalling unexpectedly or failing to start. (Added cost: Negligible, but high safety risk.)
- Medium-Term (1-6 Months): A persistent low-voltage condition strains the charging system. A failing alternator destroys a new battery, and a bad battery overworks an alternator, causing cascading failures. (Added cost: $400-$800 (Replacing both battery and alternator).)
- Long-Term (6+ Months): Sustained voltage fluctuations permanently damage expensive control modules (BCM, PCM, ABS), turning a simple battery replacement into a multi-module diagnostic nightmare. (Added cost: $1000-$2500+ (Module replacement and programming).)
Diagnosis Steps

- Scan for All Codes & Identify the Module
Use a full-system OBD-II scanner to read codes from ALL modules, not just the engine computer. Identify which specific module (e.g., BCM, ABS, IPC) reports the U3006 code. Note any other codes, as they provide crucial diagnostic direction.
Tools: Full-system OBD-II Scanner (Beginner) - Check the Battery and Charging System
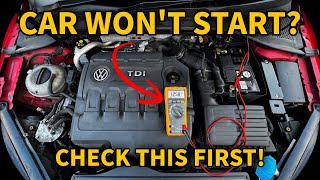
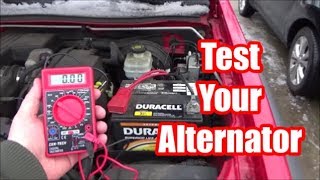
Test the battery's resting voltage with a multimeter; it must show at least 12.4 volts with the engine off. Start the engine; the alternator must bring the voltage up to 13.7-14.7 volts. Have the battery professionally load-tested to confirm its internal health. 🎬 See how to test and replace your battery and alternator.
Tools: Multimeter, battery load tester (Beginner) - Inspect Fuses and Battery Terminals
Inspect the battery terminals for corrosion and ensure they are tight. Locate the specific fuse for the affected control module using the wiring diagram. Visually inspect the fuse and test it with a multimeter for continuity. Check main fuses in the under-hood fuse box.
Tools: Multimeter, wire brush, fuse puller, wiring diagram (Beginner) - Check Technical Service Bulletins (TSBs)
Search for TSBs related to your vehicle's VIN and this specific code. Manufacturers frequently release bulletins for known wiring or software issues that save hours of diagnostic time.
Tools: Internet access, Vehicle VIN (Beginner) - ADVANCED: Perform a Voltage Drop Test
Connect the multimeter's positive lead to the positive battery post and the negative lead to the power input pin at the back of the module's connector (key on, circuit active). A reading above 0.2 volts indicates excessive resistance in the power wire. Repeat on the ground side (module ground pin to negative battery post); readings above 0.1 volts indicate a bad ground.
Tools: Multimeter, back-probe kit, wiring diagram (Advanced) - ADVANCED: Conduct a Parasitic Draw Test
If the battery keeps dying, disconnect the negative battery cable and connect a multimeter (set to Amps) in series. Wait 45 minutes for modules to sleep. A draw over 50 milliamps (0.05A) is a failure. Pull fuses one by one until the draw drops to identify the faulty circuit.
Tools: Multimeter with 10A setting (Advanced) - Test the Module Itself
If voltage drop tests show less than 0.2V on power and 0.1V on ground, and the input voltage at the module matches battery voltage, the wiring is perfect. The fault is internal to the control module, requiring replacement.
Tools: Advanced OBD-II Scanner (Professional)
When This Code Triggers (Freeze-Frame Conditions)
- Module Input Voltage: < 9.0V or > 16.0V (Triggers when voltage falls outside the specified range, frequently occurring during engine cranking with a weak battery.)
- Ignition Status: Key On, Engine Off or Engine Running (Detected with the key 'On' (blown fuse or open wiring) or while the engine is running (failing alternator).)
- Time Since Code Set: 0 seconds (For a hard fault like an open circuit, the code sets immediately once the module powers on and runs its self-check.)
- Ambient Temperature: < 32°F (0°C) (Often sets in cold weather, as low temperatures significantly reduce a battery's voltage output during startup.)
Related Codes
- U3003 — U3003 means 'Battery Voltage'. Seeing U3003 alongside U3006 confirms a systemic battery or alternator failure rather than an isolated wiring issue.
- U3007 — Refers to 'Control Module Input Power B'. Seeing both codes suggests a problem affecting the entire module, such as a bad main ground or internal failure.
- P0562 / P0563 — P0562 (System Voltage Low) and P0563 (System Voltage High) point directly at the battery or charging system as the root cause of the U3006 code.
- B1317 / B1318 — Ford-specific codes for high and low battery voltage. Seeing these alongside U3006 confirms a charging system issue.
Climate & Environmental Factors
- Cold Temperatures: At freezing temperatures (32°F/0°C), a battery loses over 20% of its power. This reduces voltage output during startup, easily dropping below the 9V threshold and triggering a U3006 code.
- High Humidity / Moisture: Moisture accelerates corrosion on battery terminals, wiring connectors, and chassis grounds. This corrosion increases electrical resistance, causing a voltage drop that starves the module.
How to Clear the Code After You Fix It
- Reconnect the battery if disconnected for repair.
- Use a full-system OBD-II scan tool to clear DTCs from all modules.
- Start the vehicle and let it idle for 3 minutes to stabilize systems.
- Perform a complete drive cycle to run readiness monitors.
Drive cycle (~20 minutes): Start from a cold start. Idle for 3 minutes. Drive in mixed city/highway conditions for 20 minutes, including steady cruising and stop-and-go traffic. Turn the vehicle off, wait 5 minutes, and re-scan.
Readiness monitors affected: U3006 is not an emissions code, but fixing the root cause (replacing a battery) or clearing codes resets all emissions monitors to 'Not Ready'.
Before emissions retest: drive at least 50 miles to fully set monitors.
Watch out for:
- Disconnecting the battery fails to clear Permanent Diagnostic Trouble Codes (PDTCs) on modern vehicles.
- If the voltage issue remains unfixed, U3006 returns immediately after clearing.
- Failing to perform a drive cycle results in an automatic emissions test failure due to 'Not Ready' monitors.
Will This Fail Emissions / State Inspection?
Yes — this code typically fails an OBD-II emissions inspection.
- California: An illuminated Check Engine Light is an automatic failure. After battery replacement, readiness monitors require up to 100 miles of driving to set.
- New York: The VIP2 inspection fails any vehicle with an active Check Engine Light.
- Texas: In emissions-testing counties, an illuminated Check Engine Light or associated ABS/VSA warning lights result in an automatic failure.
Most Commonly Affected Vehicles
- Ford Fiesta (2012-2016) — Prone to this code in the Instrument Panel Cluster (IPC) due to a failing battery.
- Ford Focus (2016-2018) — A known issue involves a hairline crack in a 50A fuse in the under-hood power distribution plate, causing U3006 and a no-start condition.
- Ford Escape (2013-2016) — Subject to TSB 14-0017 regarding faulty negative battery terminals causing voltage drops.
- Honda Fit (2015-2017) — Appears as U3006-16 (low voltage) alongside unrelated codes. A weak battery is the primary suspect.
- Acura MDX (2019-2020) — Triggered by a weak OEM battery, causing VSA and ABS warnings. Upgrading to a high-quality AGM battery resolves the issue.
- Chevrolet / GMC Silverado, Sierra, Tahoe, Yukon (2021-2022) — Subject to TSB 21-NA-044, requiring a dealer-level software update (VeSCoM) to resolve U3006 and communication codes.
- Subaru Outback, Forester (2015-2020) — A weak battery triggers U3006 in the ABS module, disabling the EyeSight driver assist system.
- Volkswagen Jetta, Golf (2014-2018) — Battery voltage issues cause malfunctions in the infotainment or convenience control modules.
Manufacturer-Specific Notes
- Ford: This code is frequently stored as a history code after jump-starting the vehicle or replacing a dead battery. If no symptoms are present, clear the code and monitor.
- Honda/Acura: U3006 is appended with a suffix: '-16' for low voltage (weak battery) or '-17' for high voltage (alternator overcharge). This instantly narrows the diagnostic path.
- General Motors (GM): TSB 21-NA-044 for 2021-2022 SUVs requires a dealer-only software re-flash (VeSCoM update) to resolve U3006.
- Subaru: A voltage drop triggering U3006 in the ABS/VDC module automatically disables the EyeSight system as a safety precaution.
Frequently Asked Questions
Can a bad alternator cause a U3006 code?
Yes. A failing alternator drops overall system voltage while the engine is running. This starves individual modules of power, triggering the U3006 code.
I just installed aftermarket accessories and now I have a U3006 code. Are they related?
Yes. Improperly installed accessories create a parasitic draw, discharging the battery while the car is off. This low voltage state triggers U3006 upon startup.
What are the most common misdiagnosis mistakes for U3006?
Replacing an expensive control module without testing the power supply. Always load-test the battery and perform a voltage drop test on the module's wiring first.
Will clearing the code fix the problem?
No. Clearing the code only turns off the warning light temporarily. The code returns immediately once the module detects the voltage fault again.
I just replaced my battery, why do I have this code?
Disconnecting the battery sometimes stores this code in memory. If the car runs perfectly, clear the code with a scanner and monitor if it returns.
What does the 'A' in 'Input Power A' mean?
The 'A' designates one of the primary power inputs to a control module. Complex modules use multiple power inputs (A, B, C) for redundancy.
What is the difference between U3006-16 and U3006-17?
U3006-16 indicates low voltage, pointing to a weak battery or high wiring resistance. U3006-17 indicates high voltage, pointing to an alternator overcharging the system.
Key Takeaways
- Code U3006 indicates a control module is receiving voltage outside the normal 9V to 16V operating range, causing it to shut down.
- Test your battery and alternator first; a resting voltage below 12.4V or a running voltage below 13.7V causes 80% of U3006 codes.
- Perform a voltage drop test on the module's power and ground wires before replacing any computers; readings above 0.2V indicate a wiring fault.
- Look for manufacturer-specific suffixes on your scanner, such as U3006-16 for low voltage or U3006-17 for high voltage, to instantly narrow your diagnostic path.
Helpful Videos


The information in this article is provided for general reference and educational purposes only. Vehicle specifications, procedures, and part compatibility can vary by production date, trim level, and region. Always consult your vehicle's factory service manual and verify part numbers before purchasing or performing repairs. Safety-critical components such as airbags, seat belts, and braking systems should be installed by a qualified professional.
- 🎬 Helpful Videos
- What Does U3006 Mean?
- Can I Drive With U3006?
- Common Causes
- Symptoms
- Common Fixes & Costs
- DIY vs Professional
- Used vs. New Parts: Buying Guide
- Cost of Not Fixing It
- Diagnosis Steps
- When This Code Triggers (Freeze-Frame Conditions)
- Related Codes
- Climate & Environmental Factors
- How to Clear the Code After You Fix It
- Will This Fail Emissions / State Inspection?
- Most Commonly Affected Vehicles
- Manufacturer-Specific Notes
- Frequently Asked Questions
- Can a bad alternator cause a U3006 code?
- I just installed aftermarket accessories and now I have a U3006 code. Are they related?
- What are the most common misdiagnosis mistakes for U3006?
- Will clearing the code fix the problem?
- I just replaced my battery, why do I have this code?
- What does the 'A' in 'Input Power A' mean?
- What is the difference between U3006-16 and U3006-17?
- Key Takeaways
- 🎟️ Get 5% Off