

Ultimate Guide to OBD-II Code U1804: Network Communication Error
The Most Comprehensive Guide to Understanding, Diagnosing, and Fixing U1804
- Code U1804 is a manufacturer-specific network error, meaning the exact failing module varies entirely by your vehicle's make and model.
- Professionally load-test your battery first, as voltage drops below 9.6V during cranking are the #1 cause of false U1804 codes.
- Unplug all aftermarket OBD-II dongles, remote starters, or alarms immediately to rule out CAN bus interference.
- Search for Technical Service Bulletins (TSBs) before replacing parts, as a 1-hour dealer software update fixes this code on many GM and Stellantis vehicles.
- Never replace a $500+ control module without first verifying it has less than 0.1 ohms of ground resistance and a steady 12V power supply.
What Does U1804 Mean?

U1804 is a generic, manufacturer-specific network trouble code. It signifies a communication breakdown between the electronic control units (modules) in your vehicle. It indicates a specific module stopped sending or receiving data on the vehicle's Controller Area Network (CAN bus). The precise meaning and the module at fault vary entirely depending on your vehicle's make, model, and year.
Technical definition: The SAE/ISO standard does not assign a universal definition to U1804. It is a manufacturer-specific code, denoted by the '1' in its number. The 'U' prefix confirms it as a Network (U-code) fault. On 2013-2014 GM vehicles, it points to a 'Telematics Communication Interface Control Module CAN Bus Off' fault (OnStar module). On Fiat and Alfa Romeo models, U1804-08 means 'Torque Request Signal From TCM Denied' or indicates a LIN bus sub-network failure.
Can I Drive With U1804?
Yes, But With Caution. Driving carries significant risks. This code indicates a computer communication failure, which disables critical systems like ABS, traction control, or airbags without warning. If the ABS or brake light is on, your emergency stopping distance increases by over 30%. Driving in 'limp mode' causes severe internal damage, leading to a $2,500-$5,000+ transmission replacement. Diagnose the issue promptly and limit driving to 100 miles at most.
Common Causes

- Low or Weak Battery Voltage (Very Common) — Modern vehicles are extremely sensitive to voltage fluctuations. An aging or weak battery is the number one cause of sporadic communication codes 🎬 Watch: Learn three ways to test your battery's health., as modules drop off the network without a steady power supply.
- Faulty Ground Connection (Very Common) — A corroded, loose, or broken ground wire for a specific module or the main chassis prevents reliable communication. Without a solid ground reference, modules cannot transmit data.
- Aftermarket Device Interference (Common) — Poorly installed aftermarket devices like remote starters, alarms, or plug-in OBD-II trackers introduce electrical noise and unexpected power draws, disrupting the CAN bus.
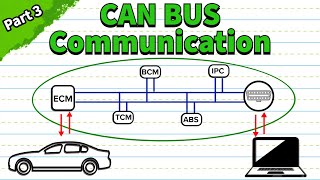
- CAN Bus Wiring or Connector Issue (Common) — The vehicle's network consists of a twisted pair of wires. Frayed wires, corroded connector pins, or rodent damage sever the communication link between modules.
- Software or Firmware Glitch (Common) — The issue is often a software bug within a module. Manufacturers issue Technical Service Bulletins (TSBs) with software updates to resolve these false communication errors.
- Faulty Control Module (Less Common) — The specific module implicated by the code has an internal failure due to a short circuit, software corruption, or physical damage from moisture or heat.
- Faulty Gateway or Body Control Module (BCM) (Rare) — The Gateway Module or BCM acts as the central router for network traffic. If this hub fails, it causes widespread communication failures across dozens of modules.
Symptoms

- Multiple Warning Lights — The Check Engine light illuminates immediately. Warning lights for ABS, traction control, or airbags also appear depending on which module is offline.
- Specific System Malfunction — The system controlled by the offline module fails. An offline OnStar module turns the mirror indicator red; an offline transmission module locks the car in limp mode.
- No-Start or Crank-No-Start Condition — If a critical module like the Powertrain Control Module (PCM) or Body Control Module (BCM) is involved, the engine fails to crank or cranks without starting.
- Erratic Gauges and Displays — The instrument cluster behaves erratically, with gauges dropping to zero, warning messages flashing, or the entire display going blank.
- Loss of Driver Aids and Comfort Features — Features relying on network data, such as cruise control, parking assist, power windows, and remote locks, become inoperative.
Diagnostic Flowchart
Tap your situation to follow the diagnostic path that matches what you're seeing on this code.
Common Fixes & Costs
- Replace Weak or Failing Battery — Parts: $150-$450, Labor: $50-$100, ~0.5 hr book time (DIY)
- Remove Faulty Aftermarket Device — Parts: $0, Labor: $0-$250, ~0.8 hr book time (DIY)
- Reprogram Control Module Software — Parts: $0, Labor: $150-$400, ~1.5 hr book time (Professional)
- Repair CAN Bus Wiring Harness or Ground Wire — Parts: $10-$50, Labor: $250-$1200+, ~5.5 hr book time (Professional)
- Replace Failed Control Module (e.g., BCM, OnStar) — Parts: $400-$1500+, Labor: $200-$600, ~2.5 hr book time (Professional)
- Replace Steering Angle Sensor — Parts: $150-$500, Labor: $100-$300, ~1.5 hr book time (Professional)
Used vs. New Parts: Buying Guide
When a used part is worth it: Used control modules (BCM, TCM) from a vehicle with the exact same part number are cost-effective for older, high-mileage vehicles where a new part's cost is prohibitive.
Donor-vehicle mileage cap: roughly under 100000 miles for the part to have meaningful remaining life.
Donor quality checklist:
- Verify the part number on the module itself is an exact match. Do not rely on year/make/model alone.
- Source from a reputable salvage yard offering a short-term functional warranty (30-90 days).
- Inspect the part for any signs of water damage, corrosion, or physical case damage.
Decision logic:
- If The part is a safety-critical module like an Airbag Controller (SRS) or ABS module. → Strongly favor a new OEM part. The risks associated with a faulty used safety part are too high.
- If The replacement module requires VIN programming. → Factor in the cost of programming ($150-$400) and confirm a local shop or dealer will program a used part before buying it.
- If The vehicle is less than 10 years old and the new part is under $800. → Buy new for the warranty and peace of mind. The savings on a used module are not worth the risk of premature failure.
Warranty tradeoff: Used modules typically have a 30-90 day warranty covering the part only. New OEM or aftermarket parts carry a 1-year or longer warranty.
Worst-case if a used part fails: 500-1500 if the used module is faulty or incompatible, including repeat labor, diagnostic fees, and purchasing a new module.
What Happens If You Wait — Timeline
- 0-1 month: Intermittent Check Engine Light and U1804 code appears, often after a cold start. The fault clears on its own but returns. (MPG impact: 0%% · Added cost: $0)
- 1-3 months: The Check Engine Light stays on permanently. Other warning lights flicker intermittently. You experience occasional glitches, like the radio failing to turn on. A parasitic draw ruins the battery if the car sits for a few days. (MPG impact: 0-2%% · Added cost: $150-$250 (Cost of a new battery ruined by deep discharge))
- 3-6 months: A critical system goes consistently offline. The car unexpectedly enters 'limp mode,' limiting speed to 30-50 mph. Safety systems like ABS and airbags disable. Continued driving causes excessive heat and wear on the transmission. (MPG impact: 5-15%% · Added cost: $400-$2000 (Electrical faults damage other modules; battery replacement required))
- 6+ months: Catastrophic failure occurs. Driving in limp mode for an extended period causes severe internal transmission damage, requiring a complete transmission replacement. The vehicle fails to start entirely. (MPG impact: 15-25%+% · Added cost: $2,500-$5,000+ (Cost of a replacement transmission))
Cost of Not Fixing It
- Immediate: Unpredictable loss of safety systems like ABS, Traction Control, or Airbags. The car enters 'limp mode,' severely limiting speed and stranding the driver. (Added cost: 0)
- 1-3 months: Continued driving in 'limp mode' causes premature wear or overheating of transmission components, turning a sensor issue into a major mechanical failure. (Added cost: 2500-5000+)
- 3+ months: An underlying electrical issue causes a parasitic battery drain, ruining a new battery. Intermittent shorts damage other connected modules on the network. (Added cost: 400-2000)
Diagnosis Steps
- Check and Load Test the Battery
Clean and tighten battery terminals. Use a professional-grade load tester to check the battery's health. A battery showing 12.6 volts at rest still fails under load, causing modules to drop offline.
Tools: Wrench set, Battery terminal cleaner, Professional battery load tester (Beginner) - Inspect and Disconnect Aftermarket Devices
Thoroughly inspect the vehicle for non-factory electronics, including remote starters, aftermarket stereos, alarms, and OBD-II dongles. Disconnect these devices entirely, clear the codes, and drive the vehicle to see if the fault returns.
Tools: Flashlight, Trim removal tools (Beginner) - Scan for All Codes and Research TSBs
Use an advanced OBD-II scanner to read manufacturer-specific 'U' codes from ALL modules (ABS, BCM, TCM). Document every code. Research the exact definition of U1804 for your vehicle and search for related Technical Service Bulletins (TSBs).
Tools: Advanced OBD-II Scanner (Beginner) - Perform a Thorough Visual Inspection
Visually inspect the wiring harness connected to the implicated module. Look for rodent chews, chafing, corrosion on connectors, or loose connections. Check main chassis ground points for corrosion or looseness.
Tools: Flashlight, Inspection mirror (Intermediate) - Check Power and Ground at the Module
Using a wiring diagram, unplug the connector at the suspect module. Use a multimeter to verify battery voltage at the power pins and check for a good ground. A good power ground has less than 0.1 ohms of resistance to the chassis.
Tools: Digital Multimeter, Vehicle-specific wiring diagram (Advanced) - Check CAN Bus Resistance
With the battery disconnected, measure resistance between the CAN High and CAN Low pins at the OBD-II port (pins 6 and 14). A healthy network reads ~60 ohms. A reading of 120 ohms indicates a missing terminating resistor or broken wire. A reading near 0 ohms indicates a short circuit.
Tools: Digital Multimeter, OBD-II port pinout diagram (Advanced) - Check CAN Lines for Shorts to Ground/Power
With the battery disconnected, measure resistance between the CAN High pin and chassis ground, then CAN Low to ground. The reading should be an open circuit. Reconnect the battery, turn the key on, and check voltage from each CAN line to ground. Neither line should show full battery voltage.
Tools: Digital Multimeter (Advanced) - Perform a Parasitic Draw Test
A faulty module that fails to 'sleep' causes a slow battery drain. Measure current draw after all modules sleep (30-60 minutes). An acceptable draw is below 50mA. A consistent draw over 100mA indicates a problem. Pull fuses one by one to isolate the circuit.
Tools: Digital Multimeter with 10A capability, Fuse puller (Professional) - Isolate the Faulty Module (Advanced)
If the CAN bus resistance is incorrect (e.g., 120 ohms), isolate the faulty module by unplugging modules one by one from the network. When the resistance returns to 60 ohms, you have found the source of the problem.
Tools: Digital Multimeter, Wiring diagrams, Trim removal tools (Advanced) - Pro Tip: Scope the CAN Bus Waveform
Using an oscilloscope is the definitive way to analyze network health. A healthy high-speed CAN bus waveform shows two clean, mirror-image square waves. A flat line indicates a short, while a noisy signal suggests interference or a failing module.
Tools: Automotive Oscilloscope, Back-probe pins (Professional)
When This Code Triggers (Freeze-Frame Conditions)
- Condition: Key On, Engine Off (The fault logs immediately at startup as modules perform their initial network check-in.)
- Battery Voltage: 9.5-11.5V (During engine cranking, voltage drops low enough to cause modules to fail their boot-up sequence and log a communication fault.)
- Vehicle Speed: Any (Network faults occur at any speed, triggered by physical events like vibration, thermal changes, or moisture ingress causing an intermittent connection.)
- System State: Post-Repair/Battery Disconnect (The code frequently appears after a battery disconnect or new component installation, causing a temporary loss of communication.)
Related Codes
- U0100 — Means 'Lost Communication With ECM/PCM.' This is a critical network failure. U1804 is often for a less critical module. If both are present, U0100 takes diagnostic priority as the PCM is a network master.
- U0140 — Means 'Lost Communication With Body Control Module (BCM).' This isolates the problem to the BCM, causing failures in lights, windows, and locks. If U0140 is present alongside U1804, the BCM is the primary suspect.
- U0121 — Means 'Lost Communication With Anti-Lock Brake System (ABS) Control Module.' Symptoms are primarily ABS and traction control warning lights. Diagnose U0121 by checking the ABS module's power, ground, and wiring first.
- U0300 — Means 'Internal Control Module Software Incompatibility.' U1804 means a module isn't communicating. U0300 means modules are communicating, but their software versions are mismatched, usually after a module replacement.
Climate & Environmental Factors
- High Humidity / Water Ingress: Moisture is a primary environmental cause of network faults. High humidity causes condensation on circuit boards, while water leaks introduce corrosion on connector pins, increasing resistance or causing short circuits.
- Cold Weather: Extreme cold significantly reduces a battery's cranking power. A weak battery fails to provide sufficient voltage during a cold start, causing modules to boot up improperly and trigger U-codes.
- Salt Belt Regions: Road salt causes aggressive corrosion on chassis grounds, wiring harnesses, and connectors exposed under the vehicle. A corroded ground point is a very common cause of communication errors.
How to Talk to a Mechanic About This Code
Say this: "I have a U1804 network communication code and other related 'U' codes. I'd like to book a diagnostic appointment. Please start by load-testing the battery and checking for any relevant TSBs or software updates before diagnosing wiring or modules."
This signals you understand the nature of network faults, directing the technician to follow a logical, cost-effective diagnostic path (battery -> software -> wiring -> parts) rather than immediately suggesting an expensive module replacement.
Avoid saying:
- 'My check engine light is on.' (Too vague, invites a wide-ranging and expensive search)
- 'Just fix it, I don't care what it takes.' (Surrenders all financial control)
- 'My friend said it's probably the BCM.' (Poisons the diagnostic process with a guess)
Questions to ask before authorizing the repair:
- Did the battery pass a professional load test, or just a simple voltage check?
- Have you checked for and ruled out any available software updates or Technical Service Bulletins (TSBs) for this code?
- If you are recommending a module replacement, did you verify good power, ground, and network signals at the module's connector first?
- Can you provide a printout of all codes from all modules, not just the check engine light code?
Where to Take It: Dealer vs Independent vs Chain
- Dealer:
A strong choice, especially if a software update is the likely fix or if the vehicle is known for specific quirks. They have direct access to factory tools and information.
Best for: Vehicles under warranty, Known manufacturer-specific issues with a TSB (e.g., GM OnStar fault), Repairs that require module programming with proprietary software
Downsides: Highest labor rates, Often defaults to replacing entire assemblies instead of repairing wiring (Typical cost: +50% vs. baseline) - Independent Shop:
Excellent choice if you can find a shop with a known reputation for electrical and network diagnostics. They often provide more repair options than just replacement.
Best for: Out-of-warranty vehicles, Diagnosing common electrical faults like bad batteries, grounds, or alternators, Finding a technician who specializes in electrical diagnostics
Downsides: Quality and equipment vary greatly; must find one specializing in diagnostics, not just general repair., May not have access to the very latest manufacturer software. (Typical cost: +0% vs. baseline) - Chain Shop:
AVOID for diagnosis. Use them only to get a free load test on your battery, then take the results to a qualified diagnostician at a dealership or independent shop.
Best for: Free or low-cost battery testing as a first step.
Downsides: Technicians are typically not trained or equipped for complex network diagnostics., High pressure to sell parts (like batteries) without completing a full diagnosis., Very high risk of misdiagnosis for a U-code. (Typical cost: -10% vs. baseline)
When to Walk Away From the Repair
Sell or trade the vehicle if the estimated repair cost exceeds 50% of its private-party value.
- Car worth $5000, fix is $2800: Walk away. The repair cost is over 50% of the car's value. Put this money towards a replacement vehicle.
- Car worth $15000, fix is $2100: Fix it. The repair is significant but well below the 50% threshold for a vehicle of this value.
- Car worth $3000, fix is $1800: Walk away. This repair is a major percentage of the car's value and other age-related failures are likely to follow.
What Scan Tool You Need for This Code

Minimum: A scanner that can read manufacturer-specific codes from ALL vehicle modules (ABS, BCM, SRS, TCM, etc.).
A basic $20 code reader only checks the engine computer (ECM) and shows 'No Codes,' completely missing a U1804 stored in the BCM or ABS. It is useless for diagnosing this problem.
Budget: BlueDriver Pro Scan Tool (~$120) — Connects to a smartphone and reads codes from all vehicle systems on many makes/models, providing the critical first step of identifying which module is setting the U1804 code.
Mid-range: Foxwell NT510 Elite / Autel MaxiCOM MK808S (~$150-450) — Offers access to all modules, live data streams, and bidirectional controls. This allows you to see live communication data and command certain functions to test module responses.
Professional: Autel MaxiSys MS906 Pro / Launch X431 Series (~$1200+) — Provides full bidirectional control, module coding/programming, and network topology views. These professional-grade tools allow a user to perform dealer-level diagnostics, including reprogramming a new module.
Rent vs buy: Most free rental scanners from auto parts stores are basic code readers and will NOT work for this code. If this is a one-time issue, your money is better spent on a one-hour diagnostic fee at a professional shop. Buy a midrange scanner only if you are a serious DIYer.
How to Clear the Code After You Fix It
- Fix the underlying hardware or software fault
- Use an advanced OBD-II scan tool to clear codes from all modules
- Perform a complete drive cycle to allow readiness monitors to run
Drive cycle (~30 minutes): A generic drive cycle includes a cold start after sitting for 8+ hours, 2-3 minutes of idling with electrical loads on, followed by a mix of city (stop-and-go) and highway (steady 55 mph for 5-10 minutes) driving.
Readiness monitors affected: Comprehensive Component Monitor, Misfire Monitor, Fuel System Monitor
Before emissions retest: drive at least 100 miles to fully set monitors.
Watch out for:
- Disconnecting the battery clears the code but resets all readiness monitors to 'Not Ready', guaranteeing an emissions test failure.
- The code returns immediately if the root cause (bad wiring, faulty module) is not corrected.
- Manufacturer-specific drive cycles are precise and hard to complete without exact instructions.
Will This Fail Emissions / State Inspection?
Yes — this code typically fails an OBD-II emissions inspection.
- California: An illuminated Check Engine Light results in an automatic failure. All readiness monitors must be 'Ready,' requiring a complete drive cycle after repair.
- New York: A vehicle fails the mandatory OBD-II inspection if the Check Engine Light is on for any reason.
- Texas: In counties requiring emissions testing, an illuminated Check Engine Light is an automatic failure. You cannot pass until the issue is fixed and the code is cleared.
Most Commonly Affected Vehicles
- Chevrolet Camaro (2013-2014) — GM TSB PIC5877A addresses U1804 causing a red light on the OnStar mirror. Models built before Jan 1, 2013 require mirror replacement. Models built after require a software update.
- Chevrolet Cruze, Orlando, Sonic (2013-2014) — These models share the same OnStar communication module (VCIM) as the Camaro and are susceptible to the same U1804 fault.
- Fiat / Alfa Romeo Giulia, Ducato, Cronos, Stelvio (2015-2024) — Commonly sets a U1804-08 sub-code indicating the PCM denied a torque request from the TCM, or a LIN Bus failure. Disconnecting the battery on a Giulia triggers temporary communication faults requiring a specific reset procedure.
- Chrysler / Dodge / Jeep Pacifica, Grand Cherokee (2017-2024) — These vehicles set various 'U' communication codes due to a weak primary or auxiliary battery. A weak battery is the first thing to check.
- Ford F-150, Puma, Focus (2015-2024) — Owners report a generic 'Vehicle Network Communication Error' message. Causes range from a bad battery to faulty gateway modules or corroded pins in major wiring connectors.
- Nissan Rogue, Altima (2018-2024) — Network communication errors are triggered by issues with the front radar sensor due to physical obstruction, misalignment, or internal faults.
- Hyundai / Kia Sonata, Santa Fe, Telluride (2019-2024) — Communication codes arise from faulty parking sensors or their wiring harnesses. A failure in one sensor disrupts network traffic.
Manufacturer-Specific Notes

- General Motors (Chevrolet): On 2013 Camaros, U1804 is almost always caused by the OnStar rearview mirror. TSB PIC5877A specifies a software update for post-Jan 2013 builds and mirror replacement for earlier models.
- Stellantis (Chrysler, Dodge, Jeep, Ram, Fiat): These vehicles are notoriously sensitive to battery voltage. Any network communication code requires immediate, professional load-testing of the battery, including the small auxiliary battery.
- Ford: A generic 'Vehicle Network Communication Error' message is a common symptom. The cause is often a single loose or corroded pin in a major connector for the gateway module or a sub-harness.
- Alfa Romeo: The U1804-08 code points to a 'Torque Request Signal From TCM Denied' or a 'LIN Bus Failure'. These cars throw multiple temporary communication codes after a battery disconnect, requiring a specific reset procedure.
Real Owner Stories
2017 Jeep Grand Cherokee with Start/Stop errors
After replacing the auxiliary battery, the vehicle went 'haywire' with multiple dash lights. The new auxiliary battery showed only 9 volts and was not charging.
Outcome: A diagnostic check revealed a blown fuse in the under-hood power distribution center responsible for charging the auxiliary battery. Replacing the fuse restored proper function.
Lesson: If a new battery doesn't fix an electrical issue, verify the charging system and fuses are working correctly before replacing the battery again.
2013-2014 Chevrolet Camaro with OnStar failure
The OnStar indicator light turned red, the compass disappeared, and the MyChevrolet app failed to connect. Codes U0198 and U183A were present.
Outcome: Vehicles built after Jan 1, 2013, require a software update to the rearview mirror module. Vehicles built before that date require a full rearview mirror assembly replacement.
Lesson: Always search for TSBs related to your specific code. The manufacturer often documents the exact failure and provides a specific repair path, saving diagnostic time.
2017 Alfa Romeo Giulia with multiple random errors after battery disconnect
After disconnecting the battery for maintenance, the dashboard lit up with multiple warning lights and system failure messages.
Outcome: A specific reset procedure was required. Starting the car, turning the steering wheel fully lock-to-lock, and turning the car off for 30 seconds cleared the codes.
Lesson: On highly sensitive modern cars, disconnecting the battery triggers a cascade of temporary communication faults. Check service info for specific reset procedures before replacing parts.
2019 Jeep Grand Cherokee with intermittent no-start
The vehicle intermittently failed to start. Replacing both batteries solved the issue temporarily, but it returned weeks later.
Outcome: This indicates a parasitic draw. A module failed to 'go to sleep' after the car turned off, draining the main battery overnight. A parasitic draw test isolated the faulty circuit.
Lesson: If a new battery dies quickly, the problem is the charging system or a parasitic draw. Measuring voltage while the car runs quickly verifies alternator function.
How to Prevent This Code From Triggering
- Perform regular battery and terminal cleaning (Every 6 months) — Corrosion creates resistance and voltage drops, causing modules to drop off the network. Cleaning with a wire brush and applying a terminal protector prevents this.
- Test battery health annually after 3 years (Once per year) — A battery's ability to hold a charge under load degrades over time. An annual professional load test identifies a weakening battery before it causes sporadic communication faults.
- Use a battery tender for long-term storage (If vehicle sits for more than 2-3 weeks) — Normal parasitic draw (25-85mA) drains a battery over several weeks. A battery tender maintains the charge above 12.4V, ensuring modules have enough voltage to boot up correctly.
- Inspect and secure ground wires (During other under-hood maintenance) — Visually check that main chassis and engine ground straps are tight and free of corrosion. A loose ground prevents a stable voltage reference for communication.
- Avoid installing cheap, non-certified electronic accessories (Ongoing) — Poorly designed aftermarket devices introduce electrical noise (EMI) onto the CAN bus, corrupting data packets and causing communication errors.
Frequently Asked Questions
Can I fix code U1804 myself?
You can perform the most common fixes yourself. Replacing a weak battery, cleaning grounds, and removing aftermarket devices solve a majority of cases. Stop DIY and hire a professional if the problem requires wiring repair or module programming.
Will clearing the code make it go away?
Clearing the code with a scanner only erases the stored fault; it does not fix the underlying problem. The code inevitably returns until you repair the root cause.
Why can't I find a single clear definition for U1804?
U1804 is a manufacturer-specific code. While all 'U' codes relate to network problems, carmakers use U1804 to signify different faults on different models. Its meaning depends entirely on the make, model, year, and the specific module setting the code.
The mechanic wants to replace a module for $1,500. Should I do it?
Before authorizing an expensive module replacement, demand proof of a thorough diagnosis. Ask the technician if they load-tested the battery, checked for TSBs, and verified power and ground directly at the module's connector.
Can a bad ground wire really cause code U1804?
Yes. A faulty ground is a primary cause of network codes. A module requires a solid ground reference (under 0.1 ohms) to transmit data. Without it, communication fails and triggers U-codes.
Why did my car show ten different 'U' codes at once?
This points to a failure of a central module or the main power supply. When a critical module like the Gateway goes offline, every dependent module reports a 'lost communication' code simultaneously. The root cause is a single point of failure, not ten separate problems.
How long does it take to diagnose a U-code?
Diagnosis takes anywhere from 5 minutes to over 5 hours. A weak battery is a quick find. However, tracing an intermittent wiring short deep inside the dashboard requires extensive labor.
What does a good CAN bus signal look like on an oscilloscope?
A healthy high-speed CAN bus signal shows two distinct, clean square waves that are perfect mirror images. When CAN High goes from 2.5V to 3.5V, CAN Low simultaneously drops from 2.5V to 1.5V. The total voltage difference is always exactly 0V or 2V.
Key Takeaways
- Code U1804 is a manufacturer-specific network error, meaning the exact failing module varies entirely by your vehicle's make and model.
- Professionally load-test your battery first, as voltage drops below 9.6V during cranking are the #1 cause of false U1804 codes.
- Unplug all aftermarket OBD-II dongles, remote starters, or alarms immediately to rule out CAN bus interference.
- Search for Technical Service Bulletins (TSBs) before replacing parts, as a 1-hour dealer software update fixes this code on many GM and Stellantis vehicles.
- Never replace a $500+ control module without first verifying it has less than 0.1 ohms of ground resistance and a steady 12V power supply.
Helpful Videos
![How To Test CAN BUS With A Multimeter [CAN Bus Resistance Check] Mechanic Mindset](https://img.youtube.com/vi/JPE42HSJxAk/mqdefault.jpg)


The information in this article is provided for general reference and educational purposes only. Vehicle specifications, procedures, and part compatibility can vary by production date, trim level, and region. Always consult your vehicle's factory service manual and verify part numbers before purchasing or performing repairs. Safety-critical components such as airbags, seat belts, and braking systems should be installed by a qualified professional.
- 🎬 Helpful Videos
- What Does U1804 Mean?
- Can I Drive With U1804?
- Common Causes
- Symptoms
- Diagnostic Flowchart
- Common Fixes & Costs
- Used vs. New Parts: Buying Guide
- What Happens If You Wait — Timeline
- Cost of Not Fixing It
- Diagnosis Steps
- When This Code Triggers (Freeze-Frame Conditions)
- Related Codes
- Climate & Environmental Factors
- How to Talk to a Mechanic About This Code
- Where to Take It: Dealer vs Independent vs Chain
- When to Walk Away From the Repair
- What Scan Tool You Need for This Code
- How to Clear the Code After You Fix It
- Will This Fail Emissions / State Inspection?
- Most Commonly Affected Vehicles
- Manufacturer-Specific Notes
- Real Owner Stories
- 2017 Jeep Grand Cherokee with Start/Stop errors
- 2013-2014 Chevrolet Camaro with OnStar failure
- 2017 Alfa Romeo Giulia with multiple random errors after battery disconnect
- 2019 Jeep Grand Cherokee with intermittent no-start
- How to Prevent This Code From Triggering
- Frequently Asked Questions
- Can I fix code U1804 myself?
- Will clearing the code make it go away?
- Why can't I find a single clear definition for U1804?
- The mechanic wants to replace a module for $1,500. Should I do it?
- Can a bad ground wire really cause code U1804?
- Why did my car show ten different 'U' codes at once?
- How long does it take to diagnose a U-code?
- What does a good CAN bus signal look like on an oscilloscope?
- Key Takeaways
- 🎟️ Get 5% Off