

Ultimate Guide to OBD-II Code U1800: A Pro-Level Diagnostic Manual
Why U1800 triggers, what it means for your vehicle, and how to fix it right the first time
- U1800 on a 2001-2007 GM Duramax means the Engine Control Module lost communication with the Fuel Injector Control Module (FICM), causing an immediate crank-no-start or stalling condition.
- Inspect the wiring harness near the alternator bracket first; chafed wires shorting to ground are the number one cause of this code.
- Never replace the $500+ FICM without load-testing both batteries and verifying voltage stays above 9.5V during cranking.
- Swap the FICM power relay with the horn relay and check the dedicated FICM fuse to rule out a $20 fix before attempting advanced diagnostics.
What Does U1800 Mean?

Code U1800 signifies a critical breakdown in the vehicle's communication network. The Engine Control Module (ECM) has lost its data link with another essential computer module. On General Motors diesel trucks, U1800 points directly to a lost connection with the Fuel Injector Control Module (FICM). The FICM activates the fuel injectors; without its signal, the engine cranks but receives no fuel.
Technical definition: U1800 is a manufacturer-specific network trouble code. General Motors defines it as 'Lost Communication With Fuel Injector Control Module (FICM)'. The code sets when the ECM fails to receive expected messages from the FICM over the Class 2 communication bus or Controller Area Network (CAN) bus for a predetermined period.
Can I Drive With U1800?
No — Do Not Drive. Driving is strongly discouraged. This code indicates a critical communication failure, most commonly with the Fuel Injector Control Module (FICM). This causes the engine to stall without warning at any speed or fail to start, posing a severe safety risk. Continuing to operate the vehicle with an intermittent fault places extreme electrical stress on the FICM, accelerating its complete failure.
Common Causes

- Damaged or Chafed Wiring Harness (Very Common) — Engine vibration causes the wiring loom to rub against engine components. The alternator bracket is the most notorious culprit on Duramax engines. This chafing wears through the wire's insulation, causing the communication wire to short to ground, breaking the data link.
- Low Battery Voltage or Bad Batteries (Common) — Communication modules require stable voltage. During engine cranking, weak batteries cause system voltage to drop below the 9.5V threshold needed by the FICM to power on. This triggers a U1800 code even if the FICM is healthy.
- Failed FICM Power Relay (Common) — The FICM is powered via a relay in the under-hood fuse box. This relay fails due to age or electrical faults, cutting off power to the module and causing an immediate loss of communication.
- Blown FICM Fuse (Common) — The FICM has a dedicated power supply fuse. A short circuit in the wiring harness or a severe internal module fault causes this fuse to blow. If a new fuse blows immediately, it confirms a dead short in the circuit.
- Failed Fuel Injector Control Module (FICM) (Common) — The FICM's internal power supply boosts battery voltage to 48V for the injectors. Weak batteries force this power supply to work harder, generating excess heat that damages internal solder joints and electronic components, leading to failure.
- Loose or Corroded Connector Pins (Less Common) — The large electrical 'bale' connectors plugging into the ECM and FICM contain dozens of small pins. Vibration, moisture, or improper re-seating after installing an aftermarket tuner causes these pins to bend or corrode, resulting in a lost connection.
- Poor or Broken Main Engine Ground (Less Common) — All modules share a common ground reference. A corroded or broken ground strap between the engine, chassis, or battery creates a 'floating ground,' leading to unpredictable voltage differences and communication errors.
- Improperly Installed Aftermarket Electronics (Less Common) — Aftermarket performance tuners or remote starters tap into CAN bus wires. Poor installation disrupts data signals and triggers U-series codes.
Symptoms

- Engine cranks but will not start — The starter motor turns the engine over, but it will not fire because the injectors receive no commands from the FICM.
- Engine stalls while driving — The engine shuts off abruptly and without warning while on the road.
- Rough running, misfiring, or hard starting — A failing FICM or intermittent wiring issue causes the engine to run poorly, shake, or hesitate before a complete failure.
- Reduced Engine Power message — The vehicle enters 'limp mode' to protect the drivetrain, severely limiting speed and acceleration.
- Intermittent or erratic instrument cluster behavior — Network communication problems cause gauges to flicker, drop to zero, or display error messages.
- Check Engine Light is on (also visible on scanner) — The ECM detects the loss of communication and illuminates the Malfunction Indicator Lamp (MIL).
Diagnostic Flowchart
Tap your situation to follow the diagnostic path that matches what you're seeing on this code.
Common Fixes & Costs
- Replacing a Blown Fuse or Faulty Relay
— Parts: $5-$30, Labor: $0-$50, ~0.2 hr book time
(Beginner)
: OEM - Replacing Failed Batteries
— Parts: $300-$600 (for a pair), Labor: $50-$100, ~0.8 hr book time
(DIY)
: OEM - Repairing a Damaged Wiring Harness
— Parts: $10-$100, Labor: $250-$1000, ~2.5 hr book time
(Intermediate)
: OEM - Replacing the Fuel Injector Control Module (FICM)
— Parts: $300-$1,500, Labor: $150-$300, ~1.5 hr book time
(DIY)
: OEM
: OEM
: OEM - Replacing a Damaged Engine Wiring Harness
— Parts: $1,200-$2,500, Labor: $1,000-$3,000, ~16.0 hr book time
(Professional)
: OEM
Used vs. New Parts: Buying Guide
When a used part is worth it: Buying a used Fuel Injector Control Module (FICM) is highly discouraged. These modules have known age-related failure modes, and a used part is likely to have the same vulnerabilities and a very limited remaining lifespan.
Donor-vehicle mileage cap: roughly under 40000 miles for the part to have meaningful remaining life.
Donor quality checklist:
- Verify the exact part number for your engine (LB7 and LLY are different and not interchangeable).
- Avoid modules from regions with extreme heat, which accelerates electronic failure.
- A 'remanufactured' or 'rebuilt' unit is not the same as a 'used' one and is a much better choice.
Decision logic:
- If Your original FICM is available and the case is not physically damaged → Use a reputable repair/rebuild service. This provides upgraded components and a lifetime warranty for less than a new part.
- If Your original FICM is missing or damaged, or you cannot have vehicle downtime → Buy a high-quality remanufactured unit from a specialist that offers a long-term warranty.
- If You are on an extreme budget and understand the high risk of premature failure → A used part is a last resort; expect a significantly shorter lifespan.
Warranty tradeoff: Used parts: Typically 30-90 day warranty, if any. Remanufactured/Repaired: Often 1-year to lifetime warranties, reflecting higher quality and upgraded components.
Worst-case if a used part fails: $400-$800 (Cost of another replacement part plus repeat labor and towing fees when the used part inevitably fails).
What Happens If You Wait — Timeline
- 0-1 month (Intermittent Fault): Occasional hard starting, especially when cold. Engine stumbles or hesitates briefly after starting. Check Engine Light comes on and goes off. The issue is a wiring chafe making momentary contact or an early-stage FICM solder failure. (MPG impact: 0-5%% · Added cost: $0-$50 (in wasted fuel))
- 1-3 months (Consistent Fault): Hard starting becomes the norm. The engine runs rough, misfires, and produces white smoke from incomplete combustion. The U1800 code is permanently set. The FICM's 48V output is consistently low. (MPG impact: 5-15%% · Added cost: $500-$1500 (Cost of a new FICM, as continued low voltage operation causes irreversible internal damage.))
- 3+ months (Critical Failure): The vehicle stalls randomly while driving as communication is lost completely. Eventually, it progresses to a permanent crank-no-start condition, leaving the driver stranded. (MPG impact: 100% (Vehicle is undrivable)% · Added cost: $150-$400+ (Towing fees plus the cost of the primary repair.))
- Contingent on cause: If the root cause is an ignored wiring short, it causes cascading failures. A short damages the FICM, the Engine Control Module (ECM), or other modules on the same data bus, turning a simple wiring repair into a multi-thousand-dollar component replacement scenario. (MPG impact: 100%% · Added cost: $2000-$5000+ (Cost of replacing multiple electronic modules and potentially a full engine harness.))
Cost of Not Fixing It
- Immediate: Catastrophic and unpredictable engine stalling at any time, including on the highway. This poses an extreme safety risk to the driver and others. (Added cost: N/A (Safety Risk))
- 0-1 Month: Continued operation with low battery voltage or intermittent wiring faults places extreme stress on the FICM's internal power supply, accelerating its complete failure. (Added cost: $500-$1500 (Cost of a replacement FICM that might have been saved))
- 1-6 Months: A failing FICM leads to poor combustion, resulting in reduced fuel economy and potentially damaging the Diesel Particulate Filter (DPF) on newer vehicles due to excessive soot. (Added cost: $2000+ (Cost of DPF replacement))
Diagnosis Steps

- Check and Load-Test the Batteries
Ensure both batteries are fully charged. A healthy battery reads at least 12.6V with the engine off. Have them professionally load-tested. During cranking, system voltage must not drop below 9.5V; a drop below this level indicates weak batteries that cause modules to shut down.
Tools: Digital Multimeter, Professional Battery Load Tester (Beginner) - Inspect Fuses and Swap the FICM Relay
Check the under-hood fuse box for any fuses labeled 'FICM', 'ECM', or 'INJ'. Visually inspect for a blown fuse. Locate the FICM power relay and swap it with an identical relay from a non-critical system (like the horn) to quickly rule out a failed relay.
Tools: Owner's Manual, Fuse Puller (Beginner) - Visually Inspect the Wiring Harness
Perform a meticulous visual inspection of the engine wiring harness running to the FICM. Pay extremely close attention to the area around the alternator and its mounting bracket, as this is a notorious chafing point. Look for any signs of rubbing, melting, or exposed wires.
Tools: Flashlight, Inspection Mirror (Intermediate) - Pro Tip: The 'Wiggle Test'
With the scan tool connected and attempting to communicate with the FICM, have a helper turn the key to the 'On' position. Systematically wiggle and manipulate sections of the engine wiring harness, especially near the alternator and connectors. If the scan tool suddenly establishes or loses communication, you have found the location of an intermittent break or short.
Tools: Advanced Scan Tool (Advanced) - Inspect Connectors and Grounds
Disconnect the battery. Unplug the large bale connectors at the FICM and ECM. Inspect for corrosion, bent pins, or pushed-back pins. Clean with contact cleaner and ensure they seat firmly. Locate and inspect the main ground straps from the engine to the chassis and from the battery to the chassis. Remove, clean, and tighten them.
Tools: Socket Set, Contact Cleaner, Wire Brush (Intermediate) - Pro Tip: Verify Power and Ground at the FICM Connector
Using a multimeter and a wiring diagram, probe the appropriate pins on the disconnected FICM connector. With the key on, verify: 1) Battery Power (12V+ constant), 2) Ignition Power (12V+ with key on), and 3) Ground (less than 0.1 ohms of resistance to the battery negative terminal). If any are missing, the fault is in the vehicle's wiring, not the FICM.
Tools: Digital Multimeter, Vehicle-Specific Wiring Diagram (Advanced) - Test FICM Logic and Main Voltage (Scan Tool)
Using a scan tool, monitor 'FICM Main Power' and 'FICM Logic Power'. Logic power must be stable at battery voltage (12V+). FICM Main Power must be 48V (+/- 2V) with the key on, during cranking, and while running. If the voltage drops below 45V, the FICM's internal power supply is failing. If the scan tool cannot communicate at all, and you've verified power/ground, the FICM is faulty.
Tools: Advanced Scan Tool (Advanced) - Perform a CAN Bus Resistance Test
Turn the ignition off and disconnect the battery. At the OBD-II port, measure the resistance between Pin 6 (CAN High) and Pin 14 (CAN Low). A healthy CAN bus reads approximately 60 ohms. A reading of 120 ohms indicates a missing terminating resistor or a break in the circuit. A reading near 0 ohms indicates a short between the two CAN wires.
Tools: Digital Multimeter (Advanced) - Advanced: Check Fuel Rail Pressure (Confounding Factor)
A no-start is also caused by low fuel rail pressure. Using a scan tool, monitor 'Desired Fuel Rail Pressure' and 'Actual Fuel Rail Pressure' during cranking. The LB7 Duramax requires at least 1,500 PSI to start. If actual pressure is far below desired pressure during cranking (e.g., only 500-700 PSI), you have a fuel system issue (like a bad CP3 pump or injectors) in addition to or instead of the U1800 fault.
Tools: Advanced Scan Tool (Advanced)
When This Code Triggers (Freeze-Frame Conditions)
- Engine State: Cranking or Key-On Engine-Off (The code sets when the ECM attempts to initialize communication with the FICM before starting and fails, resulting in a crank-no-start condition.)
- Vehicle Speed: Any Speed (For intermittent faults like a chafed wire, the code triggers at any speed when engine vibration causes the wire to momentarily short out.)
- System Voltage: < 9.5V (during crank) (Weak batteries cause voltage to drop significantly during engine cranking, preventing the FICM from powering on and communicating.)
- Engine Operating Time: Variable (The fault occurs on a cold start or after extended running, especially if heat-soak affects FICM internal components or wiring.)
Related Codes
- U0105 — This is the generic, SAE-standardized code for 'Lost Communication with Fuel Injector Control Module.' It points to the exact same problem as U1800 and is diagnosed identically.
- P0611 — 'FICM Performance.' Indicates the ECM is communicating with the FICM, but the FICM is reporting an internal performance error, most commonly that its 48V output is low. This is a precursor to a complete FICM failure.
- U0100 — 'Lost Communication with ECM/PCM.' A more severe network code. If you have U0100, other modules cannot hear the ECM at all, pointing to a failed ECM or a power/ground issue at the ECM itself.
- U0073 — 'Control Module Communication Bus 'A' Off.' Indicates a general network shutdown. On newer vehicles, a wiring harness issue causes this code to appear alongside many others, indicating widespread data disruption.
Climate & Environmental Factors
- Cold Weather: Cold weakens battery performance, causing voltage to drop below the FICM's operational threshold during cranking. It also causes failing solder joints inside the FICM to contract and break contact, leading to a no-start that disappears once the engine bay warms up.
- Humidity and Salt: High humidity and winter road salt accelerate corrosion on wiring harness connectors, module pins, and chassis grounds. A corroded ground point increases resistance, creating an unstable voltage reference and disrupting communication.
- Heat and Vibration: Constant engine vibration physically rubs wires against brackets, causing chafing. High under-hood temperatures degrade electronic components and solder joints within the FICM over time, contributing to its eventual failure.
How to Talk to a Mechanic About This Code
Say this: "I have a crank-no-start condition with a U1800 code on my Duramax. I'd like to book a diagnostic appointment. Please start by load-testing the batteries and checking the FICM fuse, relay, and all related wiring for chafing, especially near the alternator, before condemning the FICM itself."
This signals to the shop that you are an informed customer. It directs them to follow a logical, cost-effective diagnostic procedure, starting with the most common and cheapest failure points (batteries, relays, wiring) rather than immediately quoting a very expensive FICM replacement.
Avoid saying:
- 'Just fix whatever's wrong'
- 'My truck won't start, can you look at it?'
- 'Whatever you recommend'
Questions to ask before authorizing the repair:
- Did you load-test both batteries, and what was the voltage during cranking?
- Did you confirm 12V power, ignition, and good ground right at the FICM connector pins?
- If you are recommending a wiring repair, did you find the specific point of failure? Can you show it to me?
- If you are recommending a FICM replacement, how did you rule out a wiring or power supply issue?
- What is the warranty on the recommended parts and labor?
Where to Take It: Dealer vs Independent vs Chain
- Dealer:
A viable but expensive option. They have access to manufacturer-specific tools but are not the most cost-effective choice for these common, well-documented issues on out-of-warranty trucks.
Best for: Vehicles still under an extended warranty, Complex, widespread electrical issues that require a full harness replacement
Downsides: Highest labor rates, typically 1.5-2x an independent shop., Defaults to expensive, wholesale fixes (like replacing a whole harness for one bad wire) instead of nuanced repairs. (Typical cost: +50% vs. baseline) - Independent Shop:
Best fit. A reputable independent diesel specialist has likely seen and fixed this exact code dozens of times. They perform targeted, affordable wiring repairs and have access to quality remanufactured FICM options.
Best for: Out-of-warranty vehicles, especially diesel trucks., Diagnosing common, well-known failures like U1800., Cost-effective wiring harness repairs.
Downsides: Quality and expertise vary widely. It is crucial to find a shop with a strong reputation, ASE certifications, and specific experience with diesel trucks. (Typical cost: +0% vs. baseline) - Chain Shop:
AVOID. This code requires specialized diagnostic expertise beyond the scope of a general chain repair shop. The risk of an expensive misdiagnosis is very high.
Best for: Simple, routine maintenance like oil changes, tires, and battery replacement.
Downsides: Technician skill is highly variable and not specialized in complex electrical or diesel diagnostics., High pressure to meet sales targets leads to misdiagnosis and upselling of unnecessary, expensive parts. (Typical cost: -10% vs. baseline)
When to Walk Away From the Repair
If the estimated repair cost exceeds 50% of the vehicle's current private-party market value, seriously consider selling or trading it in rather than repairing it.
- Car worth $8000, fix is $750: Fix it. This is a reasonable cost for a wiring repair or remanufactured FICM and is well below the threshold.
- Car worth $12000, fix is $4500: Borderline. This represents a worst-case scenario (e.g., full engine harness replacement). Get a second opinion from an independent specialist before authorizing.
- Car worth $5000, fix is $3000: Walk away. The repair cost is over half the truck's value. It's not economically sensible unless the truck has significant sentimental value.
What Scan Tool You Need for This Code

Minimum: A tool that reads manufacturer-specific codes and live data for GM, specifically 'FICM Main Power' and 'FICM Logic Power'.
A basic $20 code reader only shows the U1800 code. It cannot display the critical, real-time FICM voltage data needed to determine if the module itself has failed or if the problem is external (wiring/power). You will be diagnosing blind.
Budget: BlueDriver Pro (~$90) — Reads and clears the code, provides freeze-frame data, and displays some live data streams via its app. It confirms the code but lacks the specific GM PIDs for FICM voltage, making it a good starting point but not a complete diagnostic tool.
Mid-range: Foxwell NT510 Elite with GM Software (~$180) — Excellent value. This handheld tool accesses manufacturer-specific GM modules, reads FICM-specific live data (Main Power, Logic Power), and performs some bidirectional controls. It is sufficient for a confident diagnosis of U1800.
Professional: Autel MaxiCOM MK808 / MK906BT (~$500-1200) — Professional-level diagnostics. Provides full access to all modules, reads all GM-specific PIDs including FICM voltages, offers full bidirectional control, and has a fast interface for graphing live data, which is ideal for performing 'wiggle tests'.
Rent vs buy: If this is a one-time diagnosis, auto parts stores offer a loaner tool program. For a refundable deposit, you borrow a scanner capable of reading codes. However, to see the specific live data needed for U1800, you must buy a mid-range tool.
How to Clear the Code After You Fix It
- Reconnect the battery (negative terminal last).
- Use an OBD-II scan tool to formally clear the U1800 and any related fault codes.
- Perform a complete GM drive cycle to allow readiness monitors to run.
Drive cycle (~20 minutes): Start from a cold soak (engine off for 8+ hours). Idle for 2-3 minutes with electrical loads on. Accelerate to 55 MPH at half throttle and hold steady for 3 minutes. Coast down to 20 MPH without using the brake. Accelerate to 60 MPH at 3/4 throttle and hold steady for 5 minutes. Coast down again.
Readiness monitors affected: Catalyst (CAT) monitor, Evaporative System (EVAP) monitor, Oxygen (O2) Sensor monitor
Before emissions retest: drive at least 100 miles to fully set monitors.
Watch out for:
- Disconnecting the battery clears the code but resets all readiness monitors to 'Not Ready', guaranteeing an emissions test failure.
- The code returns immediately if the root cause (e.g., chafed wire, bad relay) was not correctly repaired.
- The EVAP and Catalyst monitors require multiple drive cycles to set.
Will This Fail Emissions / State Inspection?
Yes — this code typically fails an OBD-II emissions inspection.
- California: An illuminated Check Engine Light results in an automatic smog check failure. All required readiness monitors must be 'Ready'; clearing the code before a test causes a failure.
- New York: A vehicle automatically fails the emissions portion of the NYS inspection if the Check Engine Light is on.
- Texas: In the 17 counties requiring emissions testing, an illuminated Check Engine Light or a 'Not Ready' status causes an automatic failure of the OBD-II test.
Most Commonly Affected Vehicles
- Chevrolet Silverado 2500/3500 HD (2001-2007) — Extremely common on trucks with the 6.6L Duramax LB7 (2001-2004.5) and LLY (2004.5-2005) engines due to FICM failures and wiring harness chafing near the alternator bracket.
- GMC Sierra 2500/3500 HD (2001-2007) — Mechanically identical to the Silverado, this model with the 6.6L Duramax (LB7/LLY) is prone to the exact same FICM and wiring harness issues.
- Hummer H1 Alpha (2006-2006) — The 2006 H1 Alpha used the 6.6L Duramax LLY engine, making it susceptible to the same U1800 code for the same reasons as the GM HD trucks.
- GMC TopKick C4500/C5500 (2004-2009) — These medium-duty trucks used LLY and later Duramax engines and experience the same FICM communication failures due to similar wiring harness routing.
- Chevrolet Kodiak C4500/C5500 (2004-2009) — The Chevrolet-badged twin of the GMC TopKick, sharing the same chassis, Duramax engines, and susceptibility to the U1800 code.
- Chevrolet Trailblazer / GMC Envoy (2002-2009) — On these platforms, U1800 points to a general Class 2 data communication failure, often caused by a faulty Body Control Module (BCM) or a wiring issue under the driver's side rear seat.
- Cadillac Escalade (2022-2024) — Newer GM vehicles experience communication codes. TSB 23-NA-102 addresses issues on models with LM2/LZ0 engines where the engine wiring harness contacts the alternator bracket or A/C lines.
- Chevrolet Silverado 1500 / Suburban / Tahoe (2022-2024) — As per TSB 23-NA-102, these models with the LM2 or LZ0 engines are susceptible to communication issues due to wiring harness contact with other components.
Manufacturer-Specific Notes
- General Motors (GM): This is overwhelmingly a GM code. On Duramax diesel trucks from 2001-2007, it is synonymous with a no-start condition caused by a FICM or wiring failure. On newer GM vehicles, communication codes are addressed by TSBs like 23-NA-102, pointing to wiring harness contact issues.
- Ford / Dodge / Chrysler: These manufacturers do not use the U1800 code. They use the standardized U0105 code to report a loss of communication with their respective injector control modules.
- Nissan / Toyota / Honda: These manufacturers do not use the U1800 code. They have proprietary 'U' codes or use standardized SAE codes (U0xxx) for network communication faults.
- Aftermarket Devices: The installation of aftermarket performance tuners or remote starters is a common cause of communication codes. These devices tap into main harness connectors, where a single bent pin takes down the entire network. Always remove aftermarket devices before beginning diagnosis.
Real Owner Stories
2003 GMC Duramax LB7 stalls on highway
Truck died suddenly while driving. Threw code U1800. After towing, owner checked fuses and relays, which seemed fine.
What they tried:
- Checked fuses and relays.
- Performed a detailed inspection of the wiring harness near the alternator bracket based on forum advice.
- Found a pink wire that had rubbed through its insulation on a metal bracket.
Outcome: Taped up the chafed wire. The truck still wouldn't start. A further check revealed the #3 ignition fuse (25A) had blown as a result of the short. After replacing the fuse, the truck started and ran normally.
Lesson: A chafed wire is the most common cause. Even after repairing the wire, check all related fuses. The short circuit blows a fuse, and the vehicle won't start until it's replaced.
2003 Chevy 3500 Duramax crank-no-start after tuner install
Installed a Banks OttoMind 6 tuner. Immediately after, the truck cranked but would not start and consistently showed a U1800 code.
What they tried:
- Removed the aftermarket tuner and returned to the factory setup, but the problem persisted.
- Swapped the FICM relay.
- Recharged the old, original batteries.
Outcome: The owner determined the FICM itself had failed. The manipulation of the connectors during tuner installation caused the final failure of an already weak module. Replacing the FICM resolved the no-start condition.
Lesson: If a U1800 code appears immediately after installing an aftermarket device, remove it. Carefully inspect the large 'bale' connectors for bent or pushed-back pins. The act of plugging/unplugging damages sensitive connections.
2005 Chevy Duramax LLY with intermittent crank-no-start
Truck came in as a crank-no-start. Scan tool showed code U0105 (the generic equivalent of U1800).
What they tried:
- Checked the FICM fuse and found it was blown.
- Replacing the fuse allowed the truck to start, confirming a short circuit in the harness.
- Disconnected the main bulkhead connectors to isolate harness sections.
- Performed a 'wiggle test' on the harness between the fuse box and the bulkhead connector while monitoring the circuit.
Outcome: The short was located and repaired in the wiring harness between the under-hood fuse box and the FICM connectors. This permanently fixed the issue.
Lesson: If a new FICM fuse blows immediately, you have a dead short. A 'wiggle test' is an effective way to find it. Isolate the fault by disconnecting connectors and testing sections of the harness.
How to Prevent This Code From Triggering
- Protect the Wiring Harness at Common Chafe Points (Once, during other maintenance) — Engine vibration is the #1 killer. Proactively inspect the harness near the alternator bracket, A/C lines, and shock towers. Wrap these areas with high-quality anti-abrasion tape or split-loom tubing to prevent wires from rubbing through.
- Maintain Battery Health and Clean Terminals (Every 3-6 months) — Low voltage from weak batteries stresses the FICM's internal power supply, causing overheating and failure. Keep terminals clean and ensure both batteries are fully charged and replaced as a pair.
- Periodically Check Main Engine and Body Grounds (Every 1-2 years) — Corrosion on the main ground straps between the engine, frame, and battery creates high resistance and an unstable ground reference for all modules. Removing, cleaning, and securely retightening these grounds ensures reliable communication.
- Upgrade Alternator and 'Big 3' Wiring (Optional, for high-demand use) — Upgrading to a high-output alternator and increasing the size of the main power/ground wires provides a more stable voltage supply, reducing stress on the entire electrical system, including the FICM.
Frequently Asked Questions
I replaced the FICM, but the truck still won't start and U1800 returned. What now?
The fault is in the wiring or power supply, not the module. Re-verify both batteries pass a load test and check for 12V power and ground directly at the FICM connector pins. Finally, perform a wiggle test on the harness to locate the intermittent short.
Can a bad ground wire really stop my truck from starting?
Yes. Computer modules require a stable ground reference to send and receive data signals. A corroded ground strap creates high resistance, corrupting the data signal and triggering a U1800 communication loss.
Why are my batteries causing a communication code?
The FICM converts 12V battery power into 48V for the injectors. Weak batteries cause voltage to drop below 9.5V during cranking, forcing the FICM to shut down or fail to initialize. Consistently low voltage also overheats and permanently damages the FICM's internal components.
Is it better to repair my FICM or buy a new one?
Repair services are the most cost-effective and reliable solution, often upgrading weak components and providing a lifetime warranty. A remanufactured unit is a solid second choice. Avoid used modules, as they carry the same inherent age-related flaws and will likely fail prematurely.
I installed a performance tuner and now I have a U1800 code. What happened?
The tuner's pass-through connector likely has a bent or pushed-back pin. This creates a poor connection on the communication line, taking down the network. Remove the tuner completely and inspect every pin in the factory connectors with a flashlight before reconnecting.
What is the most common misdiagnosis for a U1800 code?
The most costly mistake is replacing the expensive Fuel Injector Control Module (FICM) without performing foundational electrical checks. Owners often spend thousands only to find the true cause was a chafed wire, a bad $20 relay, or weak batteries. Always rule out external wiring and power supply first.
What is a 'bale connector' and why is it important for U1800?
A bale connector is a large electrical plug that uses a lever to seat dozens of pins simultaneously, used on the Duramax ECM and FICM. If the lever isn't engaged evenly, the connector won't seat properly, breaking the connection on critical communication wires.
Key Takeaways
- U1800 on a 2001-2007 GM Duramax means the Engine Control Module lost communication with the Fuel Injector Control Module (FICM), causing an immediate crank-no-start or stalling condition.
- Inspect the wiring harness near the alternator bracket first; chafed wires shorting to ground are the number one cause of this code.
- Never replace the $500+ FICM without load-testing both batteries and verifying voltage stays above 9.5V during cranking.
- Swap the FICM power relay with the horn relay and check the dedicated FICM fuse to rule out a $20 fix before attempting advanced diagnostics.
Helpful Videos
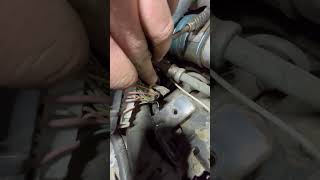

The information in this article is provided for general reference and educational purposes only. Vehicle specifications, procedures, and part compatibility can vary by production date, trim level, and region. Always consult your vehicle's factory service manual and verify part numbers before purchasing or performing repairs. Safety-critical components such as airbags, seat belts, and braking systems should be installed by a qualified professional.
- 🎬 Helpful Videos
- What Does U1800 Mean?
- Can I Drive With U1800?
- Common Causes
- Symptoms
- Diagnostic Flowchart
- Common Fixes & Costs
- Used vs. New Parts: Buying Guide
- What Happens If You Wait — Timeline
- Cost of Not Fixing It
- Diagnosis Steps
- When This Code Triggers (Freeze-Frame Conditions)
- Related Codes
- Climate & Environmental Factors
- How to Talk to a Mechanic About This Code
- Where to Take It: Dealer vs Independent vs Chain
- When to Walk Away From the Repair
- What Scan Tool You Need for This Code
- How to Clear the Code After You Fix It
- Will This Fail Emissions / State Inspection?
- Most Commonly Affected Vehicles
- Manufacturer-Specific Notes
- Real Owner Stories
- 2003 GMC Duramax LB7 stalls on highway
- 2003 Chevy 3500 Duramax crank-no-start after tuner install
- 2005 Chevy Duramax LLY with intermittent crank-no-start
- How to Prevent This Code From Triggering
- Frequently Asked Questions
- I replaced the FICM, but the truck still won't start and U1800 returned. What now?
- Can a bad ground wire really stop my truck from starting?
- Why are my batteries causing a communication code?
- Is it better to repair my FICM or buy a new one?
- I installed a performance tuner and now I have a U1800 code. What happened?
- What is the most common misdiagnosis for a U1800 code?
- What is a 'bale connector' and why is it important for U1800?
- Key Takeaways
- 🎟️ Get 5% Off