

U1505 on 2014-2018 Chevy Silverado 1500: Trailer Brake System Fault Causes & Fixes
Code U1505 on a 2014-2018 Silverado typically triggers the 'Service Trailer Brake' message. The most common causes are a corroded connector at the Trailer Brake Control Module (TBCM) under the truck near the spare tire, or a faulty in-dash controller switch. Check fuses (especially the 30A trailer battery fuse) and connectors for corrosion before replacing any expensive parts.
- U1505 means there's a communication failure with your Trailer Brake Control Module, which will disable your trailer brakes.
- Before buying parts, always check the simple things first: the trailer brake fuses in the under-hood fuse box.
- The two most common culprits are the in-dash controller switch and corrosion at the module connector under the truck; inspect the connector before replacing the module.
- This issue is well-documented by GM, and cleaning a corroded connector or replacing the in-dash switch often resolves the problem without a trip to the dealer.
What's Unique About the 2014-2018 Chevrolet SILVERADO 1500
On this generation of Silverado (K2XX platform), the trailer brake system is known for a few common failure points. GM has issued Technical Service Bulletins, specifically PIT5529A, pointing to corrosion on the connector for the Trailer Brake Power Module (also called the TBCM or K133), which is mounted under the truck and exposed to the elements. This TSB notes that missing or dislodged cavity plugs in the connector can allow water and dirt to enter, causing the fault. Additionally, a high number of owners have reported that the in-dash controller switch assembly fails, causing identical symptoms, making it another top suspect.
Diagnostic Flowchart
Tap your situation to follow the diagnostic path that matches what you're seeing on this vehicle.
Symptoms You May Notice
- "Service Trailer Brake System" message on the Driver Information Center (DIC)
- "Check Trailer Wiring" message on the DIC
- The trailer brake system is disabled
- The trailer brake output gain displays on the dash even when no trailer is connected
- Warning message appears intermittently, sometimes triggered by heat or rain
- Inability to adjust trailer gain with the in-dash switch
- Replacing the Trailer Brake Control Module (TBCM) before thoroughly checking the fuses, the in-dash switch, and the TBCM's electrical connector for corrosion.
- Assuming the truck is at fault when the issue is caused by a short in the wiring of the trailer being connected.
Most Likely Causes
- Corroded or Damaged Trailer Brake Control Module (TBCM) Connector 🔴 High Probability The TBCM is mounted under the rear of the truck on the driver's side frame rail, often above the spare tire, where its electrical connector is exposed to water, salt, and road debris. GM TSBs PIT5529A and PIT5529 explicitly cite this as a primary cause, often due to missing or dislodged cavity plugs in the connector letting moisture in.
How to confirm: Lower the spare tire for access. Locate the TBCM on the frame rail. Disconnect its electrical connector (designated X411) and inspect the pins and wiring for green or white corrosion, moisture, or physical damage. Check for broken wires leading into the connector, which can corrode internally.
Typical fix: Clean the connector terminals and module pins with an electrical contact cleaner and a small brush. If corrosion is severe, the connector pigtail may need to be replaced (e.g., part number 13383312 or aftermarket equivalents). Apply dielectric grease before reconnecting to prevent future moisture intrusion.
Est. part cost: $10-$60 - Faulty In-Dash Trailer Brake Controller Switch Assembly 🔴 High Probability The internal electronics of the switch assembly on the dashboard are a very common failure point reported by many owners, often fixing the issue when other checks fail.
How to confirm: This is often diagnosed by exclusion. If fuses and wiring are good, replacing this switch is a common, relatively inexpensive next step that often resolves the problem. In some cases, the switch will become unresponsive to gain adjustments.
Typical fix: Replace the trailer brake controller switch assembly located on the dashboard. This involves removing the side dash panel and trim to access and swap the unit. The process typically takes 5-10 minutes. Alternatively, the internal circuit board can be replaced separately with a part like Dorman 601-226.
Est. part cost: $25-$75 - Blown Fuse(s) 🟡 Medium Probability A short circuit in the trailer wiring, the truck's harness, or even a faulty trailer can cause the trailer brake system fuses to blow.
How to confirm: Check the under-hood fuse box. Specifically inspect the fuses related to the trailer brake system. A frequently blown fuse is the 30-amp J-case fuse for the trailer battery/power (often in slot #2). Also check fuses F19 (TBCM power) and F34 (ignition).
Typical fix: Replace the blown fuse with a new one of the same amperage rating. If the fuse blows again, it indicates an underlying short circuit that must be found and repaired. Check the trailer's own wiring if a new fuse blows only when it's connected.
Est. part cost: $1-$5 - Faulty Trailer Brake Control Module (TBCM) 🟡 Medium Probability Like any electronic module, the TBCM (also called Trailer Brake Power Module, K133) can fail internally due to heat, vibration, or moisture intrusion.
How to confirm: This is typically the last part to suspect. If power (battery voltage), ground, and the communication (LIN bus) signal are all verified as good at the TBCM connector, but the module still does not communicate, the module itself is condemned. A scan tool that can communicate with the Chassis Control Module is needed to confirm the loss of communication.
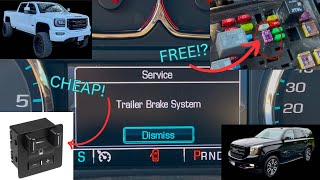
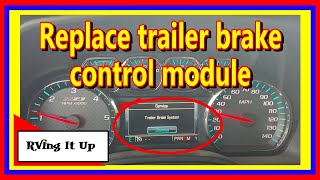
Typical fix: Replace the Trailer Brake Control Module. The new module MUST be programmed to the vehicle's VIN using GM's Service Programming System (SPS) to function correctly. This is not a plug-and-play part. Always disconnect the battery before swapping the module. 🎬 Watch this walkthrough on replacing the trailer brake module.
Est. part cost: $70-$150 - Poor Battery Connection or Low System Voltage ⚪ Low Probability Low voltage can cause unpredictable behavior in various electronic modules across the vehicle. This specific cause is mentioned as a preliminary check in TSB #PIT5529A.
How to confirm: Inspect the battery terminals for corrosion and ensure they are tight. Test the battery state of health using a professional tester, as a simple voltage check may not be sufficient. A weak or failing battery can trigger this warning.
Typical fix: Clean the battery terminals and cable ends. Charge or replace the battery if it is weak.
Est. part cost: $0-$250
Rare But Worth Checking
- Damaged Wiring Harness:
Diagnosis Steps
- Read all fault codes from all modules using a capable OBD-II scanner to confirm U1505 and any related codes like U1556 or C-codes.
- Inspect the under-hood fuse box. Check all fuses related to the trailer brake and trailer battery systems, especially the 30A J-case fuse (often #2) and smaller fuses like F19. Replace any that are blown.
- Inspect the battery terminals for tightness and corrosion. Clean as necessary and test battery state of health, as recommended by GM TSB PIT5529A.
- If fuses are good, consider the in-dash controller switch. Many owners successfully fix the issue by replacing this part, which is easier and cheaper than module replacement.
- Lower the spare tire to gain access to the Trailer Brake Control Module (TBCM) on the driver's side frame rail.
- Disconnect the TBCM electrical connector. Carefully inspect the connector and the module's pins for any signs of green or white corrosion, moisture, or bent/damaged pins. Check that all cavity plugs are present and seated in the connector.
- If corrosion is found, clean the terminals thoroughly with electrical contact cleaner. Apply dielectric grease upon reassembly. If the connector or pins are too damaged, replace the pigtail.
- If the connector is clean, use a multimeter to verify battery voltage (power) and a good ground at the appropriate pins on the connector.
- If power and ground are good, the final step is to check the LIN bus communication wire for a signal, which may require an oscilloscope. If all inputs to the module are good but it still doesn't communicate, the TBCM itself is likely faulty and requires replacement and programming.
Parts You'll Likely Need
- Trailer Brake Control Switch Assembly
(OEM #84108373 (replaces 23145874, 15926102))— A very common failure point that causes the 'Service Trailer Brake System' message. It's an easy and relatively inexpensive part to replace, often solving the problem in under 15 minutes.
Trusted brands: ACDelco, Dorman (e.g., 601-226 for the circuit board only)
OEM price range: $40-$70
Related Codes That Often Appear With This One
- U1556 — This is another LIN Bus communication code often set by the Chassis Control Module when it loses communication with the TBCM. It is frequently seen with U1505.
- C1112, C1113, C1114, C111B — These are chassis codes related to the trailer brake system that can accompany the U1505 communication fault, as noted in TSB PIT5529A.
- U0137 — A code indicating the ABS module has lost communication with the trailer brake control module, often logged alongside the primary U1505 fault.
Technical Service Bulletins (TSBs) & Recalls
- PIT5529A
- PIT5529
Platform-Specific Known Issues
- GM Technical Service Bulletin #PIT5529A explicitly calls out corrosion at the Trailer Brake Power Module connector and/or battery terminals as a cause for code U1505 and the 'Service Trailer Brake' message. It specifically mentions to check for missing or dislodged cavity plugs in the connector.
- The location of the Trailer Brake Control Module under the rear of the vehicle makes it highly susceptible to water and road salt damage, leading to the common connector corrosion issue.
- Many owners on forums report that replacing the in-dash switch is a quick and permanent fix, even when wiring and fuses appear to be fine. Some note that an aftermarket switch failed prematurely and recommend using a genuine GM part.
Mechanic-Grade Diagnostic Values
- LIN Bus Voltage (at TBCM connector) — expected: When communicating, the voltage should toggle between approx. 1V (low) and approx. 1V less than battery voltage (high). At rest, it should be a steady voltage approx. 1V less than battery voltage (~12V).. Failure: A voltage stuck at 0V could indicate a short to ground. A voltage that does not toggle indicates a lack of communication from either the master or slave module. A reading between 7-9V may be a misleading reading from a multimeter not set to capture peak min/max values.
Scan Tool Commands That Help
- GDS2 (GM Dealer Tool): Vehicle DTC Information / Module Diagnostics — Used to confirm the Chassis Control Module (CCM) is logging the U1505 code against the TBCM. The scan tool communicates with the CCM, not directly on the LIN bus, to read parameters or confirm the communication loss.
- GM SPS (Service Programming System): Module Programming/Setup — This is required after replacing the Trailer Brake Control Module (K133). The new or used module must be programmed to the vehicle's VIN to establish communication and function correctly.
Wiring & Ground Locations
- K133 — The Trailer Brake Power Control Module, located on the driver's side frame rail, typically mounted to a plate above the spare tire.. This is the 'slave' module that is failing to communicate. Its connector is the primary point of failure due to corrosion.
- X411 — The main electrical connector for the K133 Trailer Brake Power Control Module.. This connector is where corrosion and moisture intrusion commonly occur, causing the communication loss. All power, ground, and LIN bus signals for the module pass through here.
- G401 — A key ground connection located on the rear frame rail, near the trailer wiring harness.. A poor ground at this location can cause a variety of electrical issues with the trailer system, contributing to communication faults.
- Underhood Fuse Block - Fuse #2 (30A) — The main fuse box in the engine compartment.. This 30-amp J-case fuse provides power to the trailer battery charging circuit. A short in trailer wiring can blow this fuse and cause the 'Service Trailer Brake' message.
- Underhood Fuse Block - Fuse #19 — The main fuse box in the engine compartment.. This fuse provides power to the TBCM. A diagnostic video identified a corroded wire from this fuse to the Chassis Control Module Auxiliary as the root cause.
Real Owner Repair Stories
- YouTube user comment / Multiple forum reports (2015+ GM Truck/SUV) — 'Service Trailer Brake System' message on the dash.
❌ Tried (didn't work) Replacing the in-dash trailer brake controller switch.
✅ What actually fixed it Found and replaced a blown 30-amp fuse in the under-hood fuse block (position #2 for the 'trailer battery system'). This cleared the code and restored function. - YouTube channel 'DadsGarage Diagnostic Specialist' (GM Truck (Silverado/Sierra family)) — 'Service Trailer Brake System' message, code U1556 (Lost Communication with LIN device).
✅ What actually fixed it After verifying good power, ground, and a clean LIN bus signal at the TBCM connector with an oscilloscope, the TBCM itself was condemned. Replacing the TBCM (module above the spare tire) resolved the issue. The replacement part was plug-and-play in this instance. - YouTube channel 'c farmer' (2018 Chevrolet Silverado 2500HD) — 'Service Trailer Brake System' message.
❌ Tried (didn't work) Struggling to access the two 10mm bolts holding the TBCM directly.
✅ What actually fixed it For much easier access to the TBCM (K133) above the spare tire, the entire mounting plate it sits on was dropped by removing three Torx head screws. This made module replacement significantly easier. Also noted the electrical connector was full of dust and dirt that needed to be cleaned out.
OEM Part Supersession History
23145874→84108373— Standard part revision for the in-dash Trailer Brake Control Switch Assembly.23104453, 23114650, 23337305→85073617— Standard part revision for the Trailer Brake Control Module (TBCM/K133).
Heads up: A new or used TBCM is NOT plug-and-play. It must be programmed to the vehicle's VIN with GM's SPS software to function.
Model Year Variations Within This Range
- 2014-2016 vs 2017-2019: The under-hood fuse box layout changed. For the trailer brake controller relay, 2014-2016 models use relay position 64, while 2017-2019 models use relay position 63.
Helpful Videos
Used OEM Parts in Stock


New Aftermarket Parts Available

The information in this article is provided for general reference and educational purposes only. Vehicle specifications, procedures, and part compatibility can vary by production date, trim level, and region. Always consult your vehicle's factory service manual and verify part numbers before purchasing or performing repairs. Safety-critical components such as airbags, seat belts, and braking systems should be installed by a qualified professional.
- Chevrolet SILVERADO 1500:
- 🎬 Helpful Videos
- 🛍️ Shop This Part
- What's Unique About the 2014-2018 Chevrolet SILVERADO 1500
- Diagnostic Flowchart
- Symptoms You May Notice
- Most Likely Causes
- Rare But Worth Checking
- Diagnosis Steps
- Parts You'll Likely Need
- Related Codes That Often Appear With This One
- Technical Service Bulletins (TSBs) & Recalls
- Platform-Specific Known Issues
- Mechanic-Grade Diagnostic Values
- Scan Tool Commands That Help
- Wiring & Ground Locations
- Real Owner Repair Stories
- OEM Part Supersession History
- Model Year Variations Within This Range
- 🎟️ Get 5% Off