

U1500 on 2000-2004 Saturn LW200: OnStar Module Fault Explained
The U1500 code on a 2000-2004 Saturn LW200 indicates an internal failure of the OnStar module (VCIM). Since the analog OnStar service for this vehicle is obsolete, the most common and practical fix is to simply disconnect the module to clear the code and prevent potential battery drain.
- U1500 on a Saturn LW200 means the OnStar module has failed.
- This is not a critical problem and does not affect the vehicle's ability to drive safely.
- The OnStar service for this car is obsolete and cannot be reactivated, so there is no reason to pay for a replacement module.
- The best and most common fix is to locate the module in the rear cargo area and unplug its electrical connectors to prevent potential battery drain.
- This code is often accompanied by a red light on the OnStar buttons and sometimes code B1000.
What's Unique About the 2000-2004 Saturn LW200
The key context for this code on a 2000-2004 Saturn LW200 is the obsolescence of the technology. These vehicles were equipped with an early generation of OnStar that relied on analog cellular networks. These networks were decommissioned around 2008, rendering the OnStar hardware in the vehicle permanently non-functional. Therefore, the U1500 code represents the failure of a legacy component that cannot be used anyway, making the repair approach different from that on a modern vehicle where OnStar might still be active.
Diagnostic Flowchart
Tap your situation to follow the diagnostic path that matches what you're seeing on this vehicle.
Symptoms You May Notice
- Red indicator light on the OnStar button assembly or rearview mirror
- OnStar system is completely non-functional
- An audible "Phone Unavailable" message may be heard through the car's speakers.
- Potential for a dead battery due to parasitic drain from the failing module, which can drain a new battery in a few days.
- Inability to connect to OnStar services (which are defunct for this model anyway).
- Replacing the radio or Body Control Module (BCM). While these modules are on the same communication network, the U1500 code and specific symptoms like the red OnStar light are highly specific to the OnStar VCIM.
- Replacing the battery or alternator repeatedly without diagnosing the parasitic drain. A failing VCIM is a common source of such drains on older GM vehicles.
Most Likely Causes
- Internal Failure of the OnStar Module (VCIM) 🔴 High Probability The issue is well-documented in manufacturer TSBs (#PIC3278F, #PIC3278G, #PIC3718E) which point to internal faults. The electronic components are now over two decades old and are simply failing with age. This is a known pattern failure across many early 2000s GM vehicles.
How to confirm: Confirm the presence of a red OnStar light and the U1500 code. Given the high failure rate and obsolete technology, if the symptoms match, the module is almost certainly the cause. A parasitic draw test can confirm the module is draining the battery.
Typical fix: Disconnect the electrical connectors from the OnStar module. This prevents battery drain and clears the code with no negative side effects. Replacement is not recommended as the service is defunct. Forum users and repair videos confirm this is the standard, effective solution.
Est. part cost: $0 - Wiring or Connector Issue at the VCIM ⚪ Low Probability
How to confirm: Visually inspect the wiring harness and connectors at the OnStar module for signs of corrosion, damage, or looseness. This is an unlikely cause compared to the module's internal failure.
Typical fix: Repair the damaged wire or clean the connector terminals.
Est. part cost: $0-$20
Diagnosis Steps
- Verify the primary symptom: a solid or flashing red light on the OnStar mirror or button panel.
- Use an OBD-II scanner to confirm that code U1500 is present. Check for B1000 as well.
- Locate the Vehicle Communication Interface Module (VCIM). In the Saturn L-Series wagon (LW), it is typically located in the rear cargo area on the passenger side, behind the trim panel near the wheel well. Service manuals confirm its location is under the rear load floor in the wagon.
- To access the module, you will likely need to remove the cargo floor and the side trim panel. This may require a trim removal tool to avoid breaking clips.
- Visually inspect the connectors and nearby wiring for any obvious signs of damage or corrosion.
- If wiring appears intact, the fault is internal to the module. The most practical solution is to disconnect the electrical connectors to the VCIM. There are typically two or three connectors (one for power/data, and one or two for antennas). Unplug all of them.
- Secure the loose connectors with a zip tie or electrical tape to prevent them from rattling.
- After disconnecting the module, clear the DTCs with the scanner. The code should not return. The red OnStar light will also go out.
Parts You'll Likely Need
- Vehicle Communication Interface Module (VCIM)
(OEM #22692100)— This module is the source of the U1500 code due to an internal failure. However, the recommended action is to disconnect it, not replace it, as the OnStar service it provides is obsolete. If you choose to replace it, you will need to source a used part. A known part number for a 2002 L-Series is 22692100.
Trusted brands: ACDelco (Original OEM)
OEM price range: $25-$75 (Used)
Aftermarket price range: N/A
Related Codes That Often Appear With This One
- B1000 — Manufacturer TSBs PIC3278F and PIC3278G explicitly state that a B1000 code can be set along with U1500 for the exact same OnStar module internal fault.
Technical Service Bulletins (TSBs) & Recalls
- PIC3278F: Notes that an internal fault in the OnStar module can cause a U1500 or B1000 code and a "Phone Unavailable" message.
- PIC3278G: Same as above, confirming the issue across multiple model years.
- PIC3718E: Directly links a red OnStar LED and code U1500 to a failed Vehicle Communication Interface Module (VCIM) requiring replacement.
Platform-Specific Known Issues
- The primary issue is the obsolescence of the analog OnStar network. The hardware in the car is failing due to age, but the cellular service it was designed to connect to was permanently shut down by providers around 2008. This means replacing the module provides no functional benefit.
- TSB #PIC3718E notes that a failing module can cause a "no power or no connect concern" and a red OnStar LED, specifically calling for the replacement of the VCIM. It also mentions checking if the Station Identification (SID) number falls within a specific range, confirming this was a known issue with certain batches of modules.
- Owner experiences shared in forums overwhelmingly confirm that disconnecting the module is the final, effective fix for both the U1500 code and any associated battery drain.
Mechanic-Grade Diagnostic Values
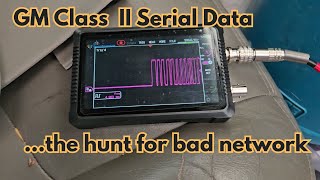
- Class 2 Serial Data Line Voltage — expected: The bus is active at a nominal 7.0 volts and inactive at ground potential (0V). A multimeter reading will fluctuate as data is transmitted, but should not be stuck high or shorted to ground.. Failure: A voltage reading stuck at 0V indicates a short to ground or an open circuit. A voltage reading stuck significantly above 7V could indicate a short to power from another circuit.
- VCIM Battery Voltage — expected: Greater than 9.5 volts and less than 15.5 volts for the module to operate correctly.. Failure: Voltage below 9.5V may prevent the module from powering on, though this would likely present as a no-communication issue with multiple modules, not just a U1500.
Scan Tool Commands That Help
- GM Tech 2: OnStar System Check — This is the initial diagnostic step when using a dealer-level tool. It polls the OnStar module (VCIM) for status and DTCs.
- GM Tech 2: Read DTC Information — To confirm the presence of U1500 and any other related codes like B1000. The Tech 2 can also show if the code is current or historical.
- GM Tech 2: Clear DTCs — Used after disconnecting the VCIM to erase the stored fault code from other modules' memory.
Wiring & Ground Locations
- G304 — Located on the left side of the engine compartment.. Wiring diagrams for the 2003 L200 show the Vehicle Communication Interface Module (VCIM) is grounded at this location. A corroded or loose G304 could cause intermittent power or communication issues with the VCIM, potentially mimicking an internal module failure.
- VCIM Connectors — On the VCIM module itself, located under the rear load floor in the LW200 wagon.. There are two main electrical connectors plus two coaxial antenna connectors (Cellular and GPS). Disconnecting the main power/data connectors is the required step to disable the module and stop parasitic drain.
- Body Control Module (BCM) — Mounted on top of the glove box.. The BCM acts as a gateway for the Class 2 data bus, which the VCIM uses to communicate with other vehicle systems. While rarely the cause for a U1500, a problem at the BCM could theoretically affect communication with multiple modules.
Real Owner Repair Stories
- SaturnFans.com Forum User (2003 Saturn LW300 (V6 version of the LW200 chassis)) — Dead battery, parasitic draw measured at 2.5 amps. Red light on the OnStar mirror.
❌ Tried (didn't work) Pulling various fuses to isolate the draw.
✅ What actually fixed it The user identified the draw was coming from the OnStar fuse. They located the VCIM in the rear cargo area, unplugged the two main connectors, and the parasitic draw was eliminated. The user confirmed this solved the battery drain issue completely.
Model Year Variations Within This Range
- 2003-2004: For the 2003 model year, the L-Series received a facelift that included revised front and rear styling and silver-colored interior trim instead of the previous wood trim. However, the location and function of the OnStar VCIM remained the same.
- 2000-2002 vs 2003-2004: A service bulletin regarding an upgrade to the digital OnStar system notes a wiring modification is needed for 2003-2004 Saturn L-Series models that is not required for earlier years. This involves splicing the right and left audio output wires at the VCIM connector C2. While not directly related to the U1500 fault, it shows a minor wiring difference at the module between the pre- and post-facelift models.
Helpful Videos


The information in this article is provided for general reference and educational purposes only. Vehicle specifications, procedures, and part compatibility can vary by production date, trim level, and region. Always consult your vehicle's factory service manual and verify part numbers before purchasing or performing repairs. Safety-critical components such as airbags, seat belts, and braking systems should be installed by a qualified professional.
- Saturn LW200:
- 🎬 Helpful Videos
- What's Unique About the 2000-2004 Saturn LW200
- Diagnostic Flowchart
- Symptoms You May Notice
- Most Likely Causes
- Diagnosis Steps
- Parts You'll Likely Need
- Related Codes That Often Appear With This One
- Technical Service Bulletins (TSBs) & Recalls
- Platform-Specific Known Issues
- Mechanic-Grade Diagnostic Values
- Scan Tool Commands That Help
- Wiring & Ground Locations
- Real Owner Repair Stories
- Model Year Variations Within This Range
- 🎟️ Get 5% Off