

OBD-II Code U1190: Lost Communication With a Control Module
What U1190 means, why it triggers, and how to fix it
- Code U1190 indicates a total loss of communication between a primary computer and a secondary module, most frequently the ABS module or cabin humidity sensor.
- On Chrysler, Dodge, and Jeep vehicles, installing a cheap aftermarket cabin humidity sensor guarantees a U1190 code; you must use a genuine OEM Mopar sensor (part #68440808AA).
- Always test the battery and fuses first; voltages dropping below 9.6V or a blown 10-amp fuse will instantly take a module offline and trigger this code.
- Driving with an active U1190 code disables your Anti-lock Braking System (ABS) and Electronic Stability Control (ESC), increasing stopping distances on wet roads.
- Never replace an expensive control module without first verifying a 60-ohm resistance on the CAN bus and confirming 12V power and ground at the module's connector.
What Does U1190 Mean?

U1190 is a network communication code indicating a primary control module (like the Body Control Module) lost connection with a secondary module. Most often, the silent module is the Anti-lock Brake System (ABS) or, in Chrysler, Dodge, and Jeep vehicles, the cabin humidity sensor. The failure to transmit data over the vehicle's CAN or LIN bus network triggers the code.
Technical definition: The SAE/ISO definition for U1190 translates to "Lost Communication With..." followed by a specific module. Common variations include "Lost Communication With ABS Control Module" or "Lost Communication With Humidity Sensor" (Dodge/Chrysler). The code sets when a primary control module fails to receive expected network messages from a secondary module within a predetermined time frame, typically 2 to 5 seconds.
Can I Drive With U1190?
Yes, But With Caution. Yes, but drive with extreme caution. This code disables critical safety systems like Anti-lock Brakes (ABS) and traction/stability control. This significantly increases the risk of wheel lock-up and skidding during hard braking or on slippery surfaces. Your stopping distance will be longer. Seek repair immediately to avoid accidents.
Common Causes

- Aftermarket Part Incompatibility (Very Common) — Installing a non-OEM sensor or module triggers a U1190 code instantly. This is the leading cause for cabin humidity sensors in Dodge/Chrysler/Jeep vehicles, where cheap replacements fail to communicate with the BCM. The original part sets a P1009, while the incompatible new part sets a U1190.
- Damaged or Corroded Wiring/Connectors (Very Common) — The wires forming the CAN or LIN bus network are susceptible to vibrations, moisture, and rodents. A single broken wire, a corroded pin in a connector, or a chafed harness disrupts the entire communication line.
- Low Battery Voltage or Faulty Alternator (Common) — Control modules require stable voltage to communicate. A weak battery, corroded terminals, or a failing alternator causes sporadic communication drops. Voltages dropping below 9.6V take modules offline.
- Blown Fuse (Common) — The silent module needs power to communicate. A blown fuse cuts power to the module, causing other modules on the network to report a loss of communication.
- Faulty Control Module (Common) — The module that went silent (often the ABS module or TIPM) has an internal hardware failure. This is prevalent in Chrysler, Dodge, and Jeep models with problematic Totally Integrated Power Modules (TIPMs).
- Faulty Terminating Resistor (Less Common) — The CAN bus network utilizes a 120-ohm resistor at each end, totaling 60 ohms of resistance. 🎬 Learn how to test CAN bus resistance with a multimeter If a resistor fails or a module containing one disconnects, resistance jumps to 120 ohms, crashing network communication.
- Software/Firmware Glitches (Rare) — Software glitches trigger false communication codes. Manufacturers release Technical Service Bulletins (TSBs) with software updates to patch these issues, particularly for HVAC-related U1190 codes.
Symptoms

- HVAC System Malfunctions — On Dodge, Chrysler, and Jeep vehicles, this code links directly to a faulty cabin humidity sensor, causing a flashing A/C recirculation button, foggy windows, and poor A/C performance.
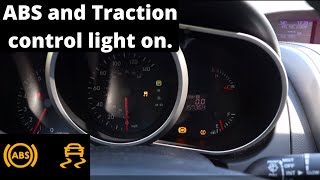
- ABS and Traction Control Lights On — The Anti-lock Brake System and Electronic Stability Control systems go offline, illuminating their respective dashboard warning lights.
- Brakes Lock Up During Hard Braking — Without ABS, wheels lock up and skid during a panic stop or on wet roads, significantly increasing stopping distance.
- Vehicle Enters 'Limp Mode' — A critical communication error forces the engine into a reduced power mode to prevent drivetrain damage.
- Inaccurate Speedometer — The ABS module sends speed data to the instrument cluster. A communication failure 🎬 Watch: Ford F150 ABS module symptoms and repair guide causes the speedometer to drop to zero or display erratic speeds.
Diagnostic Flowchart
Tap your situation to follow the diagnostic path that matches what you're seeing on this code.
Common Fixes & Costs
- Replace Cabin Humidity Sensor (Chrysler/Dodge/Jeep) — Parts: $80-$140, Labor: $50-$120, ~0.5 hr book time (DIY)
- Replace Blown Fuse — Parts: $1-$5, Labor: $0-$50, ~0.1 hr book time (Beginner)
- Repair Damaged CAN/LIN Bus Wiring — Parts: $10-$30, Labor: $200-$600, ~3.0 hr book time (Professional)
- Replace ABS Control Module — Parts: $300-$1200, Labor: $150-$350, ~2.5 hr book time (Professional)
- Replace TIPM (Chrysler/Dodge/Jeep) — Parts: $450-$1000, Labor: $150-$300, ~1.5 hr book time (Intermediate)
DIY vs Professional
- Replace Cabin Humidity Sensor — Beginner:
Tools: Plastic trim removal tool. - Replace Blown Fuse — Beginner:
Tools: Fuse puller. - Replace TIPM — Beginner:
Tools: Socket set. - Repair Damaged CAN/LIN Bus Wiring — Beginner:
Tools: Multimeter, wiring diagrams, wire strippers, soldering iron, heat shrink tubing. - Replace ABS Control Module — Beginner:
Tools: Socket set, advanced OBD-II scanner with ABS bleeding functions.
Used vs. New Parts: Buying Guide
When a used part is worth it: Buy used for expensive electronic modules (ABS, TIPM) on vehicles over 10 years old to save 50-70% off retail.
Donor-vehicle mileage cap: roughly under 100000 miles for the part to have meaningful remaining life.
Donor quality checklist:
- Match the part number exactly. Superseded numbers are rarely compatible.
- Source from a reputable seller offering a minimum 30-day warranty.
- Inspect the module pins for green corrosion or bent terminals.
Decision logic:
- If The part is a humidity sensor for a Chrysler/Dodge/Jeep. → Buy new OEM only. Aftermarket and used units fail immediately.
- If The part is an ABS module and the vehicle is less than 10 years old. → Buy a remanufactured unit or new OEM. Used parts require expensive programming and carry high failure risks.
- If The vehicle is over 10 years old and the new part costs more than 25% of the vehicle's value. → Buy a used part from a low-mileage donor.
Warranty tradeoff: Used parts carry 30-day warranties covering the part only. Remanufactured parts offer 1-year warranties. New OEM parts carry 2-year warranties covering parts and dealer labor.
Worst-case if a used part fails: $300-$800 if a used module fails, requiring repeat labor and programming costs.
What Happens If You Wait — Timeline
- Immediate: ABS and Traction Control warning lights illuminate. Anti-lock braking and stability control systems disable. (MPG impact: 0%% · Added cost: $0)
- 0-2 months: HVAC performance degrades, causing foggy windows. Continued driving without ABS increases accident risk. (MPG impact: 0-2%% · Added cost: $0 - $10,000+ (Cost of an accident))
- 2-6 months: A wiring short causes voltage spikes stressing other modules. A faulty ABS module runs continuously, burning out the pump motor. (MPG impact: 0-5%% · Added cost: $250 - $800 (Cost to replace ABS pump motor))
- 6+ months: A corroded TIPM worsens, causing unpredictable system failures. A short circuit catastrophically damages the BCM or PCM, rendering the vehicle inoperable. (MPG impact: 100% (vehicle won't start)% · Added cost: $800 - $2,500+ (Cost to replace primary control units))
Cost of Not Fixing It
- Immediate: Loss of Anti-lock Braking System (ABS) and Electronic Stability Control (ESC). This creates a severe safety risk, increasing the chance of skidding in panic stops. (Added cost: N/A)
- Short-Term (0-3 months): Persistent HVAC issues impair driver visibility due to poor defrosting. Compromised braking performance significantly increases accident risk. (Added cost: $0 - $10,000+ (Cost of an accident))
- Long-Term (6+ months): A constantly running ABS pump due to a faulty module burns out the pump motor. A wiring short damages other expensive modules on the network. (Added cost: $250 - $1500 (Cost of secondary component failures))
Diagnosis Steps

- Perform a Full Vehicle Scan
Use an advanced OBD-II scanner to check for codes in ALL modules. U1190 is accompanied by codes that pinpoint the exact offline module. A U0121 identifies the ABS Module, while a P1009 identifies the Humidity Sensor.
Tools: Advanced OBD-II Scanner (Beginner) - Check and Charge the Battery
Low voltage causes communication drops. Ensure the battery rests above 12.4 volts and passes a load test. Clean all corrosion from the battery terminals. Modules shut down below 9.6V.
Tools: Digital Multimeter, Battery Terminal Cleaner, Battery Charger (Beginner) - Check Module Fuses
Locate the fuse for the problematic module identified in Step 1 using the owner's manual. Pull the fuse and inspect for a blown filament. A blown fuse indicates a short circuit in the module or its wiring.
Tools: Fuse Puller or Pliers, Owner's Manual (Beginner) - Visually Inspect Wiring and Connectors
Inspect the wiring harness connecting to the suspect module. Look for chafed wires, green corrosion inside the connector pins, or rodent damage. Focus on areas where the harness bends or secures to the chassis.
Tools: Flashlight, Mirror (Intermediate) - Test Module Power and Ground
Identify the power and ground pins on the suspect module's connector using a wiring diagram. Disconnect the connector. Connect a 12V test light to battery negative and probe the power pin; it must light brightly. Connect to battery positive and probe the ground pin; it must also light brightly. This confirms the module is receiving the power required to communicate.
Tools: 12V Test Light, Vehicle-Specific Wiring Diagram (Advanced) - Test LIN Bus Voltage (Humidity Sensor Faults)
For Chrysler/Dodge/Jeep humidity sensor faults, back-probe the LIN bus wire at the sensor connector with the ignition ON. A healthy LIN bus toggles between 1V and 12V. A multimeter on DC volts averages 7-9V. If voltage is stuck at 0V or 12V, the LIN wire has a short or open circuit.
Tools: Digital Multimeter, Back-probe Pins (Advanced) - Test CAN Bus Network Resistance
Disconnect the battery. Measure resistance between pins 6 and 14 at the OBD-II port. A healthy network reads exactly 60 ohms. A reading of 120 ohms indicates an open circuit or a failed terminating resistor. A reading near 0 ohms indicates a short between the CAN high and low wires.
Tools: Digital Multimeter (Advanced) - Isolate the Faulty Module
If CAN bus resistance reads 120 ohms or 0 ohms, unplug modules on the network one by one. Start with the suspect module. When unplugging a specific module causes the resistance to return to normal, that module contains an internal short and requires replacement.
Tools: OBD-II Scanner, Digital Multimeter (Professional)
When This Code Triggers (Freeze-Frame Conditions)
- Engine Coolant Temp: 175-210°F (Vehicle at normal operating temperature.)
- RPM: 700-2500 (Code sets at idle or during steady-state driving.)
- Vehicle Speed: 0-65 mph (Communication loss detects at any speed, frequently logged during constant cruise conditions.)
- Battery Voltage: 13.2-14.5V (Fault triggers from a voltage drop during startup or while driving.)
Related Codes
- U0121 — The standardized SAE code for 'Lost Communication With ABS Control Module.' If present alongside U1190, the fault is definitively isolated to the ABS system.
- P1009 — P1009 means the BCM receives invalid data from the humidity sensor. Replacing a P1009-triggering OEM sensor with a cheap aftermarket sensor instantly sets a U1190 because the new part cannot communicate at all.
- U0161 — The standardized SAE equivalent of U1190 when pertaining to the HVAC Control Module or humidity sensor.
- C-codes (e.g., C1210, C0265) — Chassis codes indicate specific hardware faults within the ABS system. Fix the C-code problem first, as the internal hardware failure is causing the module to drop off the network.
Climate & Environmental Factors
- High Humidity and Moisture: Moisture drives corrosion on wiring, connector pins, and module circuit boards. This corrosion creates high resistance, directly causing communication failures.
- Road Salt (Rust Belt Regions): Salt acts as an electrolyte, dramatically accelerating copper wire and terminal corrosion. Underbody wiring harnesses are highly susceptible, leading to frequent U-codes in northern states.
- Cold Weather: Low temperatures make plastic connectors brittle and reduce battery voltage. The resulting voltage drop during cold starts triggers communication codes.
How to Talk to a Mechanic About This Code
Say this: "I have a U1190 communication code and the ABS light is on. Please verify power, ground, and CAN bus resistance at the suspect module before quoting a module replacement."
Signals to the shop that you understand U1190 is a network problem requiring basic circuit testing first. Prevents them from immediately quoting an expensive module replacement without proper diagnosis.
Avoid saying:
- 'Just fix whatever's wrong'
- 'My check engine light is on, can you look at it?'
- 'Whatever you recommend'
Questions to ask before authorizing the repair:
- What were the results of the power, ground, and network tests at the module?
- What was the CAN bus resistance reading in ohms?
- If replacing a module, is programming required and included in the labor cost?
- If it's a Chrysler/Dodge/Jeep, did you confirm the fault isn't the humidity sensor?
- What is the warranty on this specific repair, including parts and labor?
Where to Take It: Dealer vs Independent vs Chain
- Dealer:
A safe but expensive option. Best if the vehicle is under warranty or requires proprietary module programming.
Best for: Vehicles under warranty., Complex electrical issues requiring software updates (TSBs)., When a replacement module requires proprietary online programming.
Downsides: Highest labor rates, often 1.5-2x more than independent shops., Defaults to replacing entire assemblies rather than diagnosing smaller component failures. (Typical cost: +50% vs. baseline) - Independent Shop:
Best fit for out-of-warranty cases. Look for ASE certifications and positive reviews mentioning electrical diagnostic work.
Best for: Out-of-warranty vehicles where cost is a factor., Shops specializing in electrical diagnostics.
Downsides: Quality varies widely. You must find a shop with a reputation for strong electrical diagnostics., Lacks access to the latest manufacturer proprietary programming tools. (Typical cost: +0% vs. baseline) - Chain Shop:
AVOID for diagnosis. They lack the training for the electrical diagnosis required for a U1190 code and will likely misdiagnose the problem.
Best for: Routine maintenance like oil changes, tires, and battery replacement.
Downsides: Technicians are not equipped for complex network diagnostics., Business model encourages quick parts replacement over in-depth diagnosis. (Typical cost: -10% vs. baseline)
When to Walk Away From the Repair
Sell or trade the vehicle if the estimated repair cost exceeds 50% of its private-party value.
- Car worth $4000, fix is $2000: Walk away. The repair cost is 50% of the vehicle's value. This is a poor investment.
- Car worth $15000, fix is $1800: Fix it. The repair is 12% of the vehicle's value and restores critical safety features.
- Car worth $3000, fix is $1800: Walk away. The repair cost is 60% of the vehicle's value. Consider scrapping the vehicle.
What Scan Tool You Need for This Code
Minimum: An 'All-System' or 'All-Module' scanner. A basic engine-only code reader is insufficient.
A $20 scanner only reads the engine computer. U1190 is a network code, and the fault is stored in modules like the ABS, BCM, or TIPM. You need a scanner that communicates with ALL modules to find the source of the communication loss.
Budget: BlueDriver Pro (~$99) — Reads and clears codes from all modules (Engine, ABS, Airbag, BCM). Identifies which module is not communicating. Lacks bidirectional control.
Mid-range: Foxwell NT680/NT510 Elite or XTOOL D7 (~$250-400) — Adds bidirectional control. Allows you to command modules directly to test responsiveness, such as cycling the ABS pump. Includes ABS brake bleeding functions.
Professional: Autel MaxiCOM MK808/MK906BT or Launch X431 series (~$500-1200) — Full bidirectional controls, ECU coding, and programming functions. Required to program a new ABS module or TIPM to the vehicle's VIN.
Rent vs buy: For a one-time diagnosis, use the AutoZone Loan-A-Tool program. Buy a scanner only if you plan to perform your own repairs regularly.
How to Clear the Code After You Fix It
- Perform the physical repair (replace module, fix wiring, replace fuse).
- Reconnect the battery.
- Use an OBD-II scan tool to erase all Diagnostic Trouble Codes (DTCs) across all modules.
- Perform a complete drive cycle to reset readiness monitors.
Drive cycle (~30 minutes): Perform a cold start, idle for 5 minutes, drive 15 minutes at steady highway speeds (40-60 mph), and idle for 3 minutes before shutdown.
Readiness monitors affected: Comprehensive Component Monitor, Misfire Monitor
Before emissions retest: drive at least 50 miles to fully set monitors.
Watch out for:
- Clearing the code without performing a drive cycle results in an automatic emissions test failure.
- The code returns within 5 seconds of engine startup if the root cause remains unfixed.
Will This Fail Emissions / State Inspection?
Yes — this code typically fails an OBD-II emissions inspection.
- California: An illuminated Check Engine Light is an automatic failure. Incomplete readiness monitors also trigger a failure.
- New York: The vehicle fails the safety inspection if the ABS warning light is on, and fails the emissions inspection if the Check Engine Light is on.
- Texas: An active U-code illuminating the MIL causes an automatic emissions failure. An active ABS light fails the safety inspection.
Most Commonly Affected Vehicles

- Dodge Ram 1500/2500/3500 (2006-2018) — Extremely common due to failures of the TIPM and humidity sensors. Using aftermarket humidity sensors guarantees a U1190 code.
- Jeep Wrangler, Grand Cherokee (2007-2018) — Prone to TIPM failures. On Wrangler (JK) models, U1190 specifically indicates an 'Electronic Brake Control Module RAM Malfunction'.
- Dodge Charger, Challenger (2011-2021) — Frequently experiences U1190 due to a failed windshield-mounted cabin humidity sensor, disabling HVAC recirculation.
- Chrysler 300, Town & Country (2008-2016) — Shares the problematic TIPM and humidity sensor designs with Dodge and Jeep. U1190 is the primary indicator of a failed humidity sensor.
- Ford F-150, Explorer, Focus (2009-2017) — Code relates to wiring harness corrosion or damage to the ABS wheel speed sensor wiring, disrupting module communication.
- Chevrolet / GMC Silverado, Sierra, Cruze (2005-2015) — Indicates a loss of communication on the Class 2 or LIN data bus, often caused by a break in the daisy-chained data wire.
- Mitsubishi Outlander, Lancer (2008-2017) — Indicates an ECU (like Adaptive Cruise Control) cannot receive a signal from the main ETACS-ECU.
- BMW Various models (2006-2016) — BMW uses equivalent codes like 231F04 to indicate a communication fault on the PT-CAN bus.
Manufacturer-Specific Notes
- Dodge/Chrysler/Jeep/Ram: U1190 is overwhelmingly caused by a faulty cabin humidity sensor or a failing TIPM. When replacing the humidity sensor, using aftermarket parts fails 100% of the time. You must install a genuine OEM Mopar sensor.
- Ford: Suspect wiring damage first. Check the harness leading to the ABS module for chafing near suspension components. Internal relay failures on the ABS module circuit board are also highly prevalent.
- General Motors (Chevrolet/GMC): The communication network runs in a daisy-chain. A break in the wire or a fault in a minor module (like the radio) cuts off communication to all downstream modules, causing a flood of U-codes.
Real Owner Stories
2016 Ram 1500 with HVAC issues
Owner had a P1009 code (Humidity Sensor Fault) and replaced the sensor. After installing a new aftermarket sensor, the code changed to U1190.
What they tried:
- Replaced original sensor with a non-OEM sensor from a local parts store, causing the U1190 code.
- Reinstalled the original sensor, and the code reverted to P1009.
- Tried a second aftermarket sensor from Amazon, resulting in the same U1190 code.
Outcome: Owner purchased a genuine OEM Mopar humidity sensor from a dealer. After installation, all codes cleared, and the HVAC system functioned normally.
Lesson: For Chrysler/Dodge/Jeep humidity sensors, do not use aftermarket parts. The original failing part gives a P1009 code, but an incompatible aftermarket part gives a U1190 code. You must use the OEM part.
2009 Ford F-150 with ABS light and running pump
ABS light illuminated, and the ABS pump ran continuously after the truck turned off, draining the battery. Owner pulled the 50A fuse to stop it.
What they tried:
- Dealer quoted $1,500 for a replacement ABS control module.
- Owner removed the ABS module located under the air filter housing.
- Owner cut open the module housing, identified a failed MOSFET chip on the circuit board, and desoldered it.
Outcome: Owner soldered in a $5 replacement MOSFET chip, re-sealed the housing, and reinstalled the module. The ABS pump stopped running, and the ABS light turned off.
Lesson: On 2007-2014 F-150s, a communication failure or constant running pump is often due to a single failed component on the module's circuit board. Soldering skills save thousands of dollars.
2017 Jeep Wrangler with no-start and multiple codes
Vehicle failed to start (clicking sound) and displayed codes U0100 (Lost comms with ECM) and U110B.
What they tried:
- Suspected a coolant temp sensor or wiring issue.
- Attempted a jump start to rule out a weak battery.
- Towed to an independent mechanic.
Outcome: The TIPM (main fuse box) was severely corroded internally, and the starter had a dead spot. Replacing the TIPM and starter resolved all communication codes and the no-start condition.
Lesson: A flood of communication codes paired with a no-start condition points to a failure of a central power distribution module like the TIPM. Corrosion is the primary killer of these units.
How to Prevent This Code From Triggering
- Clean battery terminals and ensure tight connections. (Every 6 months) — Prevents low voltage conditions and electrical noise that cause random communication faults between modules.
- Apply dielectric grease to critical electrical connectors. (When replacing a part or disconnecting a connector.) — Creates a barrier sealing out moisture, preventing pin corrosion that leads to high resistance and open circuits.
- Use a corrosion inhibitor spray on bus bars and power distribution points. (Annually in rust belt/coastal areas.) — Displaces moisture and leaves a protective film preventing corrosion on main power junctions like the TIPM.
- Visually inspect wiring harnesses in the engine bay and undercarriage. (During every oil change.) — Allows early detection of chafing or rodent damage to CAN/LIN bus wires before they break completely.
- Use OEM or high-quality remanufactured electronic parts. (Whenever replacing a module or sensor.) — Prevents incompatibility issues, the primary cause of U1190 codes immediately following a repair.
Frequently Asked Questions
Can a bad fuse cause code U1190?
Yes. The control module needs power to operate. A blown fuse cuts power, preventing network communication and triggering a U1190 code from other modules expecting a signal.
Why did U1190 appear right after I replaced a part?
This is a classic symptom of installing an incompatible aftermarket part. Many aftermarket sensors, especially Chrysler/Dodge humidity sensors, lack OEM specifications and cannot communicate with the vehicle's computers.
Is it safe to drive my car with the ABS light on?
Your normal hydraulic brakes work, but anti-lock and stability control safety features are disabled. You must be extra cautious during hard braking or on slippery surfaces to prevent wheel lock-up. Repair the vehicle immediately to restore these critical safety functions.
What is the most common misdiagnosis for U1190?
The most common mistake is replacing an expensive module without checking its power, ground, and communication wiring. A broken wire, blown fuse, or corroded connector pin perfectly mimics a failed module. Always test the circuit before condemning a part.
I replaced the humidity sensor on my Dodge/Jeep and now I have U1190. What happened?
You likely used an aftermarket sensor. The original failing sensor set a P1009 code, but the incompatible aftermarket sensor cannot communicate at all, setting the U1190 code. Install a genuine OEM Mopar sensor to resolve the issue.
How much does it cost for a shop to diagnose a U1190 code?
Most shops charge a diagnostic fee equivalent to 1-2 hours of labor, typically $150 to $300. This fee covers reading the code and testing circuits to pinpoint the exact cause of the communication failure.
Can I reset the U1190 code by disconnecting the battery?
Disconnecting the battery clears the code temporarily, but it returns within seconds of starting the vehicle if the underlying broken wire or bad module remains unfixed.
Key Takeaways
- Code U1190 indicates a total loss of communication between a primary computer and a secondary module, most frequently the ABS module or cabin humidity sensor.
- On Chrysler, Dodge, and Jeep vehicles, installing a cheap aftermarket cabin humidity sensor guarantees a U1190 code; you must use a genuine OEM Mopar sensor (part #68440808AA).
- Always test the battery and fuses first; voltages dropping below 9.6V or a blown 10-amp fuse will instantly take a module offline and trigger this code.
- Driving with an active U1190 code disables your Anti-lock Braking System (ABS) and Electronic Stability Control (ESC), increasing stopping distances on wet roads.
- Never replace an expensive control module without first verifying a 60-ohm resistance on the CAN bus and confirming 12V power and ground at the module's connector.
Helpful Videos
![How To Test CAN BUS With A Multimeter [CAN Bus Resistance Check] Mechanic Mindset](https://img.youtube.com/vi/JPE42HSJxAk/mqdefault.jpg)

The information in this article is provided for general reference and educational purposes only. Vehicle specifications, procedures, and part compatibility can vary by production date, trim level, and region. Always consult your vehicle's factory service manual and verify part numbers before purchasing or performing repairs. Safety-critical components such as airbags, seat belts, and braking systems should be installed by a qualified professional.
- 🎬 Helpful Videos
- What Does U1190 Mean?
- Can I Drive With U1190?
- Common Causes
- Symptoms
- Diagnostic Flowchart
- Common Fixes & Costs
- DIY vs Professional
- Used vs. New Parts: Buying Guide
- What Happens If You Wait — Timeline
- Cost of Not Fixing It
- Diagnosis Steps
- When This Code Triggers (Freeze-Frame Conditions)
- Related Codes
- Climate & Environmental Factors
- How to Talk to a Mechanic About This Code
- Where to Take It: Dealer vs Independent vs Chain
- When to Walk Away From the Repair
- What Scan Tool You Need for This Code
- How to Clear the Code After You Fix It
- Will This Fail Emissions / State Inspection?
- Most Commonly Affected Vehicles
- Manufacturer-Specific Notes
- Real Owner Stories
- 2016 Ram 1500 with HVAC issues
- 2009 Ford F-150 with ABS light and running pump
- 2017 Jeep Wrangler with no-start and multiple codes
- How to Prevent This Code From Triggering
- Frequently Asked Questions
- Can a bad fuse cause code U1190?
- Why did U1190 appear right after I replaced a part?
- Is it safe to drive my car with the ABS light on?
- What is the most common misdiagnosis for U1190?
- I replaced the humidity sensor on my Dodge/Jeep and now I have U1190. What happened?
- How much does it cost for a shop to diagnose a U1190 code?
- Can I reset the U1190 code by disconnecting the battery?
- Key Takeaways
- 🎟️ Get 5% Off