

OBD-II Code U1020: Lost Communication with a Control Module
The Ultimate 2026 Guide to What U1020 Means, Why It Triggers, and How to Fix It
- Code U1020 indicates a communication failure, pointing to the driver's door module (DDM) in over 80% of cases.
- Inspect the rubber boot between the driver's door and the body first; broken 14-16 AWG power or ground wires are the number one cause.
- Expect an immediate loss of driver-side power windows, locks, and mirrors, which creates a safety hazard at toll booths or traffic stops.
- Test the DDM connector for a solid 12.6V power and less than 0.1 ohms ground resistance before spending $200+ on a replacement module.
- For 2004-2015 Nissan and Chrysler vehicles, a failing smart fuse box (IPDM/TIPM) frequently triggers this code and requires a $400-$1000 replacement.
What Does U1020 Mean?
U1020 is a network communication code indicating one of your car's computers stopped talking to another. Most often, it points to a communication breakdown with the driver's door control module (DDM), which operates power windows, locks, and mirrors. The Body Control Module (BCM) sets this code when it stops receiving signals from the DDM.
Technical definition: The official SAE/ISO definition for U1020 is a manufacturer-specific code indicating a loss of communication on the vehicle's network. For General Motors, it is defined as 'Lost Communication With Left Front Door Switch Assembly.' For Ford, it relates to 'Module Communications Network Concern' or 'Invalid Data for the Air Conditioning Clutch.' For Land Rover, it indicates 'Lost Communication with PCM Node P.'
Can I Drive With U1020?
Yes, But With Caution. Yes, but you lose power windows, locks, and mirrors in the affected door. While core driving functions remain intact, the inability to lower your window for law enforcement or adjust mirrors for blind spots creates a tangible safety hazard. Limit driving until you restore the communication link.
Common Causes
- Broken Wires in Door Jamb (Very Common) — The flexible wiring harness between the driver's door and the body opens and closes thousands of times. Wires inside fatigue and break, causing a complete loss of power and communication. The larger gauge power (orange) and ground (black) wires fail first.
- Corroded or Damaged Connector (Common) — The main electrical connector in the door or driver's kick panel loosens or corrodes from moisture. This poor connection interrupts data and power flow to the door control module.
- Low Battery Voltage (Less Common) — A weak battery causes widespread, intermittent communication errors. During startup, voltage drops low enough to disrupt the CAN bus and set a U1020 code, even if the engine cranks.
- Faulty Door Control Module (DCM) (Less Common) — The electronic module inside the door fails due to water intrusion, vibration, or internal faults. Suspect this only after ruling out wiring issues. 🎬 Watch: How to remove a door panel and control module.
- Faulty Intelligent Power Distribution Module (IPDM) or TIPM (Less Common) — On Nissan, Chrysler, Dodge, and Jeep vehicles, a failing 'smart' fuse box (IPDM or TIPM) 🎬 Watch: Troubleshooting TIPM issues on Chrysler, Dodge, and Jeep vehicles. causes this code. Internal relay failures cut power or communication to network modules.
- Improperly Installed Aftermarket Accessories (Less Common) — Incorrectly installed radios or alarms interfere with the CAN bus. Splicing into the wrong data wires disrupts module communication.
- Poor Ground Connection (Rare) — The door module requires a solid chassis ground. A loose or corroded ground wire causes unpredictable behavior and communication loss.
- Water Intrusion in Other Modules (Rare) — Leaks affecting critical network modules like the Body Control Module (BCM) cause network-wide failures, logging U1020 as a symptom of a larger problem.
Symptoms
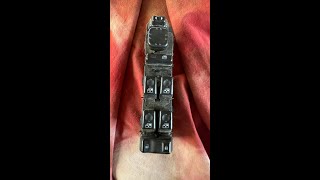
- Power Windows, Locks, or Mirrors Not Working — The driver's side door controls become unresponsive or work intermittently. You cannot operate the window, lock the doors, or adjust the mirror using the driver's switch panel.
- Backlighting on Door Switches is Off — The small lights illuminating the window and lock switches at night fail to turn on, indicating a complete loss of power to the switch panel.
- Check Engine Light or Service Message — The dashboard illuminates a warning light or displays a service message indicating a stored trouble code.
- Parasitic Battery Drain — A faulty module fails to 'sleep' due to communication loss, staying active when the car is off and draining the battery overnight.
- Inability to Program Key Fobs — A functioning driver's door module is required to enter the programming mode for new keyless entry remotes on many vehicles.
- Erratic Behavior of Other Electronics — If U1020 is a symptom of a failing BCM or IPDM, you experience flickering dash lights, radio issues, or climate control problems.
Diagnostic Flowchart
Tap your situation to follow the diagnostic path that matches what you're seeing on this code.
Common Fixes & Costs
- Repairing Broken Wires in Door Jamb — Parts: $5 - $20, Labor: $150 - $350 (parts and labor), ~1.5 hr book time (Intermediate)
- Replacing the Driver Door Module (DDM) — Parts: $75 (used) - $450 (new OEM), Labor: $200 - $650 (parts and labor, may require programming), ~1.0 hr book time (DIY)
- Cleaning Connectors and Grounds — Parts: $10 - $20, Labor: $120 - $250 (parts and labor, includes diagnostic time), ~0.8 hr book time (DIY)
- Replacing Door Wiring Harness — Parts: $150 - $800, Labor: $350 - $1500+ (parts and labor, highly vehicle dependent), ~2.5 hr book time (Professional)
- Replacing IPDM or TIPM (Nissan/Chrysler platforms) — Parts: $250 - $700, Labor: $400 - $1000 (parts and labor, may require programming), ~1.2 hr book time (Intermediate)
DIY vs Professional
- Repairing Broken Wires in Door Jamb — Beginner: No. Requires intermediate skills.
Tools: Wire strippers, wire cutters, high-quality butt connectors or soldering iron/solder, heat gun, heat shrink tubing, multimeter. - Replacing the Driver Door Module (DDM) — Beginner: Yes. A motivated beginner can do this.
Tools: Trim removal tools, socket set or screwdriver set. - Cleaning Connectors and Grounds — Beginner: Yes.
Tools: Socket set, contact cleaner, small wire brush, dielectric grease. - Replacing IPDM or TIPM — Beginner: No. Requires intermediate to advanced skills.
Tools: Socket set, multimeter, professional scan tool for programming.
Used vs. New Parts: Buying Guide
When a used part is worth it: For electronic modules like a DDM, IPDM, or TIPM, a used part from a reputable auto recycler is a cost-effective option for older vehicles where new OEM parts are prohibitive.
Donor-vehicle mileage cap: roughly under 100000 miles for the part to have meaningful remaining life.
Donor quality checklist:
- Verify the exact part number matches your original module; many look similar but are not interchangeable.
- Ask for the donor vehicle's VIN to check for compatibility and ensure it didn't have related issues.
- Inspect connectors for corrosion or damage. Avoid parts from flood-damaged vehicles.
Decision logic:
- If The part requires programming to your vehicle's VIN (common on newer cars) → Buy new or use a specialized rebuilder who can program it for you. A used module may not be reprogrammable.
- If The vehicle is over 10 years old and the new part costs more than 25% of the car's value → A used part is a reasonable economic choice.
- If The part is a known high-failure item with internal, non-serviceable components (like a TIPM fuel pump relay) → Favor a new or professionally remanufactured unit with an updated design and a warranty over a standard used part.
Warranty tradeoff: Used parts typically offer a 30-90 day warranty. New aftermarket parts often come with a 1-year to limited lifetime warranty. New OEM parts usually have a 1-2 year warranty.
Worst-case if a used part fails: $300-800 if a used module is dead on arrival or fails shortly after installation, requiring repeat labor costs plus the price of another replacement part.
What Happens If You Wait — Timeline
- 0-1 month: Intermittent failure of one function (e.g., window won't roll down). Function returns after opening/closing the door. Code U1020 is stored but may not trigger a warning light yet. (MPG impact: 0%% · Added cost: $0)
- 1-3 months: Failures become more frequent and affect more door functions (windows, locks, mirrors). The broken wire ends are separating more completely. A warning light is likely on. (MPG impact: 0%% · Added cost: $0)
- 3-6 months: Complete and permanent loss of all driver door functions. A faulty module fails to enter 'sleep' mode, causing a parasitic battery drain that kills the battery overnight or within a few days. (MPG impact: 0%% · Added cost: $150 - $350 (Cost of a new battery and/or roadside assistance))
- 6+ months: Worst-case scenario: The exposed, broken ends of the wire(s) make contact with other wires in the harness, causing a short circuit. This blows fuses, damages the wiring harness further, or destroys the Driver Door Module or Body Control Module. (MPG impact: 0%% · Added cost: $500 - $1500+ (Repair cost escalates from a simple wire splice to complex harness repair or module replacement))
Cost of Not Fixing It
- Immediate: Loss of driver-side window, lock, and mirror control. This is a safety hazard and major inconvenience. (Added cost: 0)
- 1-3 months: A dead battery due to a parasitic drain from a module that fails to 'sleep' because of the communication fault. (Added cost: $150 - $350 (for a new battery and/or roadside assistance))
- 3+ months: Increased damage to the wiring harness as broken wires chafe against each other, causing short circuits that damage the BCM or other connected modules. (Added cost: $500 - $1500+ (if a complex harness repair or module replacement becomes necessary))
Diagnosis Steps
- Check for Obvious Symptoms
Confirm the symptoms. If the driver's side power window, lock, and mirror switches are completely dead and unlit, the problem is isolated to the driver's door circuit.
Tools: None (Beginner) - Inspect the Door Jamb Harness
Peel back the black rubber boot between the driver's door and the car body. Visually inspect for broken, frayed, or cracked wires. Wiggle the harness while an assistant operates the window switches to check for momentary function.
Tools: Flashlight (Beginner) - Check Battery and Fuses
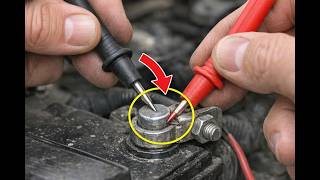
Test the battery with a multimeter to ensure 12.4V at rest and above 10V during cranking. Check the fuse panel for blown fuses related to the Driver Door Module or Body Control Module.
Tools: Multimeter, fuse puller (Beginner) - Inspect the Main Door Connector
Disconnect the main wiring harness connector at the door jamb or kick panel. Look for green/white corrosion or bent pins. Clean with contact cleaner and a small brush.
Tools: Trim removal tool, socket set, contact cleaner (Intermediate) - Test for Power and Ground at the Module
Identify the power and ground wires at the door control module connector using a wiring diagram. Verify 12.6V battery voltage and less than 0.1 ohms of ground resistance. A lack of either proves an upstream wiring problem.
Tools: Multimeter, wiring diagram, trim removal tools (Advanced) - Check CAN Bus Resistance
With the battery disconnected, measure network resistance at the OBD-II port. A healthy high-speed CAN bus reads 60 ohms between Pin 6 and Pin 14. A 120-ohm reading indicates a broken circuit or missing terminating resistor.
Tools: Multimeter, wiring diagram (Advanced) - Perform a Parasitic Draw Test
Disconnect the negative battery terminal and connect a multimeter (10A DC setting) in series. Wait 60 minutes for modules to sleep. A draw over 50mA indicates a fault; pull fuses one by one until the reading drops to identify the circuit.
Tools: Multimeter with 10A capacity (Advanced) - Analyze the CAN Bus Waveform
Use an oscilloscope to view CAN bus signals at the OBD-II port. CAN High should toggle between 2.5V and 3.5V; CAN Low between 2.5V and 1.5V. Flat lines or shorts prove a hardware fault.
Tools: Oscilloscope, wiring diagram (Professional) - Check Live Data PIDs
Access BCM live data with a bi-directional scan tool. Look for the Driver Door Module status (e.g., 'Not Responding'). If the BCM reports voltage below 11.5V, it shuts down non-essential communication.
Tools: Professional Bi-Directional Scan Tool (Advanced)
When This Code Triggers (Freeze-Frame Conditions)
- Module Voltage: 11.5 - 12.5V (During startup or key-on, engine-off. A low voltage reading here is a strong clue.)
- Vehicle Speed: 0 mph (Code often sets when the BCM attempts its initial network check at startup, before the vehicle is moving.)
- Engine RPM: 0 or > 600 RPM (Logged during the initial key-on, engine-off network sweep, or just after engine start.)
- System Status: N/A (The fault logs when a specific command is sent, such as pressing a window switch, and no response is received from the DDM.)
Related Codes
- U1000 — A general 'Class 2 Communication Malfunction' code. U1020 is specific to one module failing to hear another. If many modules store U1000, it points to a network-wide failure. If only the BCM has U1020, the fault is isolated to the DDM circuit.
- U0140 — Means 'Lost Communication With Body Control Module (BCM)'. It is the inverse of U1020. If the DDM stores U0140, it cannot hear the BCM. If the BCM stores U1020, it cannot hear the DDM.
- B1325 — A GM-specific code for 'Device Power Circuit Voltage Below Threshold.' If present with U1020, it strongly indicates the communication loss is due to a broken power wire in the driver's door jamb.
- U0073 — A generic code for 'Control Module Communication Bus A Off.' It signifies the entire CAN bus network stopped communicating, pointing to a systemic failure like a shorted main harness or failed gateway module.
Climate & Environmental Factors
- Cold Weather: Low temperatures make wire insulation brittle and prone to cracking in flexible areas like the door jamb. Cold also reduces battery efficiency, lowering system voltage and triggering communication codes.
- High Humidity and Rain: Moisture causes corrosion in electrical connectors and grounds. Water seeps into compromised door seals, creating green or white crust on pins that interrupts data signals.
- Road Salt (Winter Climates): Salty mist coats the undercarriage and seeps into connectors. Salt acts as an electrolyte that dramatically accelerates corrosion, leading to high resistance and connection failure.
How to Talk to a Mechanic About This Code
Say this: "I have a U1020 code, and my driver's door controls are not working. I've read this is very commonly caused by broken wires in the door jamb. I would like to request a diagnostic that starts by inspecting the door harness and testing for power and ground at the door module connector before considering a module replacement."
This signals to the shop that you are an informed consumer who understands the most likely and cost-effective repair. It directs them to perform the correct diagnostic steps in order, preventing them from immediately quoting an expensive and likely unnecessary module replacement.
Avoid saying:
- 'My door is broken, please fix it.'
- 'I think I need a new door computer.'
- 'Just do whatever it takes to fix the check engine light.'
Questions to ask before authorizing the repair:
- Did you find a broken or damaged wire in the door jamb harness?
- What were the voltage and ground readings at the door module connector? This confirms if the module is getting power.
- If you are recommending a new module, can you show me why you've ruled out a wiring problem?
- Will the repair be a wire splice or a full harness replacement, and what is the cost difference?
- What is the warranty on this electrical repair?
Where to Take It: Dealer vs Independent vs Chain
- Dealer:
Use if under warranty. Otherwise, a costly option that leads to an unnecessarily expensive repair. Be very specific about asking for a wire repair, not a harness replacement.
Best for: Vehicles still under warranty., Brand-new models with complex, undocumented electrical systems., Repairs involving manufacturer-specific recalls or service bulletins related to this code.
Downsides: Highest labor rates, often 1.5-2x more than independent shops., Strong tendency to replace the entire door wiring harness ($1000+) rather than performing a less expensive wire splice repair ($150-$350)., Less personalized service. (Typical cost: +75% vs. baseline) - Independent Shop:
Best fit for this code. An experienced independent technician is very familiar with this type of wiring failure and is most likely to perform a cost-effective and durable splice repair.
Best for: Most out-of-warranty vehicles., Cost-effective diagnosis and repair of common electrical faults., Building a long-term relationship with a trusted mechanic.
Downsides: Quality and expertise vary widely; look for shops specializing in electrical diagnostics with ASE certifications., May not have the latest dealer-specific tools for very new or complex models. (Typical cost: +0% vs. baseline) - Chain Shop:
AVOID. These shops are not equipped for the detailed wiring and network diagnosis required for a U1020 code. The risk of misdiagnosis and paying for unneeded parts is very high.
Best for: Simple, high-volume jobs like oil changes, tires, and brakes.
Downsides: Technicians often lack the specialized electrical diagnostic experience needed for network communication codes., High pressure to meet sales targets leads to misdiagnosis and selling unnecessary parts (like a door module) without proper testing. (Typical cost: -10% vs. baseline)
When to Walk Away From the Repair
If the estimated repair cost for the U1020 issue exceeds 40-50% of your car's current private-party value (e.g., from Kelley Blue Book), you should pause and consider your options. Since this fault does not disable the vehicle, the threshold for walking away is lower than for a critical engine or transmission failure.
- Car worth $8000, fix is $450: Fix it. This is a routine cost and well below the threshold.
- Car worth $3500, fix is $1200: Walk away. The repair costs over a third of the car's value for a non-critical function. This money is better saved for a down payment on a more reliable vehicle.
- Car worth $5000, fix is $2000: Borderline. This is a very high price for this repair (likely a full harness replacement). Get a second opinion from an independent shop focused on a wire repair before proceeding.
What Scan Tool You Need for This Code
Minimum: A scanner that reads manufacturer-specific 'B' (Body) and 'U' (Network) codes from the Body Control Module (BCM). A basic engine-only code reader will not see this code or provide useful diagnostic information.
A $20 scanner only reads generic 'P' (Powertrain) codes from the engine computer. U1020 is a network code stored in the BCM. Without the ability to communicate with the BCM, you cannot confirm the code, see related codes (like B1325), or clear it after the repair.
Budget: BlueDriver Pro / Mucar BT200 Max (~$100) — These Bluetooth dongles pair with your smartphone and read codes from all modules, including the BCM. This allows you to confirm the U1020 code, check for other critical codes, and clear them after the repair.
Mid-range: Foxwell NT510 Elite / Innova 5610 (~$180) — These handheld scanners offer full-system diagnostics plus some bidirectional controls. For a U1020 code, they show live data from the BCM, such as the voltage it receives, helping you determine if the issue is power-related before opening the door panel.
Professional: Autel MaxiCOM MK808 series / XTOOL D7 (~$500) — These tablet-based tools offer full bidirectional control and comprehensive diagnostics. They show a topology map of the vehicle's network, instantly showing which modules are offline, and can command the window up or down directly from the tool.
Rent vs buy: Free rental scanners from auto parts stores are typically basic engine code readers and are not sufficient for this job. If you plan on doing any serious DIY work, buying a tool in the 'Budget Pick' category is a wise investment that saves money on diagnostic fees.
How to Clear the Code After You Fix It
- Reconnect the negative battery terminal if it was disconnected for the repair.
- Use an OBD-II scan tool to erase the Diagnostic Trouble Codes (DTCs) from the BCM and any other modules.
- Cycle the ignition off and then on, and verify that all functions on the driver's door (windows, locks, mirrors) work correctly.
Drive cycle (~20 minutes): Since U1020 is a body/network code, a complex drive cycle is not required. After clearing the code, starting the vehicle and operating the repaired components confirms the fix. For related emissions monitors, drive 5-10 minutes in the city and 10 minutes at steady highway speeds.
Readiness monitors affected: Not directly affected by U1020., If the battery was disconnected for repair, all emissions readiness monitors reset to 'incomplete'.
Before emissions retest: drive at least 50 miles to fully set monitors.
Watch out for:
- Disconnecting the battery clears the active code, but it returns instantly on the next startup if the physical fault remains.
- Forgetting to clear the code from the BCM with a scan tool leaves the warning light on, even if the problem is fixed.
- Failing to drive the vehicle long enough after a battery disconnect results in a failed emissions test due to 'not ready' monitors.
Will This Fail Emissions / State Inspection?
Yes — this code typically fails an OBD-II emissions inspection.
- California: A U-series code, even without an illuminated Check Engine Light, causes a smog check failure. If the battery was disconnected, readiness monitors will be incomplete, also resulting in a failure.
- New York: All 1996 and newer vehicles are subject to an OBD-II emissions inspection. A stored communication code like U1020 results in an automatic failure.
- Texas: In the 17 Texas counties requiring emissions testing, any stored trouble codes that command the Malfunction Indicator Lamp (MIL) on cause the vehicle to fail the inspection.
Most Commonly Affected Vehicles
- Chevrolet Silverado, Suburban, Tahoe, Avalanche (2003-2007) — Extremely common issue due to wire fatigue in the driver's door jamb harness. The GMT800 platform is notorious for this failure.
- GMC Sierra, Yukon, Yukon XL (2003-2007) — Identical platform to Chevrolet; suffers from the same high rate of broken wires in the door harness.
- Cadillac Escalade (2003-2007) — Shares the same GMT800/900 platform and wiring design, leading to frequent U1020 codes from door harness failures.
- Ford F-150, Expedition (2004-2008) — Sets a U1020 for general network communication issues, often related to 'Invalid or Missing Data for the Air Conditioning Clutch' on the SCP bus.
- Hummer H2 (2003-2007) — Built on the GM truck platform, it is highly susceptible to the same driver's door wiring harness failures.
- Nissan Titan, Armada, Pathfinder (2004-2015) — Known for CAN communication issues caused by a failing Intelligent Power Distribution Module (IPDM). Water intrusion and internal failure take down the entire network.
- Volkswagen Routan (2009-2014) — As a rebadged Chrysler Town & Country, the Routan shares the Chrysler electrical platform and experiences similar communication bus failures related to the TIPM.
- Jaguar / Land Rover Range Rover Sport, Jaguar X-Type (2000-2017) — Logs U1020 for loss of communication with the Powertrain Control Module (PCM) or other door modules.
Manufacturer-Specific Notes
- General Motors (Chevrolet, GMC, Cadillac): On GM trucks and SUVs from 2003-2007, this code is almost always caused by broken wires in the flexible harness between the driver's door and the A-pillar.
- Ford: U1020 is less specific on Fords. It acts as a generic network fault or points to a loss of communication related to the A/C clutch status, requiring diagnosis of the specific SCP or CAN bus network.
- Nissan: CAN communication issues are frequently traced back to a failing Intelligent Power Distribution Module (IPDM E/R). Nissan issued a voluntary safety recall (PC068) for the ECM relay inside the IPDM on 2004-2006 models.
- Chrysler / Dodge / Jeep / VW: Communication codes are often caused by an internal failure of the Totally Integrated Power Module (TIPM). These 'smart' fuse boxes are a known failure point subject to lawsuits and extended warranties.
Real Owner Stories
2011 Ford F-150 with intermittent window/lock failure
Driver's window and rear windows wouldn't work from the master switch, and the 'door ajar' light stayed on. The front passenger window worked fine from the master switch.
What they tried:
- Checked all related fuses in the body control module and under-hood fuse panel; all were good.
- Tested the door ajar switch circuit by jumping the power feed pin to ground, which made the 'door ajar' light go out, confirming the upstream wiring was okay.
Outcome: Pulled back the rubber boot in the door jamb and found a broken black-and-violet ground wire. This single wire provided the ground for both the door ajar switch and the master window switch. Splicing the wire fixed all symptoms.
Lesson: Multiple, seemingly unrelated failures in one door often share a single broken power or ground wire in the flexible door harness. Always inspect the harness before replacing any switches or modules.
2007 GMC Envoy with a dead battery overnight
Vehicle battery would be completely dead after sitting overnight. The owner discovered that unplugging the passenger door module (the window/lock switch) prevented the battery drain.
What they tried:
- Replaced the passenger door module (PDM) multiple times with newer part numbers, but the drain would return after about a month.
- Replaced the ignition switch, battery, and alternator, which had other issues but did not solve the primary drain.
Outcome: The owner eventually sourced a used PDM with the exact same original part number from a working vehicle on eBay. Installing this identical part finally solved the parasitic drain permanently.
Lesson: When replacing electronic modules, a newer superseded part number can have compatibility issues. If a problem persists after replacement, finding an identical, known-good used part resolves the issue, especially if programming is a factor.
2007 Nissan Xterra with crank-no-start and flashing dash lights
While driving, the vehicle suddenly lost power, started chugging, and the brake and battery lights flashed. Afterwards, the engine would crank strongly but would not start. No trouble codes were stored.
What they tried:
- Replaced camshaft and crankshaft position sensors, which did not solve the problem.
- Considered the fuel pump but it had been replaced recently.
- Replaced the main ECM relay.
Outcome: The owner suspected the Intelligent Power Distribution Module (IPDM), a known issue on this platform. Replacing the IPDM, which contains relays for the ECM and fuel pump, resolved the no-start condition.
Lesson: On Nissan vehicles, widespread and strange electrical issues that lead to a no-start condition are frequently caused by a faulty IPDM. This should be a primary suspect after checking the battery and main relays.
How to Prevent This Code From Triggering
- Periodically lubricate the door jamb harness boot (Every 2-3 years) — Apply a silicone-based rubber lubricant to the flexible rubber boot in the door jamb. This keeps the rubber supple, reducing friction and stress on the internal wires as the door opens and closes, which helps prevent insulation from cracking and wires from fatiguing.
- Apply dielectric grease to key connectors (When servicing or if exposed) — When a connector is disconnected, apply a thin layer of dielectric grease to the seal and around the pins. This creates a barrier against moisture and oxygen, preventing the corrosion that leads to high resistance and communication failures.
- Secure any loose wiring (During any related repair) — If you ever have the door panel or kick panel off, ensure all wiring harnesses are properly secured with zip ties or factory clips. Unsecured wires vibrate or get caught on moving parts, leading to chafing and eventual breakage.
- Maintain battery health and clean terminals (Annually) — A weak battery causes low voltage conditions that trigger random communication codes. Ensure battery terminals are clean and tight, and test the battery's health annually. This prevents system voltage from dropping low enough during startup to disrupt module communication.
- Inspect and clear IPDM/TIPM water drains (Nissan/Chrysler) (Annually) — On vehicles with known IPDM/TIPM issues, water intrusion is a major cause of failure. Ensure the drains in the cowl area near the module are clear of leaves and debris to prevent water from overflowing into the electronics.
Frequently Asked Questions
I replaced the Driver Door Module, but the U1020 code came back. Why?
This is a common misdiagnosis. The root cause is usually a broken wire in the door jamb harness, not a failed module. Always test for power, ground, and data continuity at the connector before replacing parts.
Why did my windows and locks suddenly start working again?
This is a classic symptom of a broken wire making intermittent contact. Opening the door or road vibration temporarily forces the broken ends together. The problem will progressively worsen until the wire separates completely.
Can I just clear the U1020 code?
You can clear the code with a scan tool, but it returns immediately if the hardware problem remains. Since this is a physical failure like a broken wire, clearing the code provides no lasting benefit.
Is it safe to drive with a U1020 code?
Yes, it is mechanically safe as it does not impact the engine or brakes. However, losing window and mirror control creates a tangible safety hazard during highway merging or traffic stops.
How much does it cost to fix a U1020 code?
Costs vary based on the root cause. A simple wire splice at an independent shop runs $150-$350, while replacing a door module costs $200-$650. Dealership harness replacements easily exceed $1,000.
Can I fix the broken wires myself?
Yes, if you have intermediate electrical skills. It involves cutting out the damaged section and splicing in new wire using high-quality butt connectors or solder. Always use heat shrink tubing to prevent future corrosion.
What is the difference between a U1020 code and a bad BCM?
U1020 means the BCM is working but cannot hear the door module. A bad BCM is a central failure causing widespread issues. Bad BCM symptoms include multiple unrelated electrical failures, parasitic drains, or a no-start condition.
Key Takeaways
- Code U1020 indicates a communication failure, pointing to the driver's door module (DDM) in over 80% of cases.
- Inspect the rubber boot between the driver's door and the body first; broken 14-16 AWG power or ground wires are the number one cause.
- Expect an immediate loss of driver-side power windows, locks, and mirrors, which creates a safety hazard at toll booths or traffic stops.
- Test the DDM connector for a solid 12.6V power and less than 0.1 ohms ground resistance before spending $200+ on a replacement module.
- For 2004-2015 Nissan and Chrysler vehicles, a failing smart fuse box (IPDM/TIPM) frequently triggers this code and requires a $400-$1000 replacement.
Helpful Videos





The information in this article is provided for general reference and educational purposes only. Vehicle specifications, procedures, and part compatibility can vary by production date, trim level, and region. Always consult your vehicle's factory service manual and verify part numbers before purchasing or performing repairs. Safety-critical components such as airbags, seat belts, and braking systems should be installed by a qualified professional.
- 🎬 Helpful Videos
- What Does U1020 Mean?
- Can I Drive With U1020?
- Common Causes
- Symptoms
- Diagnostic Flowchart
- Common Fixes & Costs
- DIY vs Professional
- Used vs. New Parts: Buying Guide
- What Happens If You Wait — Timeline
- Cost of Not Fixing It
- Diagnosis Steps
- When This Code Triggers (Freeze-Frame Conditions)
- Related Codes
- Climate & Environmental Factors
- How to Talk to a Mechanic About This Code
- Where to Take It: Dealer vs Independent vs Chain
- When to Walk Away From the Repair
- What Scan Tool You Need for This Code
- How to Clear the Code After You Fix It
- Will This Fail Emissions / State Inspection?
- Most Commonly Affected Vehicles
- Manufacturer-Specific Notes
- Real Owner Stories
- 2011 Ford F-150 with intermittent window/lock failure
- 2007 GMC Envoy with a dead battery overnight
- 2007 Nissan Xterra with crank-no-start and flashing dash lights
- How to Prevent This Code From Triggering
- Frequently Asked Questions
- I replaced the Driver Door Module, but the U1020 code came back. Why?
- Why did my windows and locks suddenly start working again?
- Can I just clear the U1020 code?
- Is it safe to drive with a U1020 code?
- How much does it cost to fix a U1020 code?
- Can I fix the broken wires myself?
- What is the difference between a U1020 code and a bad BCM?
- Key Takeaways
- 🎟️ Get 5% Off