

U1000 on 2011-2015 Nissan LEAF: CAN Communication Fault Causes and Fixes
On a 2011-2015 Nissan LEAF, a U1000 code almost always points to a weak or failing 12V auxiliary battery, not a major component failure. Before attempting complex diagnostics, fully charge or replace the 12V battery, as its low voltage during startup disrupts module communication. Many owners report this simple fix resolves a host of seemingly complex electronic issues.
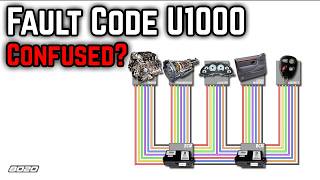
- U1000 is a network communication error, not a specific part failure.
- The number one cause on a 2011-2015 LEAF is a weak 12V auxiliary battery. Replace it if it's over 3 years old.
- Always check and clean the 12V battery terminals and main chassis grounds before seeking expensive professional diagnosis.
- Do not replace the module that stored the U1000 code; the problem is almost always elsewhere on the network.
- If a new battery and clean grounds don't solve the issue, professional diagnosis is needed to check the CAN wiring and other modules.
What's Unique About the 2011-2015 Nissan LEAF

The Nissan LEAF, like many electric vehicles, is extremely sensitive to the health of its 12V auxiliary battery. While the large lithium-ion battery powers the motor, the small 12V battery runs all the onboard computers. A slight voltage drop from this 12V battery during startup is the most common trigger for a cascade of U1000 communication codes, even if the battery seems to test 'good' under a simple load test. Many owners report chasing complex electrical issues only to find the ultimate solution was a new 12V battery. One owner on the MyNissanLeaf forum noted that after experiencing intermittent U1000 codes with no other symptoms, a load test revealed the one-year-old 12V battery was well under capacity; replacing it permanently fixed the issue.
Diagnostic Flowchart

Tap your situation to follow the diagnostic path that matches what you're seeing on this vehicle.
Symptoms You May Notice

- No noticeable symptoms, code only found with a scan tool like LeafSpy.
- Vehicle enters a reduced power or 'limp' mode.
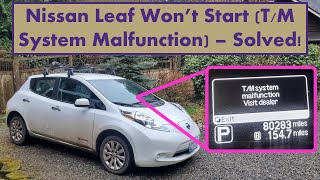
- Vehicle will not start or 'power on'.
- Vehicle fails to charge.
- Multiple warning lights on the dashboard, such as 'Service EV System'.
- Flickering interior or dashboard lights.
- Navigation or radio unit malfunctions or is blank.
- Vehicle will not shut off after being parked.
- Replacing the control module that stored the code. As per Nissan TSB NTB10066A, the module reporting U1000 is usually not the one that is faulty. [NTB10066A]
- Assuming the 12V battery is good because it passed a simple voltage or load test. The LEAF's electronics are sensitive to very brief voltage drops during startup that these tests may not catch.
Most Likely Causes

- Weak or Failing 12V Auxiliary Battery 🔴 High Probability The LEAF's computers are highly sensitive to voltage drops during the startup sequence. An aging 12V battery, even one that can still start the car, may not provide stable enough voltage, causing modules to fail their initial communication 'handshake'. Owners on forums frequently advise proactively replacing the battery if it's over 3-4 years old to avoid strange electrical issues.
How to confirm: Charge the 12V battery fully with an external charger and see if the code returns. A healthy, fully charged battery should read approximately 12.6 volts or higher at rest. For a definitive test, replace the 12V battery, especially if it is more than 3-4 years old. Many forum users report that a simple load test was not sufficient to identify a failing battery that still caused U1000 codes.
Typical fix: Replace the 12V auxiliary battery.
Est. part cost: $150-$250 - Corroded or Loose Battery Terminals and Ground Connections 🟡 Medium Probability Nissan TSBs frequently point to poor ground connections as a source of U1000 codes on various models. On the LEAF, corrosion on the 12V battery terminals or the main chassis ground points can create high resistance, causing intermittent voltage drops that trigger communication faults. The main body ground is typically the bolt where the thick negative battery cable attaches to the chassis frame.
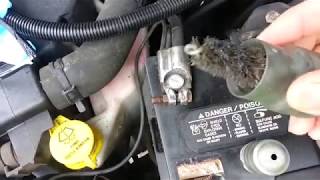
How to confirm: Visually inspect the 12V battery terminals for white or greenish corrosion. Follow the negative battery cable to its connection point on the vehicle chassis and inspect for rust or looseness. Clean all connection points with a wire brush and ensure they are tight.
Typical fix: Clean battery terminals and chassis ground points. Replace corroded terminal clamps if necessary. 🎬 Watch: How to properly clean battery terminals and ground points.
Est. part cost: $5-$30 - Damaged CAN Bus Wiring or Connectors ⚪ Low Probability The CAN bus consists of a twisted pair of wires running throughout the vehicle. While generally robust, these wires can be damaged by rodents, previous repair work, or water intrusion, leading to a short or open circuit.
How to confirm: This requires advanced diagnostics. A technician will use a multimeter to check for the correct resistance across the CAN High (Pin 6) and CAN Low (Pin 14) pins at the OBD-II port with the 12V battery disconnected. The reading should be approximately 60 ohms. A reading of 120 ohms suggests a break in the circuit or a problem with one of the two terminating resistors. Visual inspection of harnesses may also reveal damage.
Typical fix: Repair the damaged section of the wiring harness.
Est. part cost: $10-$100 in materials, but labor-intensive.
Rare But Worth Checking
- Failing Control Module: A single faulty module (e.g., VCM, BCM, ABS, or even the audio unit) can fail internally and stop communicating, or 'scream' on the network, preventing other modules from talking. Diagnosis involves unplugging modules one by one to see if communication is restored, a task best left to professionals.
- Obsolete Telematics Control Unit (TCU): The 2G cellular network used by the TCU in early LEAFs was shut down. A failing TCU can sometimes cause CAN bus errors. Nissan issued a service campaign (NTB17-077) for dealers to disable the TCU via the CONSULT diagnostic tool, which does not require physical removal of the unit. Disconnecting the 12V battery for an extended period after the TCU is disabled may cause the infotainment unit to show asterisks for the TCU ID, confirming it's offline.
Diagnosis Steps
- Check the state of health of the 12V auxiliary battery. A resting voltage below 12.4V suggests it is weak. If it is over 3 years old or shows any signs of weakness, replacement is the most effective first step.
- Ensure the 12V battery is fully charged using an external charger to at least 12.6V before testing.
- Inspect and clean the 12V battery terminals and cable clamps. Ensure they are tight.
- Trace the negative battery cable to the chassis and inspect the main ground connection for corrosion or looseness. Clean and tighten as needed.
- Using a capable scan tool (like LeafSpy or a professional tool), clear all DTCs. Disconnect the 12V battery for several minutes, reconnect, and clear codes again if they persist.
- If codes return, professional diagnosis is recommended. A technician will perform a CAN network test, checking for 60 ohms of resistance between Pin 6 and Pin 14 of the OBD-II port (with the 12V battery disconnected).
Parts You'll Likely Need
- 12V Auxiliary Battery
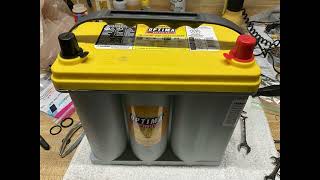
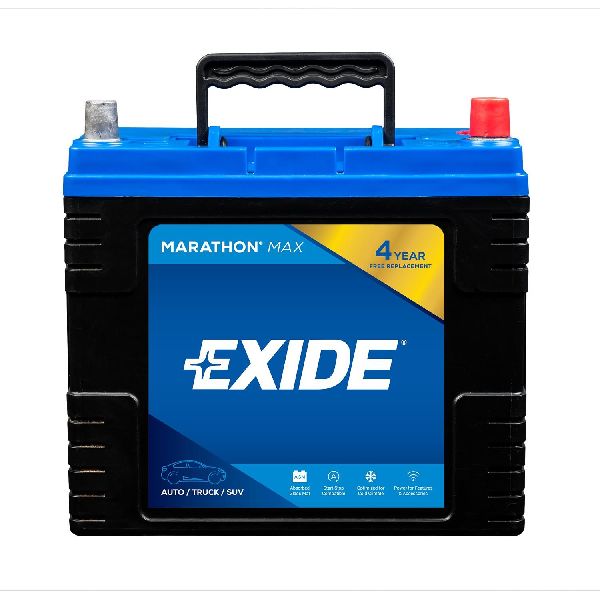
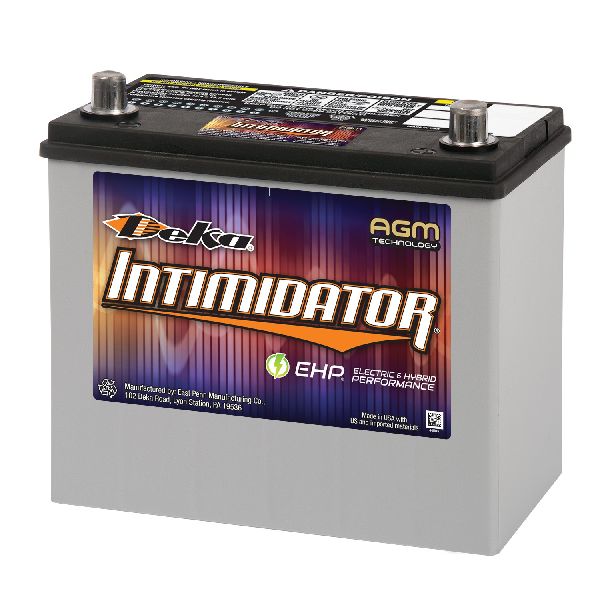
(OEM #24410-1KA0A (example, verify by VIN))— This is the most frequent cause of U1000 codes on the LEAF due to voltage instability during vehicle startup. The common aftermarket size is Group 51R. 🎬 Watch: Step-by-step guide to replacing your LEAF's 12V battery.
Trusted brands: Bosch, Duralast, Optima
OEM price range: $200-$300
Aftermarket price range: $150-$250
Related Codes That Often Appear With This One
- U1001 — This is also a CAN communication code, often specific to a loss of communication with the Engine Control Module (ECM), or in the LEAF's case, the Vehicle Control Module (VCM).
- P31B4 — This is an EV/HEV system code that can appear alongside U1000 when a communication failure related to the audio/nav unit occurs, sometimes after using the USB port improperly.
- B2562 — This code indicates low voltage to the Body Control Module (BCM) and often appears with U1000, reinforcing the likelihood of a weak 12V battery being the root cause.
Technical Service Bulletins (TSBs) & Recalls
- NTB10-066A: States that when a module reports a U1000 code, it is typically operating normally and the fault is external to that module on the CAN network. [NTB10066A]
- NTB13-027C: Provides a detailed diagnostic flow chart for CAN communication issues and defines various U-codes for Nissan vehicles, including the 60-ohm resistance check.
Platform-Specific Known Issues
- On 2013 and newer models, a 12V battery current sensor on the negative terminal is intended to manage charging. Some owners find this system undercharges the battery, leading to premature failure and U1000 codes. A common, though unofficial, fix discussed on forums is to disconnect the 4-wire plug from this sensor, which forces the DC-to-DC converter to charge the battery at a more constant, higher voltage (~14.4V) when the car is on or charging.
- Some owners have found that even a brand new 12V battery isn't fully charged off the shelf and can cause issues. It's recommended to fully charge a new battery with an external charger before installation to prevent immediate communication faults.
Mechanic-Grade Diagnostic Values
- CAN Bus Network Resistance — expected: ~60 Ohms. Failure: A reading of ~120 Ohms indicates an open circuit or one of the two terminating resistors is offline. A reading significantly less than 60 Ohms suggests a short circuit between the CAN lines.
- CAN High (Pin 6) Voltage to Ground (Pin 4/5) — expected: ~2.5V (recessive/idle), ~3.5V (dominant/active). Failure: Voltage that is stuck high, low, or does not change indicates a wiring fault or a faulty transceiver in a module.
- CAN Low (Pin 14) Voltage to Ground (Pin 4/5) — expected: ~2.5V (recessive/idle), ~1.5V (dominant/active). Failure: Voltage that is stuck high, low, or does not change indicates a wiring fault or a faulty transceiver in a module.
- 12V Battery Cranking Voltage — expected: Above 10.0V. Failure: A drop below 10.0V during startup can be sufficient to cause modules to fail their initialization and post U1000 codes, even if the car starts.
Hidden / Shadow Codes Worth Checking
- U1000-00 / U1000-01: These are not true shadow codes but manufacturer-specific suffixes visible in advanced scan tools like LeafSpy. They identify which module is reporting the communication loss, for example, 'U1000-00 08 BCM' indicates the Body Control Module is logging the fault, while 'U1000-01 08 METER' indicates the combination meter (dashboard) is logging it. (see via Advanced scan tools like LeafSpy Pro or the Nissan CONSULT dealer tool.)
Scan Tool Commands That Help
- Nissan CONSULT-III / CONSULT 4: CAN Diagnosis Support Function — This function performs a 'roll call' of all control units on the network to identify which modules are not responding. It is the dealer-level first step after retrieving the U1000 code to isolate the source of the communication loss.
- LeafSpy Pro: Clear DTCs (per module) — After a potential fix (like replacing the 12V battery or fixing a ground), a global DTC clear may not be sufficient. Going into the service menu and clearing codes for each ECU individually can help resolve persistent 'ghost' codes that remain after the underlying issue is fixed.
Wiring & Ground Locations
- EV-CAN Splice Point (2014+ models) — Behind the interior trim panel in the driver's side footwell, near the fuse box. A connector block contains the EV-CAN twisted pair wires.. This is a known access point for the EV-CAN bus. For technicians diagnosing issues or installing hardware like CAN bridges for battery upgrades, knowing this location is critical. A poor connection here could isolate the high-voltage battery system.
- EV-CAN Splice Point (2011-2013 models) — In the center console area.. The harness routing differs from later models. A fault in this area, potentially from a liquid spill or previous repair, could cause U1000 codes related to the EV system.
- CAN Bus Junction — A multi-way junction connector is located somewhere in the middle of the car, linking many of the main CAN bus modules.. A single point of failure at this junction can cause multiple modules to lose communication simultaneously, resulting in a flood of U1000 codes from different ECUs. This is a likely culprit if cleaning grounds and replacing the battery does not resolve the issue.
- OBD-II / DLC (M4) — Above the driver's left knee, beneath the steering column.. This is the primary diagnostic access point. It exposes three separate CAN networks: Car-CAN (Pins 6 & 14), EV-CAN (Pins 12 & 13), and AV-CAN (Pins 3 & 8). Knowing the pinout allows a technician to test each bus individually.
Real Owner Repair Stories
- MyNissanLeaf.com forum user (2011-2015 Nissan LEAF (specific year not mentioned, but behavior is characteristic of the generation)) — Recurring U1000-00 (BCM) and U1000-01 (Meter) codes found in LeafSpy. No check engine light or other drivability symptoms were present.
❌ Tried (didn't work) Clearing codes (they would return weekly)., Having the one-year-old 12V battery tested with a 'real' load tester, which it passed.
✅ What actually fixed it Replacing the 12V battery. Despite passing a load test, the battery was found to be under capacity, likely causing voltage glitches during startup. After replacement, the U1000 codes did not return.
"I Checked Everything" — The Actual Cause
- A very common scenario for the U1000 code on a LEAF is when a professional load test on the 12V battery shows it as 'good', leading mechanics to search for complex wiring faults. However, the root cause is often still the battery, as it may be unable to prevent a momentary voltage drop during the vehicle's power-on sequence that is too brief for standard testers to flag as a failure, but long enough to disrupt CAN module initialization.
When the Usual Fixes Don't Work
- While the 12V battery and grounds are the most common culprits, they are not the only cause. In cases where those have been checked and are known-good, the next step is to suspect a physical break in the CAN wiring harness or a failure at a central CAN junction connector. One forum user described a scenario where multiple U1000 codes from various modules suggested a break in the harness that isolated one side of the network from the other, a problem that would require advanced wiring diagnostics with a multimeter and wiring diagrams to trace and repair.
OEM Part Supersession History
294G0-1HH0A→— This is the OEM part number for the Battery Current Sensor used on 2012 models and is relevant for the 2013+ model year variation that introduced this sensor.
Heads up: This sensor is a key difference in the 12V charging system for 2013+ models compared to the 2011-2012 models.
Model Year Variations Within This Range
- 2013-2015: Introduction of a 12V battery current sensor on the negative terminal. This sensor's logic can sometimes undercharge the 12V battery, leading to premature failure and U1000 codes.
- 2014-2015 vs 2011-2013: The main EV-CAN bus wiring harness splice point is located in the driver's side footwell on 2014+ models, whereas it is in the center console on 2011-2013 models. This is critical information for diagnosing a physical wiring fault in the EV-CAN network.
Helpful Videos

We Have This Part in Stock

The information in this article is provided for general reference and educational purposes only. Vehicle specifications, procedures, and part compatibility can vary by production date, trim level, and region. Always consult your vehicle's factory service manual and verify part numbers before purchasing or performing repairs. Safety-critical components such as airbags, seat belts, and braking systems should be installed by a qualified professional.
- Nissan LEAF:
- 🎬 Helpful Videos
- 🛍️ Shop This Part
- What's Unique About the 2011-2015 Nissan LEAF
- Diagnostic Flowchart
- Symptoms You May Notice
- Most Likely Causes
- Rare But Worth Checking
- Diagnosis Steps
- Parts You'll Likely Need
- Related Codes That Often Appear With This One
- Technical Service Bulletins (TSBs) & Recalls
- Platform-Specific Known Issues
- Mechanic-Grade Diagnostic Values
- Hidden / Shadow Codes Worth Checking
- Scan Tool Commands That Help
- Wiring & Ground Locations
- Real Owner Repair Stories
- "I Checked Everything" — The Actual Cause
- When the Usual Fixes Don't Work
- OEM Part Supersession History
- Model Year Variations Within This Range
- 🎟️ Get 5% Off