

U0265 on 2016 Cadillac CT6: Lost Camera Communication Causes and Fixes
On a 2016 Cadillac CT6, code U0265 typically means 'Lost Communication With Front Camera Module'. This disables driver-assist features. Often, the cause is a software glitch that requires a dealer to reprogram the module, not replace it. Always check for software updates before replacing parts, and be aware that windshield replacement can trigger this issue if the camera is not recalibrated.
- U0265 on a 2016 CT6 almost always points to a communication loss with the front-facing safety camera.
- Do not replace any parts until a dealer or qualified shop has checked for software updates for the Front Camera Module; a reprogram is the most common fix.
- Driving is possible, but be aware that important safety features like Automatic Emergency Braking will not function.
- If the windshield was recently replaced, carefully inspect the camera's connector behind the rearview mirror for damage or a loose connection, and confirm that a mandatory calibration was performed.
What's Unique About the 2016-2016 Cadillac CT6
The 2016 CT6 is the only production vehicle built on GM's advanced, aluminum-intensive Omega platform. For this generation of Cadillac and other GM vehicles, U0265 is frequently caused by a software anomaly within the camera module itself, rather than a hardware failure. GM has issued bulletins for various models (like N202305180 for the CT4/CT5 and 25-NA-050 for the Corvette) advising that reprogramming the B174W Front Camera Module is the first and most common fix. Additionally, a specific GM Technical Service Bulletin (PIT5441C) warns that a technician's own faulty diagnostic tool (MDI/MDI 2) can induce this code, leading to a misdiagnosis if not considered.
Diagnostic Flowchart
Tap your situation to follow the diagnostic path that matches what you're seeing on this vehicle.
Symptoms You May Notice
- "Service Driver Assist System" message on the instrument cluster.
- Forward Collision Alert, Lane Keep Assist, and other camera-based safety systems are disabled.
- Amber warning light for the Automatic Emergency Braking system may appear.
- Surround view or backup camera may be inoperative.
- In some cases, a faulty camera module can cause a parasitic battery drain, leading to a dead battery.
- Replacing the Front Camera Module when only a software update was needed. This is an expensive and unnecessary repair in many cases, as confirmed by multiple GM service bulletins.
Most Likely Causes
- Front Camera Module (FCM) Software Anomaly 🔴 High Probability This is a well-documented issue on many modern GM platforms where the module's software can cause it to stop communicating. TSBs like N202305180 and 25-NA-050 explicitly call for a software update as the primary fix.
How to confirm: A GM dealer or a qualified shop with access to GM's Service Programming System (SPS2) must check for available software updates for the Front Camera Module (B174W).
Typical fix: Reprogramming the Front Camera Module with the latest software. This does not involve replacing any parts.
Est. part cost: $0 - Wiring or Connector Issue 🟡 Medium Probability The camera connector (B174W) can be disturbed, damaged, or not fully seated during windshield replacement. Wiring in the front of the vehicle is also exposed to potential damage or corrosion.
How to confirm: Visually inspect the wiring and connector at the Front Camera Module, located behind the rearview mirror. 🎬 See how to access and inspect the front camera module Check for loose connections, bent pins, or signs of corrosion. A multimeter can be used to check for 12V power and solid ground at the connector.
Typical fix: Repairing the damaged section of the harness or cleaning/reseating the connector. Applying dielectric grease can help prevent future corrosion.
Est. part cost: $10-$50 - Failed Front Camera Module ⚪ Low Probability
How to confirm: This is diagnosed by exclusion. If software updates are complete and all wiring/power/ground circuits are confirmed to be good, the module itself is the likely culprit. A professional scan tool is needed to confirm the module is unresponsive.
Typical fix: Replacing the Front Camera Module and performing a mandatory programming and dynamic calibration procedure so the system can function correctly.
Est. part cost: $150-$230
Rare But Worth Checking
- Faulty Technician Diagnostic Tool: As per TSB #PIT5441C, a faulty MDI (Multiple Diagnostic Interface) cable used by a technician can induce false communication codes, including U0265. This is a diagnostic error, not a vehicle fault, but can lead to an incorrect diagnosis if not considered.
- Improper Windshield Replacement: If the windshield was replaced with non-OEM glass, the camera mounting bracket may be misaligned, making successful calibration impossible even with a good camera. GM also now requires camera calibration after any windshield replacement or removal.
Diagnosis Steps
- Connect a professional-grade scan tool (like GM's GDS2) capable of reading GM-specific codes and communicating with all modules.
- Check for GM-specific symptom bytes (e.g., 'U0265 71' for 'Invalid Serial Data Received') which can provide more specific diagnostic direction.
- Check for any available software updates for the Front Camera Module (B174W). This is the most common fix and should be the first step.
- If no updates are available, perform a thorough visual inspection of the wiring and connector going to the front camera, located behind the rearview mirror. Check for any damage, especially if the windshield has been replaced recently.
- Using a multimeter, check the power and ground circuits for the camera module to ensure it's receiving proper voltage (approx. 12V) and has low resistance to ground (<5 Ω).
- Test the communication bus lines (CAN bus) for proper resistance and voltage to rule out a network-wide problem.
- If software, wiring, and power are all good, the Front Camera Module itself is the likely point of failure and should be replaced.
- After replacement, the new camera module must be programmed using SPS2 and then undergo a dynamic calibration. This requires driving the vehicle on a well-marked road at speeds between 35-56 MPH until the scan tool indicates the calibration is 100% complete. 🎬 Watch: Quick tips for performing a GM dynamic camera calibration
Parts You'll Likely Need
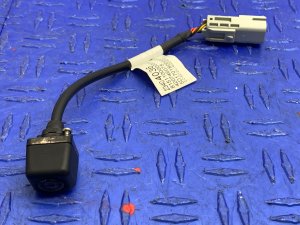
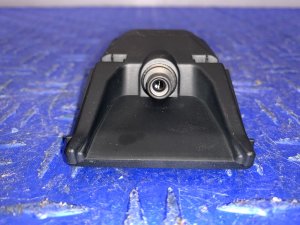
- Front View Camera
(OEM #23507082)— If software and wiring issues are ruled out, the internal electronics of the camera module may have failed, requiring replacement. This part requires programming and calibration after installation.
Trusted brands: ACDelco (GM Genuine)
OEM price range: $150-$230
Aftermarket price range: $100-$180
Related Codes That Often Appear With This One
- U0075 — This is a general CAN bus communication code often listed alongside U0265 in TSBs related to object detection system issues.
- U026A, U026B, U026C, U0268, U0269 — These codes relate to other ADAS sensors. Seeing them together with U0265 can point to a systemic issue, like the diagnostic tool fault mentioned in TSB #PIT5441C.
- P25A2, U0566 — In newer Cadillacs, these codes often set with U0265, indicating a loss of communication that also triggers a request from the brake module to illuminate the MIL. TSB PIC6404 addresses this specific combination.
Technical Service Bulletins (TSBs) & Recalls
- PIT5441C: Advises that a faulty diagnostic tool cable can induce code U0265 and other communication codes, leading to a misdiagnosis. It suggests inspecting the tool before proceeding with vehicle repairs. [Bulletin #PIT5441C, 4, 18]
- N202305180 / PIC6404: While for newer CT4/CT5 models, these bulletins confirm a pattern where U0265 is caused by a software issue in the front camera module that is fixed by reprogramming, not replacement.
- 25-NA-050: Reinforces the software issue pattern on other GM vehicles, specifically calling out U0265 being set by software anomalies in the B174W Front Camera Module.
- 23-NA-095: Describes a condition on similar GM trucks where a faulty front camera module can cause a parasitic battery drain, a symptom that could accompany a U0265 code.
Platform-Specific Known Issues
- A known issue documented in TSB #PIT5441C states that a faulty diagnostic interface cable used by the technician can cause this code to be set falsely. The bulletin advises inspecting the tool before diagnosing the vehicle. [Bulletin #PIT5441C, 4]
- The 2016 CT6 was the debut vehicle for the GM Omega platform, a complex architecture that was not shared with any other production model 🎬 Watch: A professional diagnostic teardown of the 2016 CT6 electronics, making some of its electronic integrations unique.
Mechanic-Grade Diagnostic Values
- CAN Bus Resistance at Module Connector — expected: 54 to 69 Ω. Failure: A reading of ~120 Ω indicates an open circuit or a missing terminating resistor. A reading below 54 Ω suggests a short between the CAN lines.
- Front Camera Module Power Supply Voltage — expected: 12.0 ± 0.5 V. Failure: Voltage below this range indicates a power supply issue (fuse, wiring).
- Front Camera Module Ground Resistance — expected: Below 1 Ω. Failure: Resistance higher than 1 Ω indicates a poor ground connection, which can cause intermittent module operation.
- CAN Bus Voltage (Idle) — expected: CAN_H ≈ 2.5 V, CAN_L ≈ 2.5 V. Failure: Significant deviation from 2.5V on either line when the bus is idle.
Hidden / Shadow Codes Worth Checking
- U0265 sym00: A specific symptom byte for U0265 that may be set in the Body Control Module (BCM). Some GM bulletins advise clearing this code if no other DTCs are present, as it may be set due to an internal software investigation. (see via GM GDS2 or equivalent professional scan tool.)
- U3000 with symptom 44, 49, 54, or 57: These are internal fault codes that may be stored in the Front View Camera Module itself, even if only U0265 is seen in other modules. They can point to specific internal logic failures, low voltage during cranking (44), or even an obstructed view (49). (see via GM GDS2, when communicating directly with the B174W Front Camera Module.)
Scan Tool Commands That Help
- GDS2: Front View Camera Module Learn — This is a mandatory calibration procedure required after replacing or reprogramming the B174W Front Camera Module. It is a dynamic process requiring a specific drive cycle.
- GDS2: Extended Camera Relearn Procedure — Use this when the standard 'Learn' procedure fails to complete. It involves covering the camera lens and letting the vehicle sleep for 30+ minutes before re-attempting the learn process.
- SPS (Service Programming System): Reprogram K174W Front View Camera Module — This is the function used to apply software updates to the camera module, which is the most common fix for intermittent U0265 codes.
- GDS2: Clear All DTCs — As part of a reset procedure, such as after power-cycling the module by pulling its fuse, clearing all codes is a necessary step before re-evaluating system operation.
Wiring & Ground Locations
- B174W Connector — On the front windshield, inside the housing behind the rearview mirror assembly.. This is the direct connection point for the Front Camera Module. It is susceptible to being disturbed or improperly seated during windshield replacement, leading to a loss of communication.
- X51R Right Instrument Panel Fuse Block — Inside the vehicle, typically accessible by opening the front passenger door and removing a side dash panel.. This fuse block contains the fuse for the Front Camera Module (often labeled F11DR). A temporary fix described in a TSB involves pulling this fuse for one minute to power cycle the module.
- G103 — Located at the left rear of the engine compartment on the cowl, above the brake booster.. This is a major ground point for multiple modules, including the Body Control Module (BCM) and Instrument Panel Cluster (IPC). A poor connection here can cause widespread communication issues.
- DLC (Data Link Connector) Pins 3 & 11 — Under the driver's side dashboard.. These are the specific pins for the Object Detection Bus on some GM vehicles. TSB PIT5441C warns that a faulty diagnostic tool cable can have issues with these pins, inducing a false U0265 code.
Helpful Videos

We Have This Part in Stock
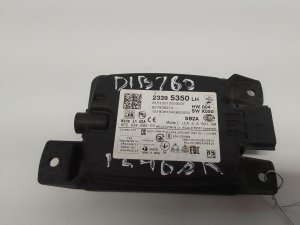




The information in this article is provided for general reference and educational purposes only. Vehicle specifications, procedures, and part compatibility can vary by production date, trim level, and region. Always consult your vehicle's factory service manual and verify part numbers before purchasing or performing repairs. Safety-critical components such as airbags, seat belts, and braking systems should be installed by a qualified professional.
- Cadillac CT6:
- 🎬 Helpful Videos
- 🛍️ Shop This Part
- What's Unique About the 2016-2016 Cadillac CT6
- Diagnostic Flowchart
- Symptoms You May Notice
- Most Likely Causes
- Rare But Worth Checking
- Diagnosis Steps
- Parts You'll Likely Need
- Related Codes That Often Appear With This One
- Technical Service Bulletins (TSBs) & Recalls
- Platform-Specific Known Issues
- Mechanic-Grade Diagnostic Values
- Hidden / Shadow Codes Worth Checking
- Scan Tool Commands That Help
- Wiring & Ground Locations
- 🎟️ Get 5% Off