

U0200 on 2006-2010 Dodge Charger: Lost Communication With Passenger Door Module Fixes
On a 2006-2010 Dodge Charger, code U0200 is almost always caused by broken wires in the driver's side door jamb harness. The communication wiring for the passenger door is uniquely routed through the driver's side. The fix is to repair the broken wires, which is a low-cost DIY job (under $30) for those with basic electrical skills. A shop may charge between $150 and $400 for the diagnosis and repair.
- U0200 on a 2006-2010 Charger means the Passenger Door Module has lost communication.
- The most likely cause is broken wires in the DRIVER'S side door jamb harness, not the passenger's.
- Always inspect the wiring in the driver's door boot before buying any parts. A 'wiggle test' can quickly confirm the diagnosis.
- This repair is often inexpensive and can be done by a DIYer with basic wiring skills using solder or butt connectors.
- If code U0199 is also present, it strongly reinforces the diagnosis of a broken driver's door harness.
What's Unique About the 2006-2010 Dodge CHARGER
What's unique to the first-generation Dodge Charger and its Chrysler LX platform siblings (like the 300 and Magnum) is the root cause of this code. Counter-intuitively, the problem is almost never in the passenger door. The communication wiring for the passenger door module is routed through the driver's door wiring harness. This harness is a well-documented failure point; the wires fatigue and break from the repeated stress of opening and closing the driver's door. The specific CAN bus wires are typically a twisted pair, and a break in either one will sever communication. This is why code U0199 (Lost Communication with Driver Door Module) often appears alongside U0200.
Diagnostic Flowchart
Tap your situation to follow the diagnostic path that matches what you're seeing on this vehicle.
Symptoms You May Notice
- Passenger power window is inoperative
- Passenger power door lock is inoperative
- Passenger power mirror cannot be adjusted
- Driver's side power window and lock may also be inoperative if code U0199 is also present.
- Intermittent operation of passenger door functions, which may work when the driver's door is in a certain position.
- A red dot (security light) may appear on the dash.
- The rear window switches continue to operate normally.
- Replacing the Passenger Door Module (PDM) before checking the wiring in the driver's door jamb.
- Replacing the passenger window motor or lock actuator without first checking for communication codes.
- Only inspecting the passenger door harness and assuming it's the source of the problem for a passenger-side code.
Most Likely Causes
- Broken Wires in Driver's Door Jamb Harness 🔴 High Probability The wiring for both door modules passes through the driver's side door jamb. Constant flexing from opening and closing the door causes the copper wires, particularly the CAN bus communication wires, to become brittle and break over time. This is a widely reported issue in owner forums for the LX platform.
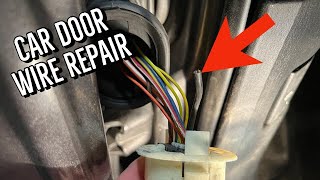
How to confirm: Peel back the rubber accordion boot between the driver's door and the car's body. Visually inspect each wire for cracks, chafing, or complete breaks. Gently tug on individual wires; a broken wire may still be held together by its insulation. The CAN bus wires are a twisted pair, often White/Black and White/Light Blue; a break in either will cause this code. A 'wiggle test' can also confirm the issue: with the ignition on, wiggle the harness while an assistant tries to operate the passenger window or lock. If function returns intermittently, it confirms a wiring break.
Typical fix: Repair the broken wires by splicing in a new section of wire using butt connectors or by soldering and covering with heat shrink tubing. Ensure the repair has enough slack to prevent future stress. Aftermarket door harness pigtail repair kits are also available from brands like Dorman or from retailers like CarParts.com.
Est. part cost: $10-$50
Rare But Worth Checking
- Faulty Passenger Door Module (PDM): This should only be considered after the wiring in both the driver's and passenger's door jambs has been thoroughly inspected and confirmed to be intact. Module failure is far less common than the wiring issue. TSB 08-061-12 does mention replacing the module as a repair step, but many owners report this fails to fix the issue if the underlying wiring problem isn't addressed first.
- Broken Wires in Passenger Door Jamb Harness: While less common than the driver's side, the passenger side harness can also fail. It's worth inspecting if the driver's side wiring is found to be in good condition.
- Faulty Body Control Module (BCM): A failure of the BCM is very rare but possible. This would likely be accompanied by numerous other communication codes and widespread, erratic electrical issues like random horn honking, wiper activation, or a 'No Bus' message on the dash.
- Blown Fuse: A blown fuse for the door modules can cause a loss of communication. Check the fuses for the DDM/PDM in the fuse box located in the trunk before proceeding with more complex diagnostics.
Diagnosis Steps
- Scan for Diagnostic Trouble Codes (DTCs). Note if U0200 is present alone or with U0199.
- Verify the symptoms. Attempt to use the passenger window, lock, and mirror from both the driver's and passenger's switches.
- Begin inspection at the most likely point of failure: the driver's side door jamb. Peel back the rubber accordion boot that protects the wiring harness.
- Carefully inspect each wire for signs of cracking, chafing, or complete breaks. Pay close attention to the twisted pair of CAN bus wires (often White/Black and White/Light Blue).
- Gently pull on each wire to check for breaks hidden inside the insulation. Perform a 'wiggle test' by manipulating the harness with the ignition on to see if function returns.
- If broken wires are found, repair them using butt connectors or by soldering and applying heat shrink. Ensure the repair is secure and has slack.
- If the driver's side harness is intact, perform the same inspection on the passenger's side door jamb harness.
- If all wiring appears to be good, check the related fuses for the door modules in the trunk-mounted fuse box.
- If fuses and wiring are good, the next step involves using a multimeter to check for power (approx. 12V), ground, and CAN bus signal (approx. 2.5V on each wire) at the Passenger Door Module connector. This is a more advanced step.
- Only consider replacing the Passenger Door Module after all wiring and power/ground checks have been confirmed to be good.
Parts You'll Likely Need
- Wire Repair Supplies — This is for splicing the broken wires found in the door jamb harness, which is the most common cause of the U0200 code.
Trusted brands: 3M, Dorman
Aftermarket price range: $10-$30 - Door Harness Repair Pigtail — An alternative to individual wire repair, these kits provide a new section of harness with a connector to splice in, which can be a more durable long-term fix.
Trusted brands: Dorman, Crown Automotive
Aftermarket price range: $30-$75 - Passenger Door Module (PDM)
(OEM #4602894AH (superseded by multiple part numbers, e.g., 68055298AK))— This part is only needed in the rare case that the module itself has failed, and all wiring has been verified as good. Part numbers have been superseded many times; always verify with VIN.
Trusted brands: Mopar
OEM price range: $150-$250
Aftermarket price range: $80-$150
Related Codes That Often Appear With This One
- U0199 — U0199 is 'Lost Communication With Driver Door Module'. Since the wiring for both modules runs through the same driver's door harness, a break in that harness often affects both modules simultaneously, causing both codes to appear.
Technical Service Bulletins (TSBs) & Recalls
- 08-061-12: Addresses inoperative driver and/or passenger front power locks and windows, citing DTCs U0200 and U0199. The bulletin involves inspecting and potentially replacing the door modules, though owner experience suggests the root cause is often the wiring harness which the TSB procedure may overlook.
Platform-Specific Known Issues
- The first-generation Dodge Charger (LX Platform) is notorious for wiring failures within the driver's door jamb harness due to repeated flexing, leading to codes U0200 and U0199.
- Owner forums like ChargerForums.com and LXForums.com are filled with threads detailing this exact failure, with many users confirming the fix was repairing broken wires in the driver's door boot, even when only the passenger-side code U0200 was present.
Mechanic-Grade Diagnostic Values
- CAN C Bus Resistance (between DLC pins 6 & 14, key-off) — expected: ~60 Ohms. Failure: A reading of ~120 Ohms indicates a break in the circuit or a missing terminating resistor. A reading significantly below 60 Ohms suggests a short.
- CAN High (CAN C +) Voltage to Ground (key-on) — expected: ~2.6V - 2.7V. Failure: 0V or a voltage significantly different from the expected range indicates a fault. A steady 2.5V can indicate the CAN High and Low wires are shorted together.
- CAN Low (CAN C -) Voltage to Ground (key-on) — expected: ~2.3V - 2.4V. Failure: 0V or a voltage significantly different from the expected range indicates a fault. A steady 2.5V can indicate the CAN High and Low wires are shorted together.
- PDM Power Supply Voltage at Module Connector — expected: 11.3V - 14V. Failure: Voltage below 11.3V can cause the module to shut down and set communication codes.
- PDM Ground Circuit Resistance to Chassis — expected: Below 1.0 Ohm. Failure: High resistance in the ground circuit can cause erratic module behavior or complete failure.
Scan Tool Commands That Help
- StarSCAN / wiTECH / compatible bidirectional scanner: Actuator Tests for Door Modules — After verifying power and ground are good at the module, a bidirectional scanner can command the PDM to perform functions like 'Window Up/Down' or 'Lock/Unlock'. If the module receives the command but the component doesn't actuate, it points to a problem with the motor or the module's output driver, rather than a communication issue. If the command fails, it confirms a communication breakdown.
Wiring & Ground Locations
- CAN C Bus Wires — Inside the driver's door jamb harness boot. They are a twisted pair.. These wires, typically White/Black (CAN High) and White/Light Blue (CAN Low), carry the communication signal for both the driver and passenger door modules. A break here is the primary cause of U0200.
- G301 — Below the right 'B' pillar.. This is a primary ground point for components on the right side of the vehicle, including the Passenger Door Module (PDM). A corroded or loose G301 can cause a loss of power or erratic behavior for the PDM, leading to communication codes.
- Driver's Door Jamb Harness Boot — The flexible rubber boot between the driver's door and the A-pillar.. This is the single most common failure point. The repeated flexing from opening and closing the door causes the CAN bus wires routed through it to break, severing communication with the passenger door module.
Real Owner Repair Stories
- ChargerForums.com / LXForums.com (multiple users) (2006-2010 Dodge Charger (various trims)) — Passenger window and lock inoperative, U0200 and often U0199 codes present.
❌ Tried (didn't work) Replacing the Passenger Door Module (PDM)., Checking fuses., Inspecting the passenger door harness.
✅ What actually fixed it Finding and repairing multiple broken wires (specifically the twisted pair CAN bus wires) inside the rubber boot of the DRIVER'S side door jamb. The repair typically involved splicing the wires with butt connectors or solder and heat shrink.
OEM Part Supersession History
4602894AH→Multiple revisions, including 68055298AK and others.— Standard part updates and revisions by the manufacturer.
Heads up: While many modules are physically similar, they are often programmed for specific vehicle options (e.g., with/without memory seats). Always verify the correct part number for your vehicle's VIN before purchasing a replacement PDM to avoid feature loss or new communication issues.
Model Year Variations Within This Range
- 2009-2010: For models with the 5.7L Hemi V8, the 2009 model year introduced the 'Eagle' engine, which featured better heads, an improved intake manifold, and VVT (Variable Valve Timing). This increased horsepower from ~350 to ~375. While this doesn't directly affect the U0200 code, it's a significant mechanical change within the 2006-2010 range.
- 2007-2010: All-wheel drive became an option starting in 2007. This added a transfer case and related components but did not fundamentally change the door control wiring that causes the U0200 code.
Helpful Videos

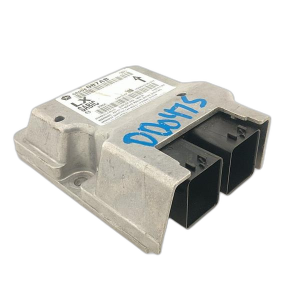
We Have This Part in Stock





The information in this article is provided for general reference and educational purposes only. Vehicle specifications, procedures, and part compatibility can vary by production date, trim level, and region. Always consult your vehicle's factory service manual and verify part numbers before purchasing or performing repairs. Safety-critical components such as airbags, seat belts, and braking systems should be installed by a qualified professional.
- Dodge CHARGER:
- 🎬 Helpful Videos
- 🛍️ Shop This Part
- What's Unique About the 2006-2010 Dodge CHARGER
- Diagnostic Flowchart
- Symptoms You May Notice
- Most Likely Causes
- Rare But Worth Checking
- Diagnosis Steps
- Parts You'll Likely Need
- Related Codes That Often Appear With This One
- Technical Service Bulletins (TSBs) & Recalls
- Platform-Specific Known Issues
- Mechanic-Grade Diagnostic Values
- Scan Tool Commands That Help
- Wiring & Ground Locations
- Real Owner Repair Stories
- OEM Part Supersession History
- Model Year Variations Within This Range
- 🎟️ Get 5% Off