

U0186 on 2017 Chevrolet Silverado: Lost Communication With Audio Amplifier Fixes
On a 2017 Silverado, U0186 means the audio amplifier is offline, causing no sound. The most likely cause is not the amplifier but a poor connection or fault at the Serial Data Gateway Module (SDGM) under the driver's side dash, an issue documented in GM TSBs #PIT5586B and its later revisions like #20-NA-212. Inspecting and reseating the SDGM connectors is the first and most common fix.
- U0186 on a 2017 Silverado means a loss of communication with the audio amplifier, resulting in no sound.
- Do not immediately replace the amplifier or radio. The most common cause is a poor connection at the Serial Data Gateway Module (SDGM) under the driver's dash.
- Inspecting and reseating the two large connectors on the SDGM is the first, easiest, and most likely fix.
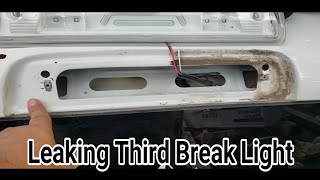
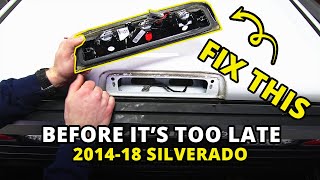
- If the amplifier has failed, check for water damage from a leaking third brake light gasket, and repair the leak along with replacing the amp.
What's Unique About the 2017-2017 Chevrolet SILVERADO
For this generation of Silverado (K2XX platform), the U0186 code is very frequently a symptom of a different problem, not a failed amplifier. GM has documented a common issue with the Serial Data Gateway Module (SDGM), which acts as a central router for vehicle data. Poor pin connections or a software 'logic lock' in the SDGM can disrupt communication to various modules, with the audio amplifier being a common victim. This is why official service bulletins, like TSB #PIT5586B and its successors (#PIT5586G, #20-NA-212), point technicians to the SDGM first before suspecting the amplifier itself.
Diagnostic Flowchart
Tap your situation to follow the diagnostic path that matches what you're seeing on this vehicle.
Symptoms You May Notice
- No sound from the radio or any audio source
- Loss of turn signal 'click' sound
- Absence of warning chimes (e.g., seatbelt, door ajar)
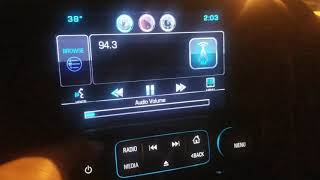
- Radio display appears to function normally but produces no audio
- Steering wheel audio controls are unresponsive
- Radio display may be blank or frozen in some cases
- Replacing the audio amplifier without first inspecting the Serial Data Gateway Module (SDGM) and its connectors. The SDGM is the more frequent point of failure according to multiple GM service bulletins.
- Replacing the radio head unit or infotainment screen. The U0186 code points specifically to a communication loss with the separate amplifier module, not the radio itself.
Most Likely Causes
- Poor Connection or Fault at Serial Data Gateway Module (SDGM) 🔴 High Probability This is a widely documented issue on the K2XX platform. GM TSBs #PIT5586B, #PIT5586G, and #20-NA-212 specifically identify poor terminal tension, fretting corrosion, or backed-out pins at the SDGM's X2 connector as a primary cause for a group of communication codes, including U0186. The module can also suffer from a 'logic lock' requiring a reset.
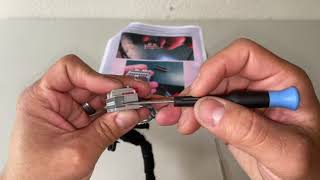
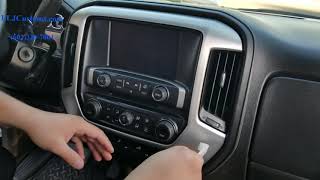
How to confirm: Visually inspect the X1 (gray) and X2 (black) connectors at the SDGM, located under the driver's side dashboard near the OBD-II port. Check for any bent, loose, corroded, or backed-out terminals. A technician would perform a 'pin drag test' to ensure proper tension. Many owners report success by simply disconnecting and firmly reconnecting these two plugs. 🎬 Watch: This simple reset often restores sound and blinker clicks.
Typical fix: Often, simply disconnecting the battery, then disconnecting and firmly reconnecting the SDGM connectors can resolve the issue. If terminals are damaged, they must be repaired. In some cases, the SDGM may have a 'logic lock' and require reprogramming by a dealer or a hard reset (disconnecting the battery for 30 minutes). If these steps fail, the module itself may need replacement.
Est. part cost: $0 - $250 - Failed Audio Amplifier 🟡 Medium Probability The amplifier is an electronic module that can fail internally. A very common reason for failure on these trucks is water intrusion from a leaking third brake light (CHMSL) gasket or a leaking rear sliding window. Water drips down the back of the cab and directly onto the amplifier or its connector, causing corrosion and failure.
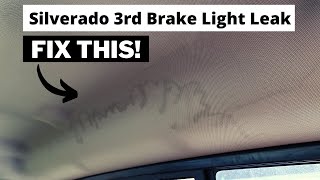
How to confirm: After confirming the SDGM and its wiring are good, check for power, ground, and data signals at the amplifier's connector. The amplifier is located on the rear wall of the cab, typically behind the rear driver's side seat. If 12V power and ground are present but the module does not communicate, it has likely failed. Check for water stains on the headliner or carpet in this area.
Typical fix: Replace the audio amplifier. The new amplifier may require programming to the vehicle. Crucially, if water damage is found, the source of the leak (usually the third brake light gasket) MUST be repaired to prevent the new amplifier from failing as well.
Est. part cost: $250-$500 - Blown Fuse ⚪ Low Probability
How to confirm: Check the fuses for the audio system. There is often a 30A or 40A fuse for the amplifier located in either the passenger-side instrument panel fuse box or a rear fuse block.
Typical fix: Replace the blown fuse. If it blows again, there is a short circuit in the amplifier's power wire or an internal short in the amplifier itself that must be diagnosed.
Est. part cost: $1-$5
Rare But Worth Checking
- Damaged CAN Bus Wiring: The communication wire (often a single green wire for low-speed GMLAN) could be shorted or broken somewhere between the SDGM and the amplifier. This requires tracing the wire and checking for continuity.
- Aftermarket Equipment Interference: Improperly installed aftermarket accessories like remote starters, alarms, or audio line-out converters can be spliced into the GMLAN network incorrectly, causing data corruption and communication codes.
Diagnosis Steps
- Scan for all DTCs in all modules. Note if other U-codes are present, as this points towards the SDGM.
- Check and test the vehicle's battery and charging system to rule out low voltage as a cause.
- Locate the Serial Data Gateway Module (SDGM) under the driver's side dash, near the parking brake pedal assembly.
- Following the guidance of TSB #20-NA-212, disconnect the battery. Then, disconnect the SDGM's X2 (black) and X1 (gray) connectors and inspect the terminals for damage, corrosion, or poor pin tension.
- If no terminal issues are found, reconnect everything securely. Many owners find this simple reseating action resolves the problem.
- Reconnect the battery, clear the codes, and see if the U0186 code returns and if audio function is restored.
- If the code persists, locate the audio amplifier behind the rear seat. Inspect its connector for corrosion or signs of water damage. Check the headliner above for water stains from the third brake light.
- Using a multimeter, verify the amplifier has 12V+ power and a solid ground connection at its connector.
- If power and ground are good but the amplifier still won't communicate, the amplifier itself has likely failed and requires replacement.
Parts You'll Likely Need
- Serial Data Gateway Module
(OEM #13533490)— This module is the most common point of failure for this code on this platform, due to either internal logic faults or, more often, poor connector integrity as cited in TSBs. Part numbers can be superseded; always verify with a VIN.
Trusted brands: ACDelco, GM Genuine Parts
OEM price range: $85-$250
Aftermarket price range: $70-$200 - Audio Amplifier
(OEM #84356449)— If the SDGM and wiring are confirmed to be in good condition, the amplifier itself is the next most likely component to have failed, often due to water damage from a leaking third brake light or rear window.
Trusted brands: ACDelco, GM Genuine Parts
OEM price range: $250-$500
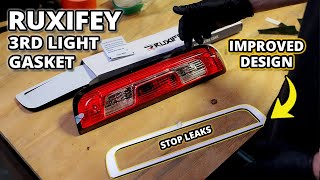
Aftermarket price range: $200-$400 - Third Brake Light Gasket — If the amplifier failed due to water intrusion, this inexpensive foam gasket is a critical part of the repair to prevent a repeat failure. Many owners use black RTV silicone as a more permanent fix. 🎬 Watch: How to install a new gasket to stop leaks.
Trusted brands: GM Genuine Parts, Dorman, Permatex (RTV Silicone)
OEM price range: $15-$30
Aftermarket price range: $10-$20
Related Codes That Often Appear With This One
- U0100, U0101, U0140, U0151, U0155, etc. — The presence of multiple other 'U' (communication) codes alongside U0186 strongly suggests a network-wide problem, making the Serial Data Gateway Module (SDGM) the primary suspect, as it is the central hub for communication. TSBs PIT5586B and 20-NA-212 list a large number of U-codes that can be caused by this single point of failure.
Technical Service Bulletins (TSBs) & Recalls
- Bulletin #PIT5586B (and later revisions PIT5586G, 20-NA-212): Instructs dealers to check the Serial Data Gateway Module X1/X2 connectors for terminal concerns and repair as needed.
Platform-Specific Known Issues
- The 'Wiggle and Reseat' Fix for the SDGM: Numerous owners on forums like gm-trucks.com report a complete and immediate fix by simply locating the SDGM under the driver's dash, disconnecting its two main connectors (X1 and X2), and plugging them back in firmly. This suggests the issue is often just a poor connection from vibration over time, rather than a failed part.
- The Leaking Third Brake Light (CHMSL) Disaster: A common narrative for Silverado owners who end up needing a new amplifier involves a failed foam gasket on the high-mounted third brake light. After a heavy rain or car wash, water leaks into the cab, runs down the back wall, and drips directly onto the amplifier, shorting it out. Repair requires replacing both the amplifier and the gasket.
Mechanic-Grade Diagnostic Values
- Low-Speed GMLAN Signal Voltage — expected: Pulsing voltage between 0V and 5V.. Failure: Voltage is stuck high (near 5V), stuck low (near 0V), or shows no activity.
- Audio Amplifier Power Supply Voltage — expected: Battery Voltage (~12.6V with Key On, Engine Off) at the amplifier connector.. Failure: 0V or significantly low voltage, indicating a blown fuse or open in the power wire.
- Audio Amplifier Ground Connection — expected: Less than 0.2V drop or under 1 Ohm resistance to a known good chassis ground.. Failure: Voltage reading above 0.2V or high resistance to ground indicates a poor ground connection.
- High-Speed GMLAN Bus Resistance (for general network health) — expected: Approximately 60 Ohms when measured across pins 6 and 14 of the OBD-II port (with battery disconnected).. Failure: A reading of 120 Ohms suggests an open circuit or a missing termination resistor; a reading near 0 Ohms indicates the CAN High and Low wires are shorted together.
Scan Tool Commands That Help
- GM GDS2 (Global Diagnostic System 2): Module Diagnostics / DTC Display — This is the first step to perform a full vehicle scan to see which modules are reporting 'no communication' codes. Seeing multiple 'U' codes points strongly to a central network issue like the SDGM.
- GM GDS2 (Global Diagnostic System 2): Data Bus Diagnostic Tool — This specialized function within GDS2 is used to actively query the data bus, identify which modules are responding, and analyze the bus voltage state to diagnose opens, shorts, or faulty modules on the GMLAN network.
- GM GDS2 (Global Diagnostic System 2): Control Functions / Output Controls — While you cannot directly command the amplifier when it's offline (U0186), you can use output controls on other modules (like the BCM or Radio) to verify they are functioning and attempting to send commands, helping to isolate the fault to the amplifier or its branch of the network.
Wiring & Ground Locations
- Audio Amplifier Connector (X1) — On the audio amplifier, located on the rear wall of the cab, behind the driver's side rear seat.. This is the primary connection point for testing power, ground, and data directly at the amplifier. Pin 4 (Red/Yellow wire) is battery power, and Pin 8 (Black/White wire) is the ground. The Low-Speed GMLAN signal is on a Dark Green wire.
- SDGM Connector X2 (Black) — On the Serial Data Gateway Module, under the driver's side dash near the OBD-II port.. This connector is cited in TSB #PIT5586B as a common point of failure. The Low-Speed GMLAN wire (Dark Green) for the amplifier passes through this connector (Pin 6 in some diagrams), making it a critical inspection point.
- Interior Ground Point — A common ground location for interior electronics is a bolt on the metal body structure behind the plastic trim panel to the right of the gas pedal.. A poor ground for the amplifier or related modules can cause communication issues. While the amplifier has its own ground wire, verifying chassis grounds in the vicinity is a valid diagnostic step for intermittent electronic issues.
- Low-Speed GMLAN Circuit — A single Dark Green wire that runs from the SDGM to various modules, including the audio amplifier.. This is the specific data wire used for communication with the audio amplifier. A break or short on this wire will cause code U0186.
Real Owner Repair Stories
- gm-trucks.com forum user (2017.5 Chevrolet Silverado (K2XX Platform)) — No audio from the radio, no turn signal clicks, no warning chimes. Radio display worked fine. Code U0186 was present.
❌ Tried (didn't work) Disconnecting the battery for over an hour., Checking all related fuses.
✅ What actually fixed it The owner located the Serial Data Gateway Module (SDGM) under the driver's side dash. He disconnected the two large connectors (gray and black), inspected them, found no visible issues, and plugged them back in firmly. This immediately restored all audio functions and the code did not return.
OEM Part Supersession History
Unknown→13533490— This is a common current part number for the Serial Data Gateway Module across many 2017+ GM vehicles. Part numbers are frequently updated by GM to address hardware or software revisions.
Heads up: While this part fits a wide range of vehicles, it must be programmed to the specific vehicle's VIN and options using GM's Service Programming System (SPS) after installation.
Helpful Videos
We Have This Part in Stock



The information in this article is provided for general reference and educational purposes only. Vehicle specifications, procedures, and part compatibility can vary by production date, trim level, and region. Always consult your vehicle's factory service manual and verify part numbers before purchasing or performing repairs. Safety-critical components such as airbags, seat belts, and braking systems should be installed by a qualified professional.
- Chevrolet SILVERADO:
- 🎬 Helpful Videos
- 🛍️ Shop This Part
- What's Unique About the 2017-2017 Chevrolet SILVERADO
- Diagnostic Flowchart
- Symptoms You May Notice
- Most Likely Causes
- Rare But Worth Checking
- Diagnosis Steps
- Parts You'll Likely Need
- Related Codes That Often Appear With This One
- Technical Service Bulletins (TSBs) & Recalls
- Platform-Specific Known Issues
- Mechanic-Grade Diagnostic Values
- Scan Tool Commands That Help
- Wiring & Ground Locations
- Real Owner Repair Stories
- OEM Part Supersession History
- 🎟️ Get 5% Off