

U0151 on 2015-2020 GMC Yukon XL: Lost Communication With Restraints Module Fixes
On a 2015-2020 GMC Yukon XL, code U0151 with an airbag light is most often caused by a pinched wiring harness behind the left side of the instrument panel near the parking brake pedal, as documented in GM Technical Service Bulletin #PIT5288H. Inspecting and repairing this specific harness is the most likely fix.
- U0151 means the airbag control module (SDM) is not communicating, disabling the airbag system.
- For the 2015-2020 Yukon XL, the most probable cause is a pinched wiring harness behind the left side of the dashboard, per GM TSB #PIT5288H.
- Before considering expensive module replacement, always perform a full wiring inspection in the area specified by the TSB.
- A simple first step can be to try resetting the SDM by pulling its fuse for 30 seconds.
- Due to the involvement of the airbag system, this repair is best left to a professional if you are not experienced with automotive wiring and safety systems.
What's Unique About the 2015-2020 Gmc YUKON XL
For this specific generation of GMC Yukon XL and its platform mates, General Motors issued a Technical Service Bulletin (TSB) #PIT5288H that identifies a very common problem. The main dash wiring harness, located behind the driver's side knee bolster near the park brake pedal assembly and I/P dash mounting bracket, is highly susceptible to being pinched or chafed against a metal bracket. This specific vulnerability is a well-documented cause for U0151 and a host of other seemingly unrelated electrical communication codes on this platform.
Diagnostic Flowchart
Tap your situation to follow the diagnostic path that matches what you're seeing on this vehicle.
Symptoms You May Notice
- Airbag warning light is illuminated on the instrument cluster
- A "Service Safety Restraints System" or "Service Airbag" message appears on the driver information center
- In some cases, as noted by TSB #PIT5288H, other electrical issues may be present, such as an inoperative rear wiper, blank radio screen, or a dead battery
- Intermittent "Service Stabilitrak" message may also appear
- Replacing the SDM (airbag module) without first thoroughly inspecting the wiring harness. Given the known issue described in TSB #PIT5288H, the wiring is a much more likely culprit than the module itself.
Most Likely Causes
- Pinched or Damaged Wiring Harness 🔴 High Probability As identified in GM TSB #PIT5288H, the dash harness routing on the left side of the instrument panel causes it to be pinched between a metal I/P mounting bracket and the body, near the parking brake pedal. This chafing eventually cuts into the CAN bus wires, causing shorts or open circuits.
How to confirm: Remove the driver's side lower dash panel (knee bolster) and the side access panel. Visually inspect and feel the wiring harness that runs along the metal dash mounting bracket, just above and behind the parking brake pedal assembly. The damage can be difficult to see; try to move the harness freely to check if it is caught on the bracket.
Typical fix: Loosen the I/P dash mounting bracket bolts to free the harness. Carefully cut open the harness loom, identify the damaged wires (often the twisted pair for the CAN bus), and repair them using solder and heat shrink or quality butt connectors. Wrap the repaired section and reroute the harness to prevent future pinching, often securing it away from the bracket with zip ties.
Est. part cost: $5-$50 - Temporary SDM Glitch 🟡 Medium Probability As referenced in GM safety bulletin 18179 (for a different vehicle but with a relevant procedure), the Sensing and Diagnostic Module (SDM) can sometimes experience a temporary glitch, leading to a communication loss on startup. This can also be caused by a low voltage event from a weak battery.
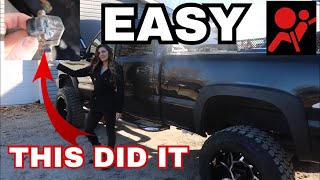
How to confirm: Attempt a hard reset. Locate the SDM/Airbag fuse in the instrument panel fuse block (often on the driver's or passenger's side dash panel). Remove the fuse for at least 60 seconds, then reinstall it. Clear the codes with a scanner and see if U0151 returns. 🎬 Watch: A simple guide to diagnosing and fixing airbag warning lights.
Typical fix: If the code clears and does not return, the issue was likely a one-time software glitch. No parts are needed. If it recurs frequently, the underlying cause (like the pinched harness or a failing battery) must be addressed.
Est. part cost: $0 - Faulty Serial Data Gateway Module (SDGM) ⚪ Low Probability GM TSB 20-NA-212 notes that an internal error or poor connector contact at the SDGM can cause it to stop communicating, leading to multiple U-codes, including U0151.
How to confirm: This requires a professional scan tool to check if multiple modules are offline. A technician would check for communication with the SDGM and inspect its connectors (X1 and X2) for bent or loose terminals.
Typical fix: May require reprogramming the SDGM. If that fails or connectors are damaged, the module may need to be replaced and programmed by a dealer or qualified shop.
Est. part cost: $200-$400 - Failed Sensing and Diagnostic Module (SDM) ⚪ Low Probability
How to confirm: This is a process-of-elimination diagnosis. If all wiring (especially the harness at the driver's side dash), connections, and power/ground to the SDM are confirmed to be good, but the module still does not communicate, the module itself has likely failed.
Typical fix: Replace the SDM. This is a critical safety component that must be replaced with a new, correctly programmed unit. This is not a DIY job and must be done by a professional.
Est. part cost: $400-$800
Rare But Worth Checking
- Low Battery Voltage: Communication modules are sensitive to voltage. A weak or failing battery can cause unpredictable communication errors across the vehicle's network, including setting a U0151 code.
Diagnosis Steps
- Scan all vehicle modules for any other stored trouble codes. Note any other 'U' codes, as they can help pinpoint a network-wide problem. A long list of communication codes strongly suggests a wiring issue.
- As a simple first step, perform a hard reset of the SDM. Locate the SDM/Airbag fuse in the instrument panel fuse block, remove it for 60 seconds, then reinstall it. Clear codes and see if U0151 returns immediately.
- If the code returns, perform a thorough visual and physical inspection of the wiring harness located on the left side of the instrument panel, as detailed in TSB #PIT5288H. Remove the driver's side knee bolster and dash end cap for access. Focus on the area where the harness passes the metal dash mounting bracket near the parking brake pedal.
- If the harness appears damaged or is pinched, carefully repair the affected wires. Ensure all connections are secure and insulated, and route the harness away from the sharp bracket to prevent it from being pinched again.
- If the harness is intact, check the power and ground connections at the SDM to ensure it's receiving proper voltage.
- Test the CAN bus wiring between the SDM and the vehicle's data link connector for continuity and resistance. A healthy CAN bus should have a resistance of approximately 60 ohms with the battery disconnected.
- If all wiring and connections are confirmed to be good, the issue may be with the SDM or the Serial Data Gateway Module (SDGM). This level of diagnosis requires professional tools and should be performed by a qualified technician.
Parts You'll Likely Need
- Wiring Repair Supplies — If the cause is the common pinched harness issue, you will only need supplies like TESA tape, butt connectors or solder, and zip ties to repair and secure the wiring.
Trusted brands: 3M, Dorman, TESA
OEM price range: $5-$25
Aftermarket price range: $5-$20 - Sensing and Diagnostic Module (SDM)
(OEM #84431413 (Note: Part number is VIN-specific. Always verify with a dealer))— If all wiring has been ruled out and the module itself is faulty, it will need to be replaced. This is a last resort after all other diagnostics have failed and requires professional programming.
Trusted brands: ACDelco
OEM price range: $400-$800
Aftermarket price range: $300-$600
Related Codes That Often Appear With This One
- U0126 — Lost Communication With Steering Angle Sensor Module. This code is also listed in TSB #PIT5288H and can be caused by the same pinched harness.
- U0077 — Lost Communication With Multiple Control Modules. This code is also listed in TSB #PIT5288H and points towards a broader network issue, such as the pinched harness affecting multiple communication lines.
- U0415 — Invalid Data Received From Anti-Lock Brake System Control Module. Also mentioned in TSB #PIT5288H, indicating the widespread electrical disruption caused by the harness issue.
- B144C, C0710, C0544, U1548, U1549, U154A — These are various other body and chassis communication codes all listed in TSB #PIT5288H as being potential companion codes caused by the same pinched harness.
Technical Service Bulletins (TSBs) & Recalls
- Bulletin #PIT5288H: Addresses a pinched wire harness in the left instrument panel causing U0151 and a wide range of other communication DTCs. This is the primary known issue for this platform.
Platform-Specific Known Issues
- TSB #PIT5288H is the most critical document for this issue. It explicitly states that the instrument panel wiring harness can become pinched between a metal mounting bracket and the body near the driver's left knee, leading to code U0151 and other communication failures.
Mechanic-Grade Diagnostic Values
- High-Speed GMLAN Bus Resistance — expected: 60 Ohms (± 5 Ohms). Failure: A reading of ~120 Ohms indicates an open circuit or a module/terminating resistor is offline. A reading significantly below 60 Ohms indicates a short between the CAN wires.
- CAN High Voltage (Key On, Engine Off) — expected: Fluctuates between 2.5V and 3.5V. Failure: No voltage, or voltage stuck at a specific level, indicates a bus or module fault.
- CAN Low Voltage (Key On, Engine Off) — expected: Fluctuates between 2.5V and 1.5V. Failure: No voltage, or voltage stuck at a specific level, indicates a bus or module fault.
- SDM Module Ground Continuity — expected: < 0.1 Ohms. Failure: A higher resistance reading indicates a poor ground connection, which can cause communication loss.
Scan Tool Commands That Help
- GDS2 (GM Dealer/Professional Scan Tool): Module Scan / Ping — To perform a network test and verify which modules are actively communicating on the bus. A 'No Comm' status for the SDM (K17) confirms the fault.
- GDS2 or other advanced scan tool: SDM Setup and Programming — This is required after replacing the Sensing and Diagnostic Module. The new module must be programmed with the vehicle's VIN and specific configuration to function.
- Specialty EEPROM tools (e.g., CarProg): Clear Crash Data / Reset Internal Fault — In rare cases, particularly after an accident or severe electrical event, the SDM may store 'hard codes' that cannot be cleared with a standard scanner. This function directly reprograms the module to clear these locked faults, but should only be used by professionals after the root cause of the code is fixed.
Wiring & Ground Locations
- DLC (Data Link Connector) — Under the driver's side dashboard, to the left of the steering column.. This is the primary access point for testing the entire GMLAN network. Pin 6 (CAN-H) and Pin 14 (CAN-L) are used for High-Speed GMLAN bus diagnostics.
- Sensing and Diagnostic Module (SDM) — Typically located under the driver's seat or front center console, bolted to the floor pan.. This is the module that is offline. Water intrusion from the floor can be a problem, leading to corrosion of the module and its connector, as noted in GM bulletins for other platforms.
- Instrument Panel Grounds — A key ground point for many interior modules is located inside the cab, near the A-pillar and left-side speaker. Another is on the firewall.. The SDM shares communication pathways with other modules grounded in this area. A poor instrument panel ground can cause widespread communication (U-codes) issues, including U0151.
- Frame Grounds (Forward) — On the frame rail behind both front wheels. These are notoriously exposed to road spray and corrosion.. While not the primary ground for the SDM itself, these main chassis grounds are critical for overall vehicle electrical stability. A corroded frame ground can introduce electrical noise and voltage fluctuations that disrupt module communication.
Helpful Videos
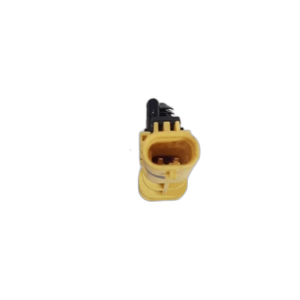
Used OEM Parts in Stock


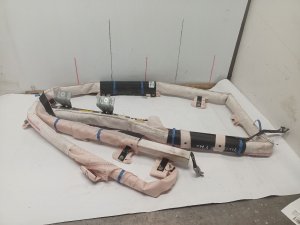

New Aftermarket Parts Available


The information in this article is provided for general reference and educational purposes only. Vehicle specifications, procedures, and part compatibility can vary by production date, trim level, and region. Always consult your vehicle's factory service manual and verify part numbers before purchasing or performing repairs. Safety-critical components such as airbags, seat belts, and braking systems should be installed by a qualified professional.
- Gmc YUKON XL:
- 🎬 Helpful Videos
- 🛍️ Shop This Part
- What's Unique About the 2015-2020 Gmc YUKON XL
- Diagnostic Flowchart
- Symptoms You May Notice
- Most Likely Causes
- Rare But Worth Checking
- Diagnosis Steps
- Parts You'll Likely Need
- Related Codes That Often Appear With This One
- Technical Service Bulletins (TSBs) & Recalls
- Platform-Specific Known Issues
- Mechanic-Grade Diagnostic Values
- Scan Tool Commands That Help
- Wiring & Ground Locations
- 🎟️ Get 5% Off