

U0151 on 2015-2017 GMC Sierra: Lost Communication With Airbag Module Fixes
This code means the truck's main computer has lost communication with the airbag system's control module. The most common causes on this platform are not a bad module, but physical wiring issues like a pinched harness in the dash or a bad connector pin at the gateway module, as identified in GM Technical Service Bulletins.
- U0151 on a 2015-2017 Sierra means the airbag system is offline and will not work in a crash. This is a critical safety issue.
- Before suspecting a costly module failure, thoroughly inspect the two most likely causes identified by GM: the wiring harness behind the left side of the dash (TSB #PIT5288E) and the X2 connector at the Serial Data Gateway Module (TSB #PIT5586B).
- This is not a DIY-friendly repair for beginners. Diagnosing CAN bus networks and handling airbag system components requires specialized knowledge and tools.
- If the Restraints Control Module (RCM/SDM) does need to be replaced, it must be professionally programmed to your truck's VIN to function correctly.
What's Unique About the 2015-2017 Gmc SIERRA
On the 2015-2017 GMC Sierra (K2XX platform), the U0151 code is frequently traced back to specific, documented wiring and connection vulnerabilities. Unlike in many other vehicles where the module itself might be the first suspect, GM has issued multiple Technical Service Bulletins (TSBs) pointing technicians directly toward checking for a pinched wire harness behind the instrument panel and inspecting specific connector terminals at the Serial Data Gateway Module. This suggests a pattern of physical wiring faults rather than random module failures, a known issue across the entire K2XX lineup including the Silverado, Tahoe, and Escalade.
Diagnostic Flowchart
Tap your situation to follow the diagnostic path that matches what you're seeing on this vehicle.
Symptoms You May Notice
- Airbag warning light is continuously illuminated on the instrument cluster
- "Service Air Bag" or "Service Restraint System" message appears on the Driver Information Center (DIC).
- Inability to communicate with the SRS/Airbag module using a diagnostic scan tool.
- Audible chimes upon starting the vehicle.
- Other warning lights, like for Stabilitrak, may appear at the same time due to the network communication fault.
- Replacing the Restraints Control Module (RCM/SDM) without first thoroughly inspecting the wiring harnesses and connectors as specified in TSBs #PIT5288E and #PIT5586B. The wiring is a more frequent point of failure on these trucks.
- Replacing front impact sensors. These sensors typically set their own specific codes and would not cause a general loss of communication with the main module. 🎬 Watch: How to replace front impact sensors if you have sensor-specific codes.
Most Likely Causes
- Pinched or Damaged Wire Harness 🔴 High Probability A known issue documented in GM TSB #PIT5288E. The instrument panel wire harness can be pinched between the left I/P dash mounting bracket and the body, near the parking brake pedal area, causing shorts or opens in the CAN bus wires.
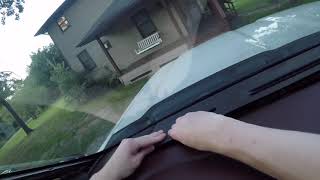
How to confirm: Remove the driver's side lower dash panel (knee bolster) and side access panel. Visually inspect and feel the wiring harness that runs along the metal dash mounting bracket for signs of being crushed, chafed, or damaged.
Typical fix: Loosen the I/P dash mounting bracket to free the harness. Open the loom, repair damaged wires (typically by soldering and using heat shrink), and re-route the harness to prevent future pinching.
Est. part cost: $5-$50 - Poor Terminal Connection at Serial Data Gateway Module (SDGM) 🔴 High Probability A known issue documented in GM TSB #PIT5586B. Terminals in the X2 connector of the SDGM can fret, corrode, or back out, disrupting communication for multiple modules, including the SDM. The SDGM is located behind the driver's side of the instrument panel, near the parking brake assembly.
How to confirm: After accessing the SDGM, disconnect the battery, then unplug the X2 connector. Inspect the pins and terminals for looseness, corrosion, or damage. Check for proper pin tension.
Typical fix: Repair or replace the affected terminals. Clean any corrosion and apply a small amount of dielectric grease (GM P/N 12345575 is often specified) to the connector seals before reassembly to prevent moisture intrusion.
Est. part cost: $5-$25 - Failed Restraints Control Module (RCM/SDM) 🟡 Medium Probability Modules can fail due to internal component breakdown or moisture. On this platform, the SDM is located under the center console or center seat, making it vulnerable to spilled liquids. Some 2016 models were also noted to have SDMs with hairline cracks in the mounting feet.
How to confirm: After confirming all wiring, connectors, power, and grounds to the module are good, the module itself becomes the primary suspect. This requires a professional scan tool to attempt communication.
Typical fix: Replace the RCM/SDM. The new module must be programmed to the vehicle's VIN and calibrated, which requires specialized dealer or professional tools. 🎬 Watch: Step-by-step guide for SDM module replacement and programming.
Est. part cost: $300-$600 - Blown Fuse or Power Supply Issue ⚪ Low Probability While not specific to this platform, any vehicle can suffer from a blown fuse. A Reddit user with a similar GM truck found a blown airbag fuse was the cause of their no-communication issue.
How to confirm: Check the fuse for the RCM/SDM, often labeled 'SRS' or 'AIRBAG', in the instrument panel fuse block (typically on the passenger side of the dash). Use a multimeter to verify power and ground at the module's connector.
Typical fix: Replace the blown fuse. If the fuse blows again, a short circuit exists that must be traced and repaired.
Est. part cost: $1-$5
Diagnosis Steps
- Perform a full vehicle scan to see which other modules may have lost communication. A single U0151 points more toward the RCM circuit, while multiple U-codes suggest a wider network problem originating from the harness or SDGM.
- Check for and address any relevant TSBs. Specifically, follow the instructions in TSB #PIT5288E to inspect the wire harness at the left instrument panel near the parking brake.
- Following TSB #PIT5586B, locate the Serial Data Gateway Module (behind driver's side dash) and inspect the X2 connector for any terminal issues.
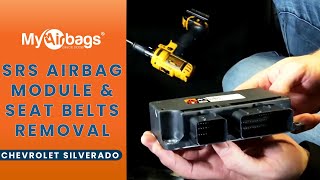
- Disconnect the battery and wait at least 15 minutes. Locate the RCM/SDM (under the center console or center seat) and inspect its connectors (typically bright yellow) for corrosion, moisture, or damage. 🎬 See how to safely access and remove the airbag control module.
- Using a wiring diagram, check for battery voltage and a clean ground at the RCM/SDM connector.
- Check the resistance of the CAN bus wires at the diagnostic port (pins 6 and 14). A healthy network typically shows 60 ohms of resistance with the key off. Readings of 120 ohms or an open circuit indicate a wiring break or a failed terminating resistor.
- If all wiring, power, and grounds are confirmed to be good, the RCM/SDM is likely faulty and requires replacement and programming.
Parts You'll Likely Need
- Restraints Control Module / Sensing and Diagnostic Module
(OEM #e.g., 23394012, 84048210, 84377315 (Part number is VIN-specific and must be verified))— This is the part to replace if all wiring and connections have been verified as good. It is the brain of the airbag system and requires programming upon installation.
Trusted brands: ACDelco, GM Genuine
OEM price range: $400-$600
Aftermarket price range: $250-$450 - Wiring Harness Repair Supplies — Often, the fix is repairing a specific wire or terminal, not replacing a major component. This is the most likely scenario according to GM's TSBs.
OEM price range: $10-$50
Aftermarket price range: $5-$25
Related Codes That Often Appear With This One
- U0073 — Control Module Communication Bus 'A' Off. This is a general network code often set alongside U0151 when a wiring issue disrupts the entire CAN bus.
- U0140 — Lost Communication With Body Control Module. Often appears with U0151 if the root cause is a shared network wiring fault, as seen in TSB #PIT5586B.
- U0100 — Lost Communication With ECM/PCM. Like other U-codes, this can be triggered by the same gateway module or harness faults mentioned in TSB #PIT5586B.
Technical Service Bulletins (TSBs) & Recalls
- PIT5586B: Instructs technicians to check the Serial Data Gateway Module X2 connector for terminal concerns when a wide range of U-codes, including U0151, are present.
- PIT5288E: Directs technicians to inspect the left instrument panel for a pinched wire harness that can cause U0151 and other electrical issues.
Platform-Specific Known Issues
- TSB #PIT5586B: Points to potential terminal issues in the Serial Data Gateway Module's X2 connector causing U0151 and a host of other communication codes.
- TSB #PIT5288E: Identifies a pinched wire harness at the left instrument panel as a cause for U0151 and other electrical faults.
Mechanic-Grade Diagnostic Values
- High-Speed CAN Bus Resistance — expected: 60 Ohms (+/- 5 Ohms). Failure: A reading of 120 Ohms indicates an open in the bus or one of the two terminating resistors is offline. A reading less than 60 Ohms indicates the bus wires are shorted together.
- Power and Ground at SDM Connector — expected: 12.0V (+/- 0.5V) at the power pin; Less than 0.1 Ohms continuity to ground at the ground pin.. Failure: Low or no voltage, or high resistance on the ground circuit, indicates a power supply or ground path issue preventing the module from operating.
Hidden / Shadow Codes Worth Checking
- U0151 71: Invalid Serial Data Received. This indicates that communication from the SDM is present, but the data is corrupt or nonsensical. It points towards a fault within the SDM itself or severe network interference. (see via GM GDS2 or other professional-grade scan tool capable of reading manufacturer-specific symptom bytes.)
- U0151 7F: Erratic Communication. This suggests the signal from the SDM is intermittent or unstable, pointing towards a loose connection, chafed wire, or failing module transceiver. (see via GM GDS2 or other professional-grade scan tool capable of reading manufacturer-specific symptom bytes.)
Scan Tool Commands That Help
- GDS2: Setup SDM Part Number in BCM — This function is required after installing a new Sensing and Diagnostic Module (SDM) to marry the new module to the Body Control Module (BCM), establishing a primary security key.
- GDS2: Configure New Module / Enable Deployment Loops — After programming a new SDM and setting it up in the BCM, this command must be run. It enables the individual airbag and pretensioner circuits. The process will fail if any faults (like open circuits to airbags) still exist in the system.
- Snap-on (e.g., Ethos, Solus): Module Setup > Setup New SDM — Professional aftermarket scan tools often have a simplified function to perform the BCM-to-SDM handshake and setup procedure after a module replacement, which can be faster than the multi-step factory process.
Wiring & Ground Locations
- G218 — Under the driver's side of the instrument panel, near the A-pillar, behind the kick panel. It is a ground stud on the body.. This is a major ground point for the Body Control Module (BCM) and other interior electronics. TSB PIT5405C identifies a poor connection here (often due to the dash insulator mat getting trapped under the ground nut) as a cause for numerous communication DTCs and widespread electrical problems that can mimic a U0151 fault.
- Sensing and Diagnostic Module (SDM) — Bolted to the floor under the center console or center seat, beneath the carpet.. This is the physical location of the module that has lost communication. It is vulnerable to moisture from spilled liquids or wet carpets, which can corrode connectors or damage the module itself.
- Serial Data Gateway Module (SDGM) — Behind the driver's side of the instrument panel, often near the BCM and parking brake assembly.. This module acts as a network hub. The X2 connector on this module is a known failure point for terminal issues as cited in TSB #PIT5586B, which can cause the U0151 code.
- Main Negative Battery Cable Ground Points — The main negative battery cable has ground connections to both the engine block and the vehicle frame.. Corrosion or looseness at these primary ground points can cause system-wide low voltage and erratic electrical behavior, leading to random communication codes like U0151.
Real Owner Repair Stories
- YouTube comment on a G218 Ground fix video (2014-2018 GMC Sierra/Chevy Silverado (platform-specific issue)) — Complete electrical graveyard, truck randomly shutting off, flickering dash lights, various warning messages including power steering and park assist disabled.
❌ Tried (didn't work) Testing the battery and alternator, which both checked out as good.
✅ What actually fixed it The problem was a bad ground at G218, located behind the driver's side kick panel. Sound-deadening insulation material from the factory was trapped under the ground nut, preventing a solid connection. The fix was to remove the trim, pull the insulation away from the ground stud, and tighten the nut.
OEM Part Supersession History
13512416, 13590225, 13592895, 13594417→13518054— Standard part evolution, potential internal revisions for reliability.
Heads up: When replacing the SDM, it is critical to verify the correct part number for the specific vehicle VIN and options (e.g., with/without roof airbag). Using the wrong part can lead to programming failure or system malfunction.
Model Year Variations Within This Range
- 2016: A service update (ID: 15796) was issued for some 2016 Sierra/Silverado trucks due to a potential hairline crack in one of the mounting feet of the Sensing and Diagnostic Module (SDM). This could affect the module's performance and was addressed by replacing the SDM.
Helpful Videos



We Have This Part in Stock


The information in this article is provided for general reference and educational purposes only. Vehicle specifications, procedures, and part compatibility can vary by production date, trim level, and region. Always consult your vehicle's factory service manual and verify part numbers before purchasing or performing repairs. Safety-critical components such as airbags, seat belts, and braking systems should be installed by a qualified professional.
- Gmc SIERRA:
- 🎬 Helpful Videos
- 🛍️ Shop This Part
- What's Unique About the 2015-2017 Gmc SIERRA
- Diagnostic Flowchart
- Symptoms You May Notice
- Most Likely Causes
- Diagnosis Steps
- Parts You'll Likely Need
- Related Codes That Often Appear With This One
- Technical Service Bulletins (TSBs) & Recalls
- Platform-Specific Known Issues
- Mechanic-Grade Diagnostic Values
- Hidden / Shadow Codes Worth Checking
- Scan Tool Commands That Help
- Wiring & Ground Locations
- Real Owner Repair Stories
- OEM Part Supersession History
- Model Year Variations Within This Range
- 🎟️ Get 5% Off