

U0151 on 2015-2017 Chevrolet Silverado: Causes and Fixes for Lost Airbag Communication
On a 2015-2017 Silverado, code U0151 with an airbag light is most often caused by a pinched wiring harness behind the driver's side instrument panel or poor connections at the Serial Data Gateway Module (SDGM), as documented in GM TSBs. This is a critical safety issue that disables the airbags and is a known problem on the K2XX platform.
- U0151 means your Silverado's airbag system is INOPERATIVE and will not deploy in a crash. This is a critical safety failure.
- Do not immediately assume the expensive airbag module has failed. The problem is most likely a pinched wire harness behind the driver's side dash, as documented in GM TSB #PIT5288H.
- A secondary common cause is a poor connection at the Serial Data Gateway Module (SDGM), also documented in a TSB.
- Diagnosis requires careful visual inspection of specific wiring locations before replacing any parts.
- Due to the safety-critical nature of the airbag system, professional service is strongly recommended for diagnosis and repair.
What's Unique About the 2015-2017 Chevrolet SILVERADO

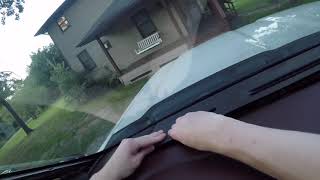
On this specific generation of Silverado (K2XX platform), the U0151 code is very frequently linked to documented manufacturing and design issues rather than random part failure. GM has issued Technical Service Bulletins (TSBs) that point directly to common failure points, such as a main wiring harness getting pinched by a dash bracket during assembly (TSB #PIT5288H) or communication problems originating at the central Serial Data Gateway Module (SDGM) (TSB #PIT5586B). Another known issue is a poor ground connection at G218 due to trapped insulation (TSB #PIT5405C) 🎬 Watch: How to locate and repair the G218 ground connection.. These known issues make diagnosis more direct, as the problem is often in one of a few specific locations.
Diagnostic Flowchart

Tap your situation to follow the diagnostic path that matches what you're seeing on this vehicle.
Symptoms You May Notice

- Airbag warning light is illuminated on the instrument cluster.
- "Service Airbag System" or "Service Restraint System" message on the Driver Information Center (DIC).
- In some cases, other electrical issues may be present if the cause is a widespread wiring problem, such as an inoperative rear wiper, a dead battery, flickering dash lights, or the radio/HVAC display going blank. [TSB #PIT5288H, 21]
- Replacing the clock spring. A bad clock spring typically sets codes specific to the driver's airbag circuit (not U0151) and affects steering wheel controls.
- Replacing front impact sensors. Failed impact sensors will set their own specific DTCs and do not cause a total loss of communication with the main airbag module.
- Unnecessary SDM Replacement. Due to the high prevalence of wiring and ground issues on this platform, the SDM itself should only be replaced after all TSB-related wiring and connection checks have been exhaustively performed.
Most Likely Causes

- Pinched Wire Harness at Left Instrument Panel 🔴 High Probability A known issue documented in TSB #PIT5288H where the dash harness gets crushed between the left I/P mounting bracket and the body during vehicle assembly. This is considered the most notorious cause on K2XX trucks.
How to confirm: Visually and physically inspect the wiring harness located under the driver's side dashboard, above the parking brake pedal assembly. Check if the harness is caught, crushed, or cannot be moved freely where it passes the large, black, stamped-steel I/P support bracket. The damage may be on the top or bottom of the bracket and may require unwrapping the harness tape to see broken or chafed wires.
Typical fix: Loosen the I/P dash mounting bracket bolts to free the harness. Carefully open the wiring loom and repair any broken or chafed wires (CAN bus wires are often a twisted pair) using proper soldering and heat-shrink methods. Reroute the harness to prevent it from being pinched again.
Est. part cost: $5-$25 - Poor Connection at Serial Data Gateway Module (SDGM) 🟡 Medium Probability TSB #PIT5586B and its successors point to terminal issues in the X1 or X2 connectors of the SDGM, which acts as the central hub for vehicle communication networks. The module can also enter a 'logic lock' state, effectively freezing communication.
How to confirm: Locate the SDGM, which is typically behind the upper glove box compartment. The glove box assembly must be removed for access. Inspect its connectors (specifically X1 and X2) for loose pins, corrosion, or damage. A professional scan tool is needed to confirm if the module is truly offline.
Typical fix: Attempt a hard reset by disconnecting the battery for 30 minutes. If that fails, reseat the connector. If terminals are loose or corroded, they may need to be replaced or repaired. A dealer may need to reprogram the SDGM with updated software; if that fails, the module requires replacement.
Est. part cost: $10-$500 - Poor Ground Connection (G218) 🟡 Medium Probability TSB #PIT5405C identifies a poor connection at ground G218, often due to sound-deadening insulation material getting trapped under the ground eyelet during assembly, which can cause widespread communication codes.
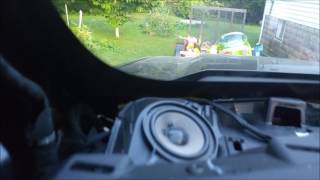
How to confirm: Locate ground G218 under the driver's side of the instrument panel, near the A-pillar, often behind the kick panel or speaker. Check that the 10mm nut is tight and that no black insulation material is trapped between the ground eyelet and the body stud.
Typical fix: Disconnect the battery. Remove the 10mm nut, pull the eyelet off the stud, and trim away any trapped insulation from under the eyelet with a utility knife. Clean the contact surfaces and securely retighten the nut.
Est. part cost: $0-$5 - Faulty Sensing and Diagnostic Module (SDM) ⚪ Low Probability While less common than wiring issues on this platform, the module itself can fail internally, sometimes due to moisture intrusion if the carpet becomes saturated from snow on boots or a water leak. A service update (#15796) was also issued for some 2016 models for a hairline crack in the SDM mounting foot, which could cause it to not perform as intended.
How to confirm: This is diagnosed by exclusion. If all wiring (CAN bus, power, ground) and network connections to the module test good, the SDM itself is the likely culprit. The SDM is typically located under the center console or driver's seat, bolted to the floor. A professional scan tool is required to confirm it is offline.
Typical fix: Replace the SDM. The new module must be programmed to the vehicle's VIN by a dealer or qualified shop with the proper tools.
Est. part cost: $300-$600
Rare But Worth Checking
- Low Battery Voltage: Low voltage can cause unpredictable communication errors between modules. Before complex diagnostics, ensure the battery is fully charged and the charging system is working correctly. A battery replacement can sometimes trigger a temporary warning light that needs a system reset.
- Blown or Corroded Fuse: A blown fuse for the SDM will cut its power, causing a communication loss. Owners have reported issues with fuses in the under-hood block (specifically F40 and F45) where corrosion on the fuse terminals, not just a blown fuse, was the problem. Always pull the fuse and inspect the metal legs and the slot for corrosion.
- Damaged Communication Enable Circuit (5986): TSB #PIT5457D notes that circuit 5986, which 'wakes up' modules like the SDM, can be damaged under the driver's or passenger's sill plates, causing a loss of communication. This would require testing voltage on that specific circuit at the SDM connector.
Diagnosis Steps
- Check Battery Health: Ensure battery voltage is above 12.4V and the charging system is functioning correctly. Verify battery cable clamps are tight and corrosion-free.
- Scan All Modules: Use a professional scan tool to check for DTCs in all vehicle modules. A cluster of 'U' codes strongly suggests a network-wide issue (wiring, ground, SDGM) rather than a single failed module.
- Inspect Fuses: Check the airbag/SDM fuses in the under-hood fuse block (commonly F40 and F45). Physically remove them and inspect both the fuse legs and the block terminals for any green or white corrosion.
- Inspect G218 Ground (TSB #PIT5405C): Remove the driver's side kick panel/trim. Locate ground G218 near the A-pillar. Disassemble and check for trapped insulation between the eyelet and the stud. Clean and secure the connection.
- Inspect for Pinched Harness (TSB #PIT5288H): Remove the driver's side dash/knee bolster panels and carefully inspect the main wiring harness where it passes the large metal I/P mounting bracket for signs of being pinched, crushed, or damaged.
- Inspect SDGM Connectors (TSB #PIT5586B): Access the Serial Data Gateway Module behind the glove box. Inspect its electrical connectors (X1 and X2) for loose pins, corrosion, or damage.
- Check Power and Ground at SDM: If the above steps show no faults, access the SDM under the center console/seat. Using a wiring diagram and a multimeter, verify the SDM has proper battery voltage and a clean ground connection directly at its connector.
- Test CAN Bus Wires: If a wiring issue is still suspected, test the CAN bus high and low wires between the SDM, the SDGM, and the data link connector for continuity, shorts to power, and shorts to ground.
- Professional Diagnosis: If the cause is not found, the issue may be a failed SDM or a complex network fault requiring advanced diagnostics by a professional technician.
Parts You'll Likely Need
- Wiring Repair Supplies — The most common causes are a pinched/damaged wire or a bad ground, which need to be repaired, not replaced.
Trusted brands: 3M
OEM price range: $5-$25
Aftermarket price range: $5-$25 - Sensing and Diagnostic Module (SDM)
(OEM #13518051 (w/o roof airbag, supersedes 13512414, 13590222, 13592892, 13594414), 13507217 (w/ roof airbag))— If wiring and connections are confirmed to be good, the module itself may have failed. It must be replaced and programmed.
Trusted brands: ACDelco (GM Genuine)
OEM price range: $400-$600
Aftermarket price range: $300-$500
Related Codes That Often Appear With This One
- U0077 — Indicates a general High-Speed CAN bus failure, often seen with the pinched harness issue described in TSB #PIT5288H. [TSB #PIT5288H]
- U0140 — Lost Communication with Body Control Module (BCM). This often appears with U0151 when a network-wide problem exists, like a faulty SDGM or the G218 ground issue. [17, TSB #PIT5586B]
- U0415 — Invalid Data Received from ABS Control Module. This points towards data corruption on the network, suggesting a wiring or module fault rather than a primary ABS problem. [TSB #PIT5288H]
Technical Service Bulletins (TSBs) & Recalls
- PIT5288H: Addresses multiple communication codes, including U0151, caused by a pinched wire harness at the left instrument panel. [TSB #PIT5288H]
- PIT5586B: Addresses multiple communication codes, including U0151, caused by terminal concerns at the Serial Data Gateway Module connector. [TSB #PIT5586B]
Platform-Specific Known Issues
- TSB #PIT5288H: Documents that various communication DTCs, including U0151, can be caused by the dash harness being pinched between the left I/P dash mounting bracket and the body. The fix is to free the harness and repair any damaged wires.
- TSB #PIT5586B: Points to poor terminal connections at the X2 connector of the Serial Data Gateway Module (SDGM), which can cause a loss of communication with multiple modules.
- TSB #PIT5405C: Details how a poor connection at ground G218, caused by trapped insulation, can lead to a host of intermittent electrical problems and communication DTCs, including U0151.
Mechanic-Grade Diagnostic Values
- High-Speed CAN Bus Resistance — expected: 60 Ohms (Ω) ± 5 Ω, measured between Pin 6 and Pin 14 of the DLC with the battery disconnected.. Failure: A reading of ~120 Ω indicates an open circuit or one of the two terminating resistors is offline. A reading near 0 Ω indicates the CAN High and Low wires are shorted together.
- High-Speed CAN Bus Voltage (Key On, Engine Off) — expected: CAN High (Pin 6 to Ground): ~2.6V. CAN Low (Pin 14 to Ground): ~2.4V.. Failure: Voltages that are stuck, do not mirror each other, or are shorted to ground (0V) or power (~12V) indicate a bus fault.
- SDM Ground Circuit Resistance — expected: < 0.1 Ω. Failure: High resistance indicates a poor ground connection, such as the known issue at G218.
- SDM Power Supply Voltage — expected: 12.0 V ± 0.5 V. Failure: Voltage below 11.5V can cause the module to drop off the network. This should be tested with the module connected and key on (loaded circuit).
Hidden / Shadow Codes Worth Checking
- U0151 71: Indicates 'Invalid Serial Data Received' from the SDM. This means communication is present, but the data is corrupt. GM bulletin PIT5569A suggests this should prompt checking for codes in the SDM itself. (see via GM GDS2 or other professional scan tool with symptom byte display.)
- U0151 7F: Indicates the communication from the SDM is 'Erratic'. (see via GM GDS2 or other professional scan tool with symptom byte display.)
Scan Tool Commands That Help
- GM GDS2: Setup New Module / Setup SDM — This function is required after replacing the Sensing and Diagnostic Module (SDM) to program it to the vehicle. Failure to do so will result in other codes, like B1001 (Configuration Not Learned).
- GM GDS2: Module Diagnostics > Data Display — To verify which modules are actively communicating on the network. If only the SDM is offline, it helps focus diagnosis on the SDM's specific power, ground, and data lines. If multiple modules are offline, it points to a network-wide issue (SDGM, wiring).
- GM GDS2: Serial Data Gateway Module Setup — This function is required after replacing the Serial Data Gateway Module (SDGM).
Wiring & Ground Locations
- G218 — Under the driver's side of the instrument panel, near the A-pillar, behind the kick panel or speaker. It is a stud with a 10mm nut.. This is a primary ground point for the Body Control Module (BCM). A poor connection here, often due to trapped insulation, can cause widespread communication codes, including U0151.
- SDM (Sensing and Diagnostic Module) — Bolted to the floor under the center of the cab, typically accessed by removing the center console or front seats.. This is the module that is offline. All power, ground, and communication wires must be tested at its main connector to confirm a module failure.
- SDGM (Serial Data Gateway Module) — Located behind the upper glove box compartment.. This is the central hub for network communication. Faulty terminals in its X1 or X2 connectors are a known cause of U0151 per TSB #PIT5586B.
- DLC (Data Link Connector) — Under the driver's side dashboard, to the left of the steering column.. Pins 6 (CAN High) and 14 (CAN Low) are used to test the resistance and voltage of the High-Speed CAN bus to verify network integrity.
Real Owner Repair Stories
- Reddit user (2017 Silverado 1500) — Stabilitrak and airbag warning lights immediately after a jumpseat to center console conversion.
❌ Tried (didn't work) Checked airbag fuse., Checked connections under the seats., Disconnected the battery to clear codes.
✅ What actually fixed it The user was advised that the new console may be missing the passenger seat position sensor or associated wiring, which is part of the SRS system and can cause communication codes if not transferred from the original seat/console. The resolution was not posted but the diagnosis points to a missing component from the seat swap.
OEM Part Supersession History
13594414, 13592892, 13590222, 13512414→13518051— Standard part revision and consolidation by the manufacturer.
Heads up: This part requires programming and/or special setup procedures after installation. Part is specified for models 'Without roof air bag'. Always verify the correct part number by VIN.
Model Year Variations Within This Range
- 2016: Certain 2016 Silverado/Sierra models were subject to Service Update #15796 due to a potential hairline crack in the SDM mounting foot caused by stud misalignment during assembly. This could cause the SDM to not perform as intended.
Helpful Videos

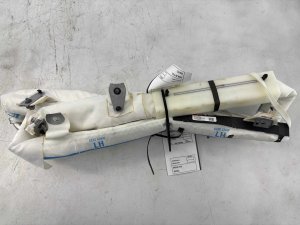
Used OEM Parts in Stock


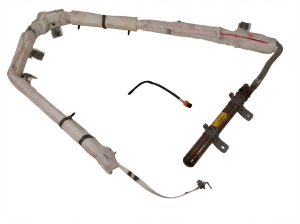
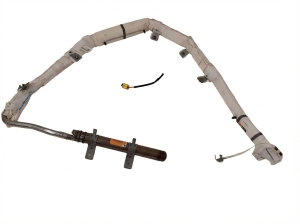

New Aftermarket Parts Available


The information in this article is provided for general reference and educational purposes only. Vehicle specifications, procedures, and part compatibility can vary by production date, trim level, and region. Always consult your vehicle's factory service manual and verify part numbers before purchasing or performing repairs. Safety-critical components such as airbags, seat belts, and braking systems should be installed by a qualified professional.
- Chevrolet SILVERADO:
- 🎬 Helpful Videos
- 🛍️ Shop This Part
- What's Unique About the 2015-2017 Chevrolet SILVERADO
- Diagnostic Flowchart
- Symptoms You May Notice
- Most Likely Causes
- Rare But Worth Checking
- Diagnosis Steps
- Parts You'll Likely Need
- Related Codes That Often Appear With This One
- Technical Service Bulletins (TSBs) & Recalls
- Platform-Specific Known Issues
- Mechanic-Grade Diagnostic Values
- Hidden / Shadow Codes Worth Checking
- Scan Tool Commands That Help
- Wiring & Ground Locations
- Real Owner Repair Stories
- OEM Part Supersession History
- Model Year Variations Within This Range
- 🎟️ Get 5% Off